EE Summer School - Taking it Further
Introduction
It is our hope that you have enjoyed this project. Building upon what you have learnt this week, this page provides a range of links and support to help you take your ideas further and use your new Arduino Nano in future projects.
In cases where you have found this project rewarding, and would like to consider studying engineering at university, you will also find some additional information about the undergraduate engineering courses offered here at Bath.
Using the Arduino Nano
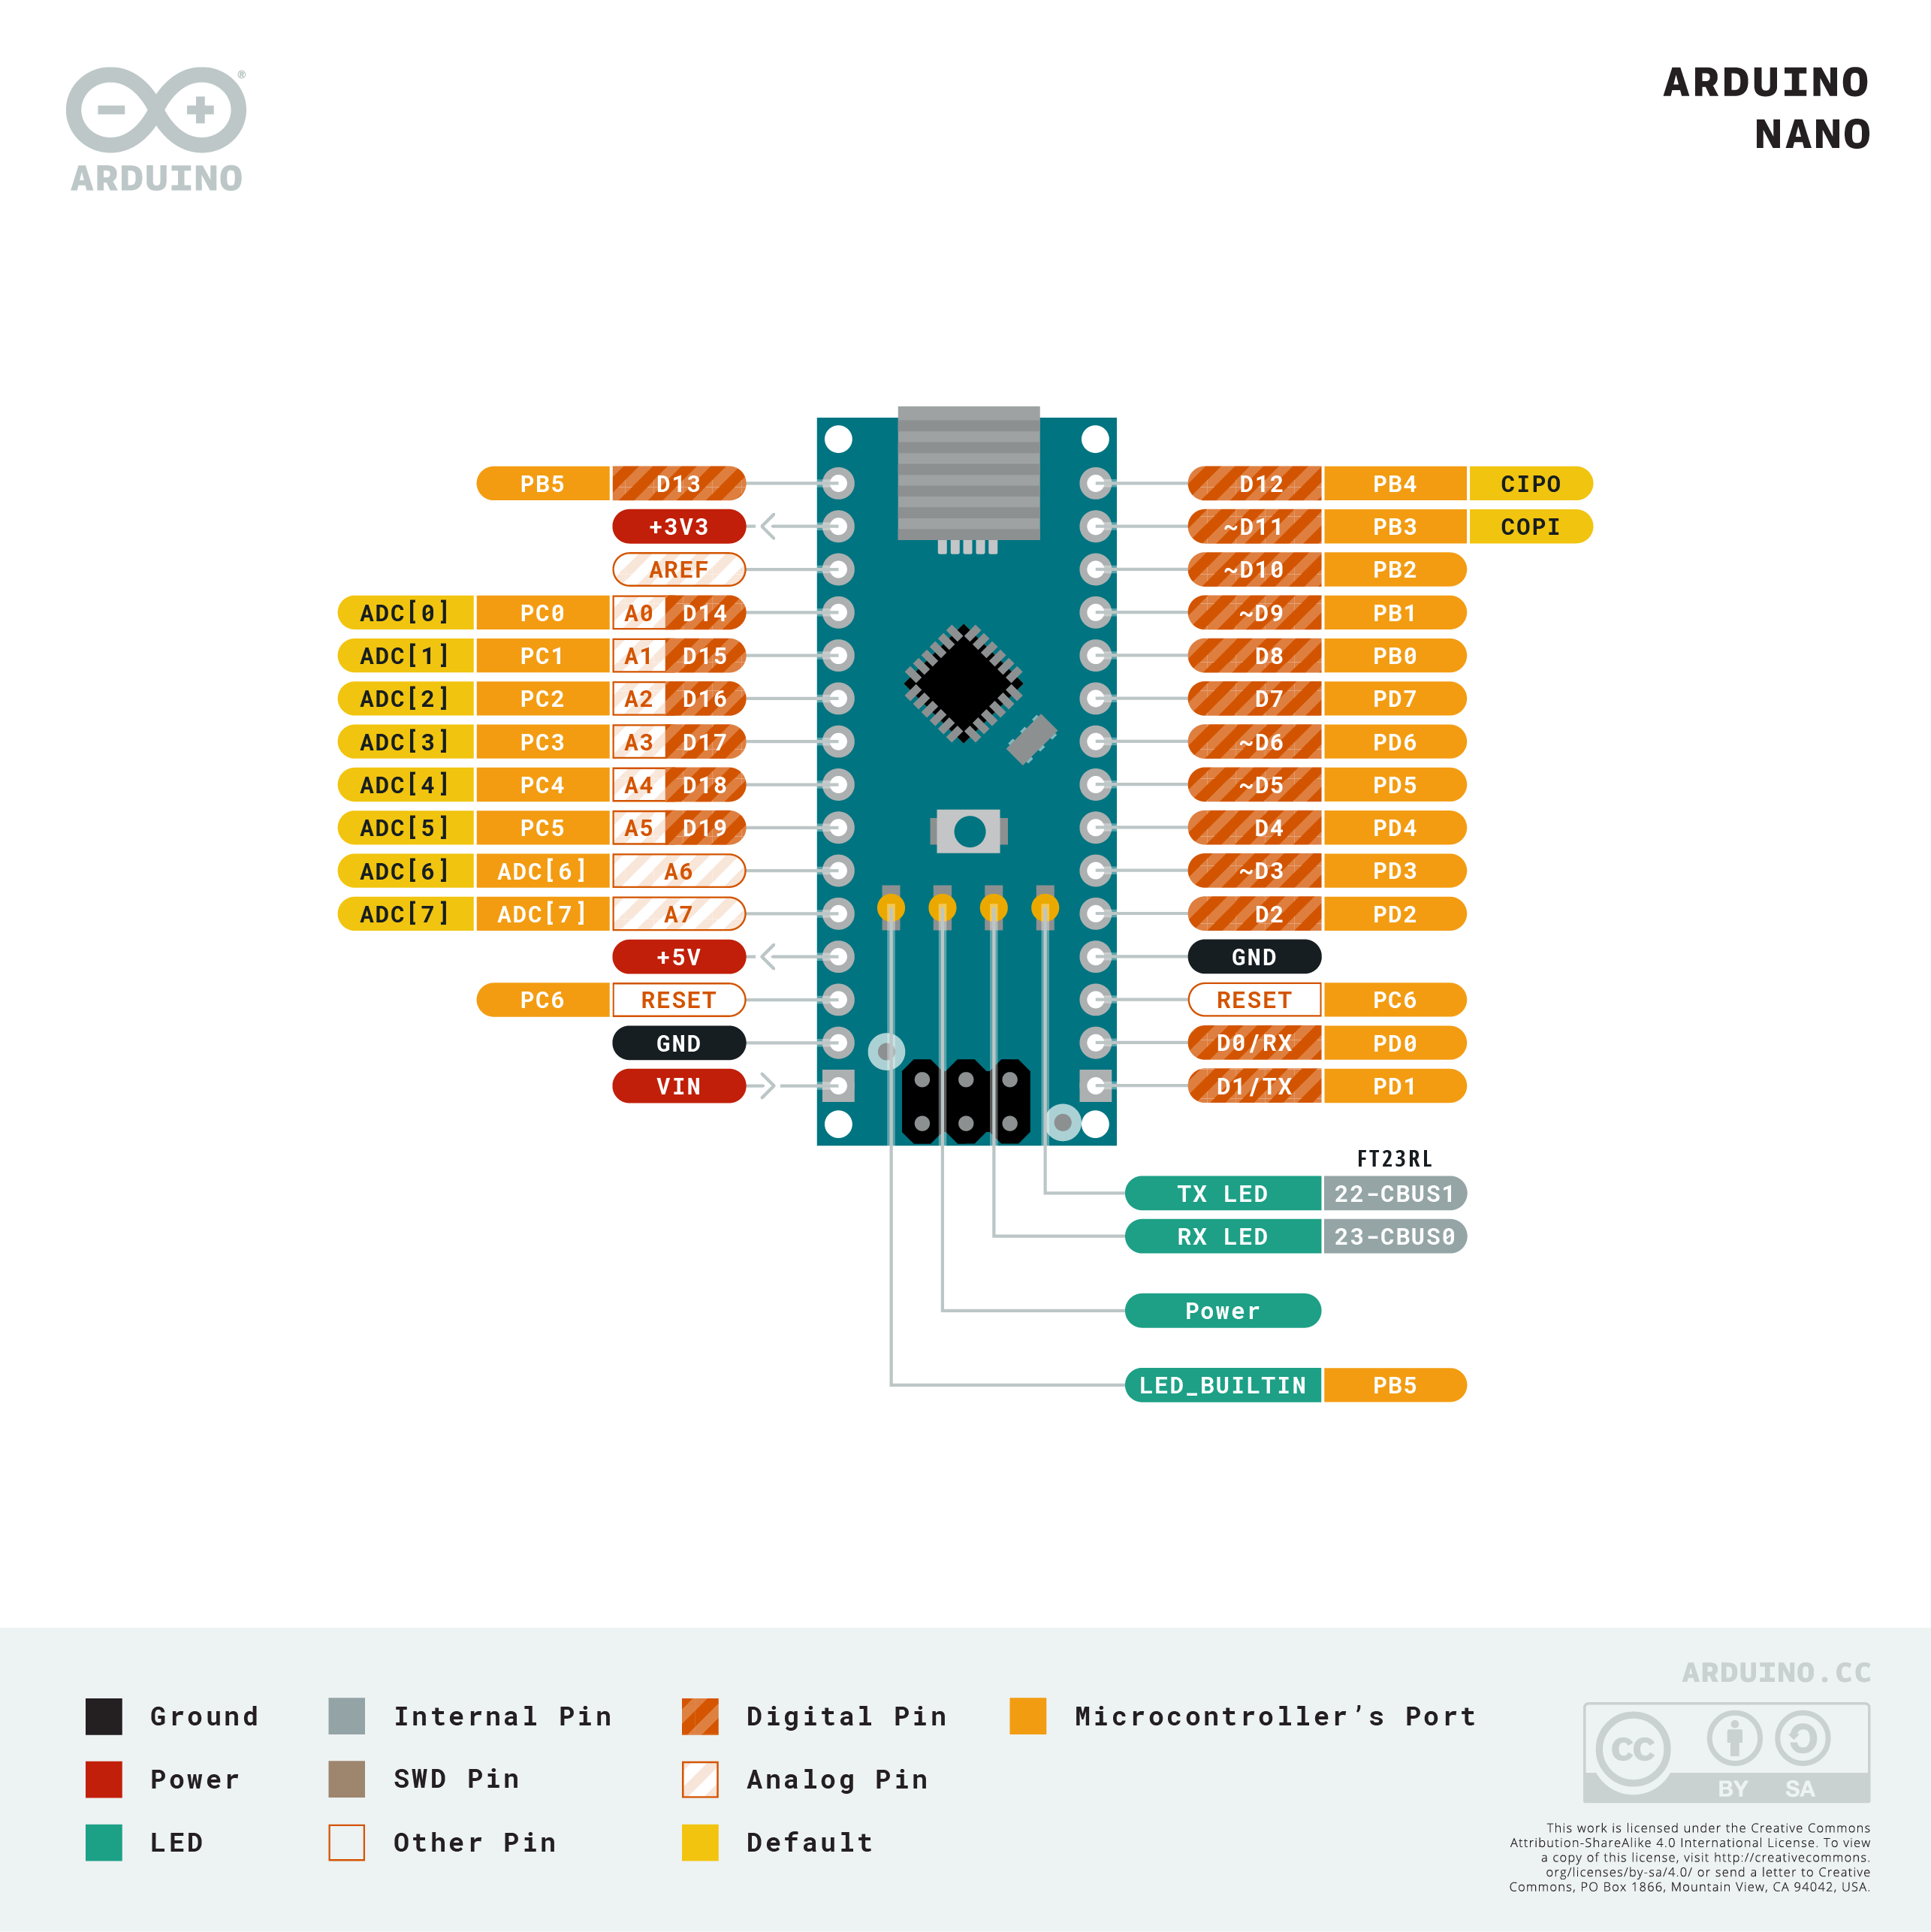
The Arduino platform has become a core staple of the hobbyist and prototyping community. As a result there are lots of useful resources available online for any budding engineer to get started. One of the most important things to consider is which Arduino board you are using, and what pins (or connections) are available on the board. This summer school has provided you with an Arduino Nano board, and the pins this board offers are shown in .

We used some of these pins (D7-D9) on our Pulse Oximeter board to control the LEDs. We can tell this by looking at where the LEDs are connected to the Arduino in the Pulse Oximeter Schematic and identifying the pin names. This schematic also shows that A5, A4 and D3 were used to connect the screen and sensor to the Arduino, but in this case labels were used to avoid drawing wires all over the schematic and making it harder to follow. Any labels that share the same name are assumed connected to one another.
Programming the Nano
As you saw this week, the Arduino is programmed using the Arduino IDE. This may be downloaded from the official Arduino website. There is also a web based editor available as an alternative to installing the IDE on your own PC. Both will require that drivers be installed to allow the IDE/web editor to communicate with the Nano over USB.
The Arduino Uno
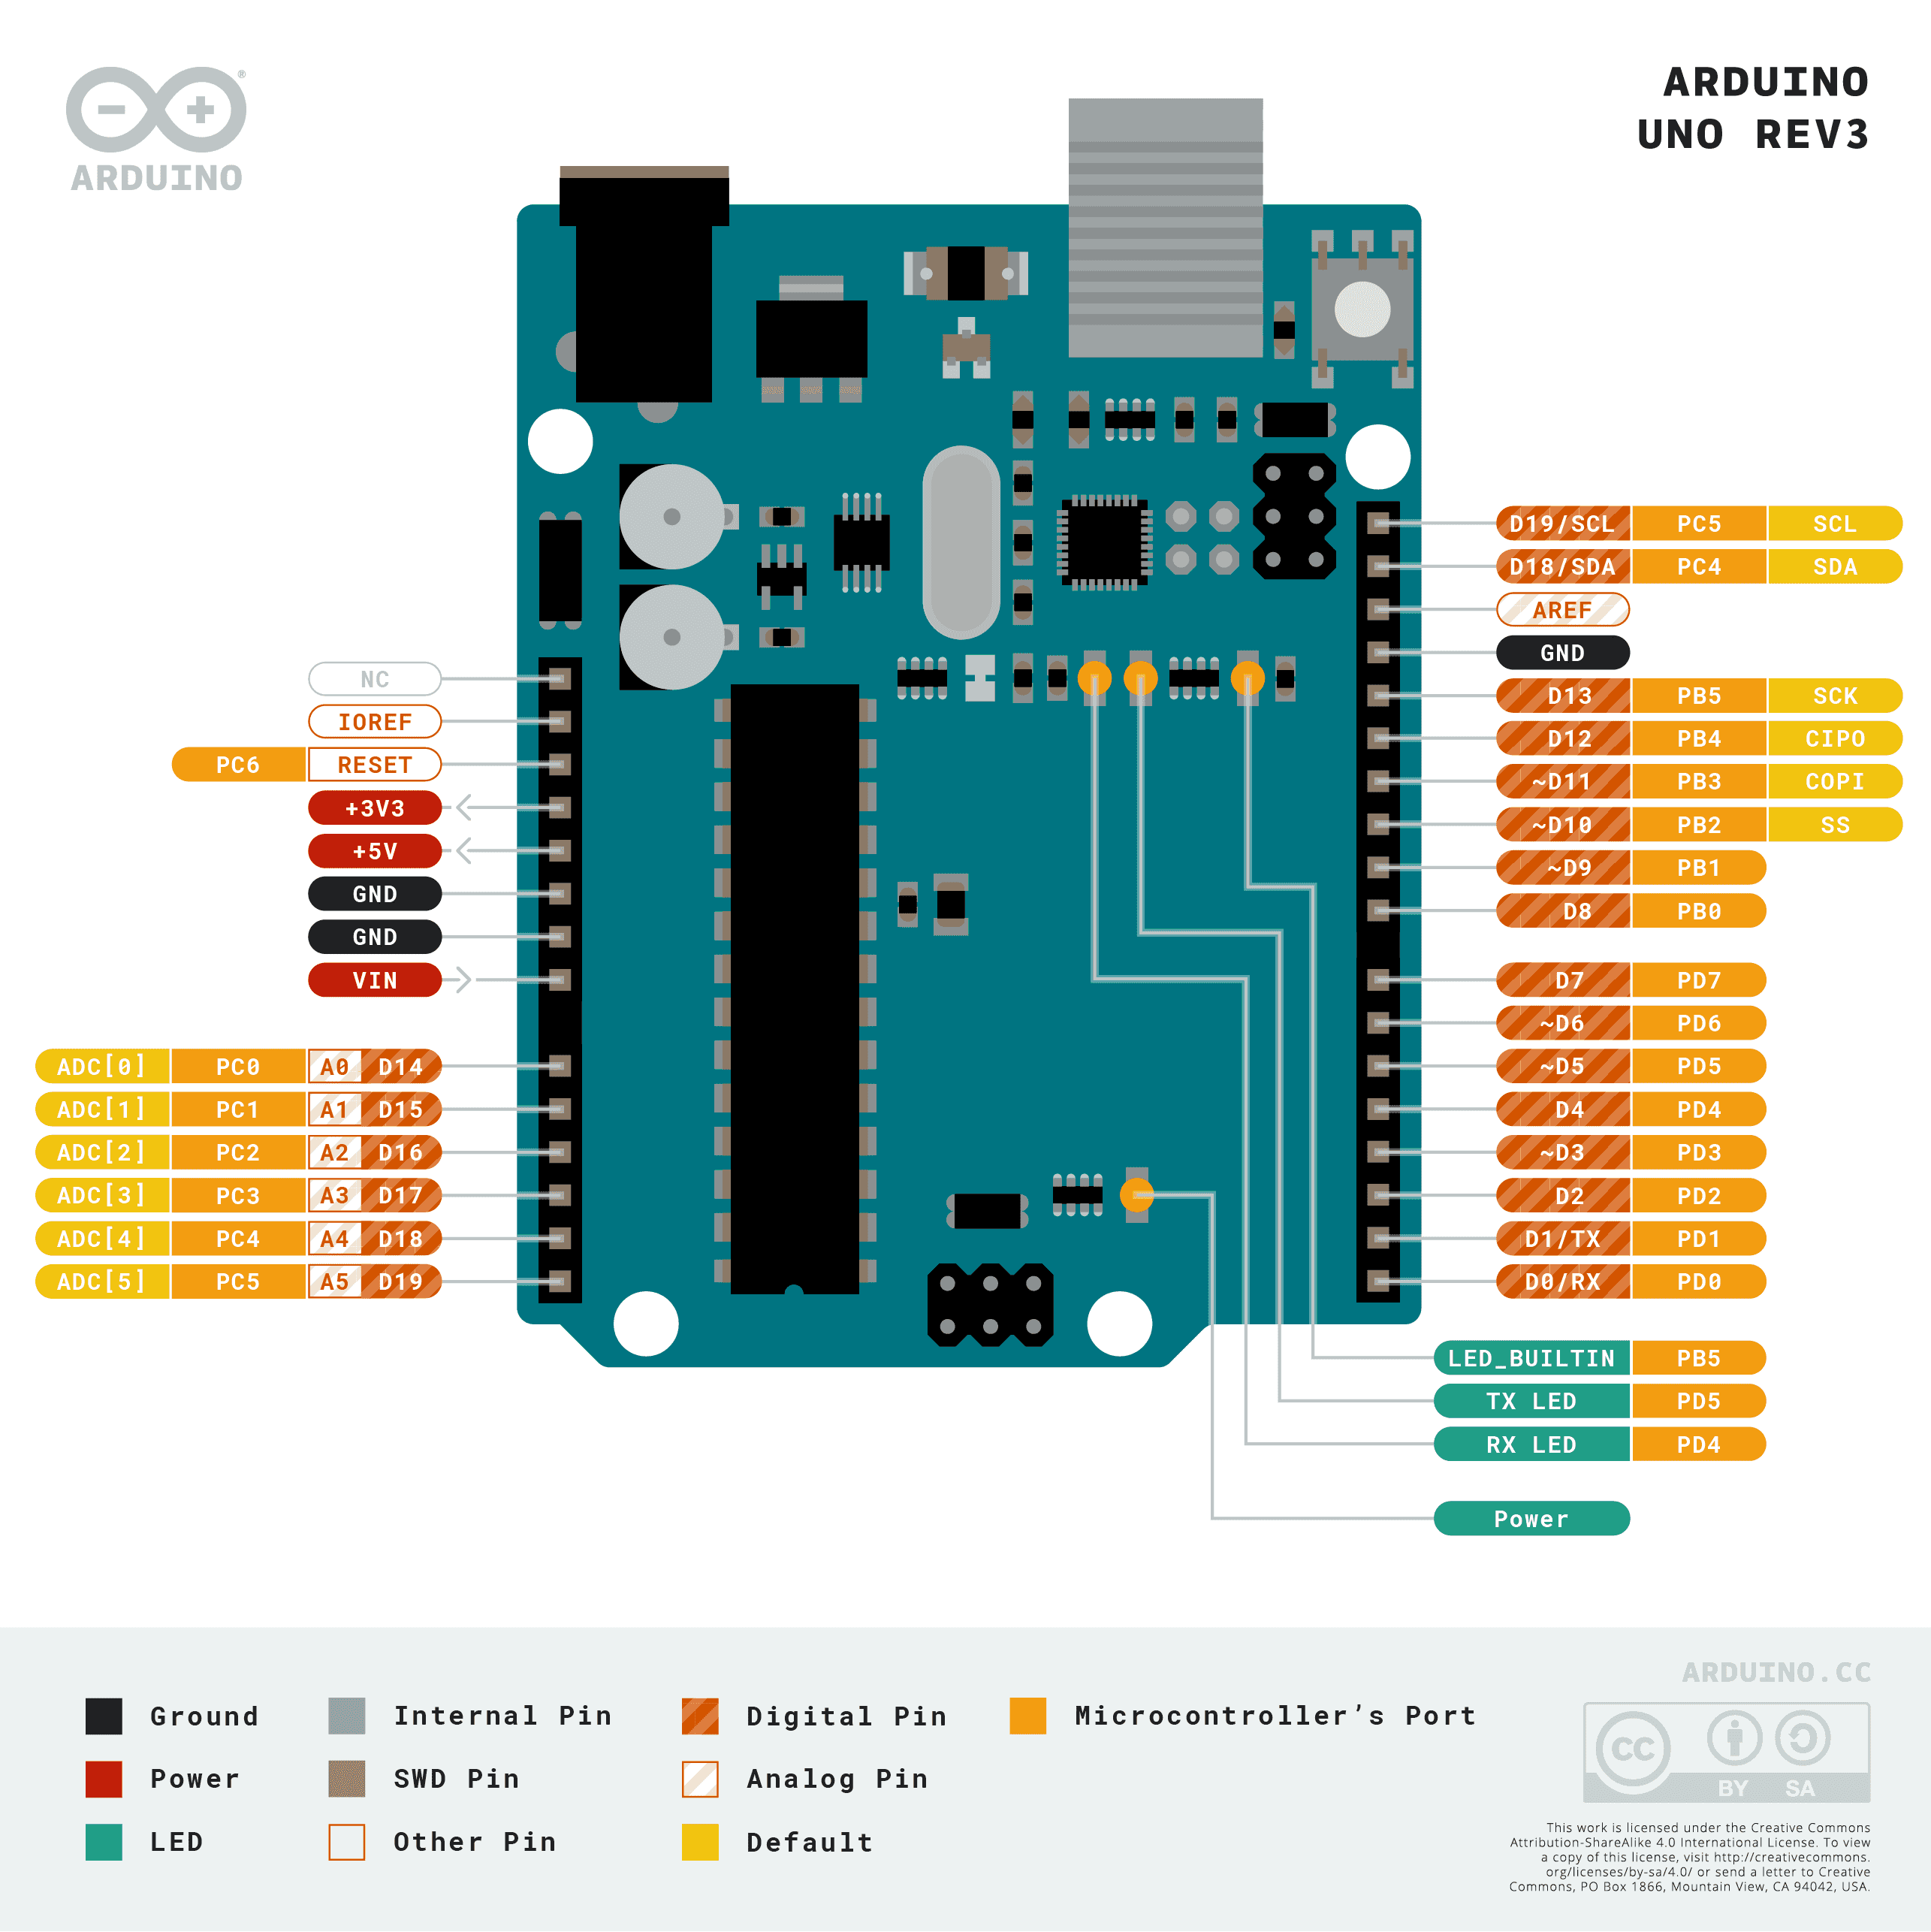
The Arduino Nano is not the only board that is made by Arduino. In fact, they may a huge range of boards, but their two most popular are the Nano and the Uno. The Uno is a larger board, with extra GPIO pins available, and slightly more memory. The pin diagram for the Arduino Uno is shown in . We include this here because you may need to ensure that you modify the code or pins used in any projects that you implement if it was originally intended for the Uno board, so that it will work on the Nano. Both the Uno and Nano are programmed using the same language.

Online Circuit Simulators
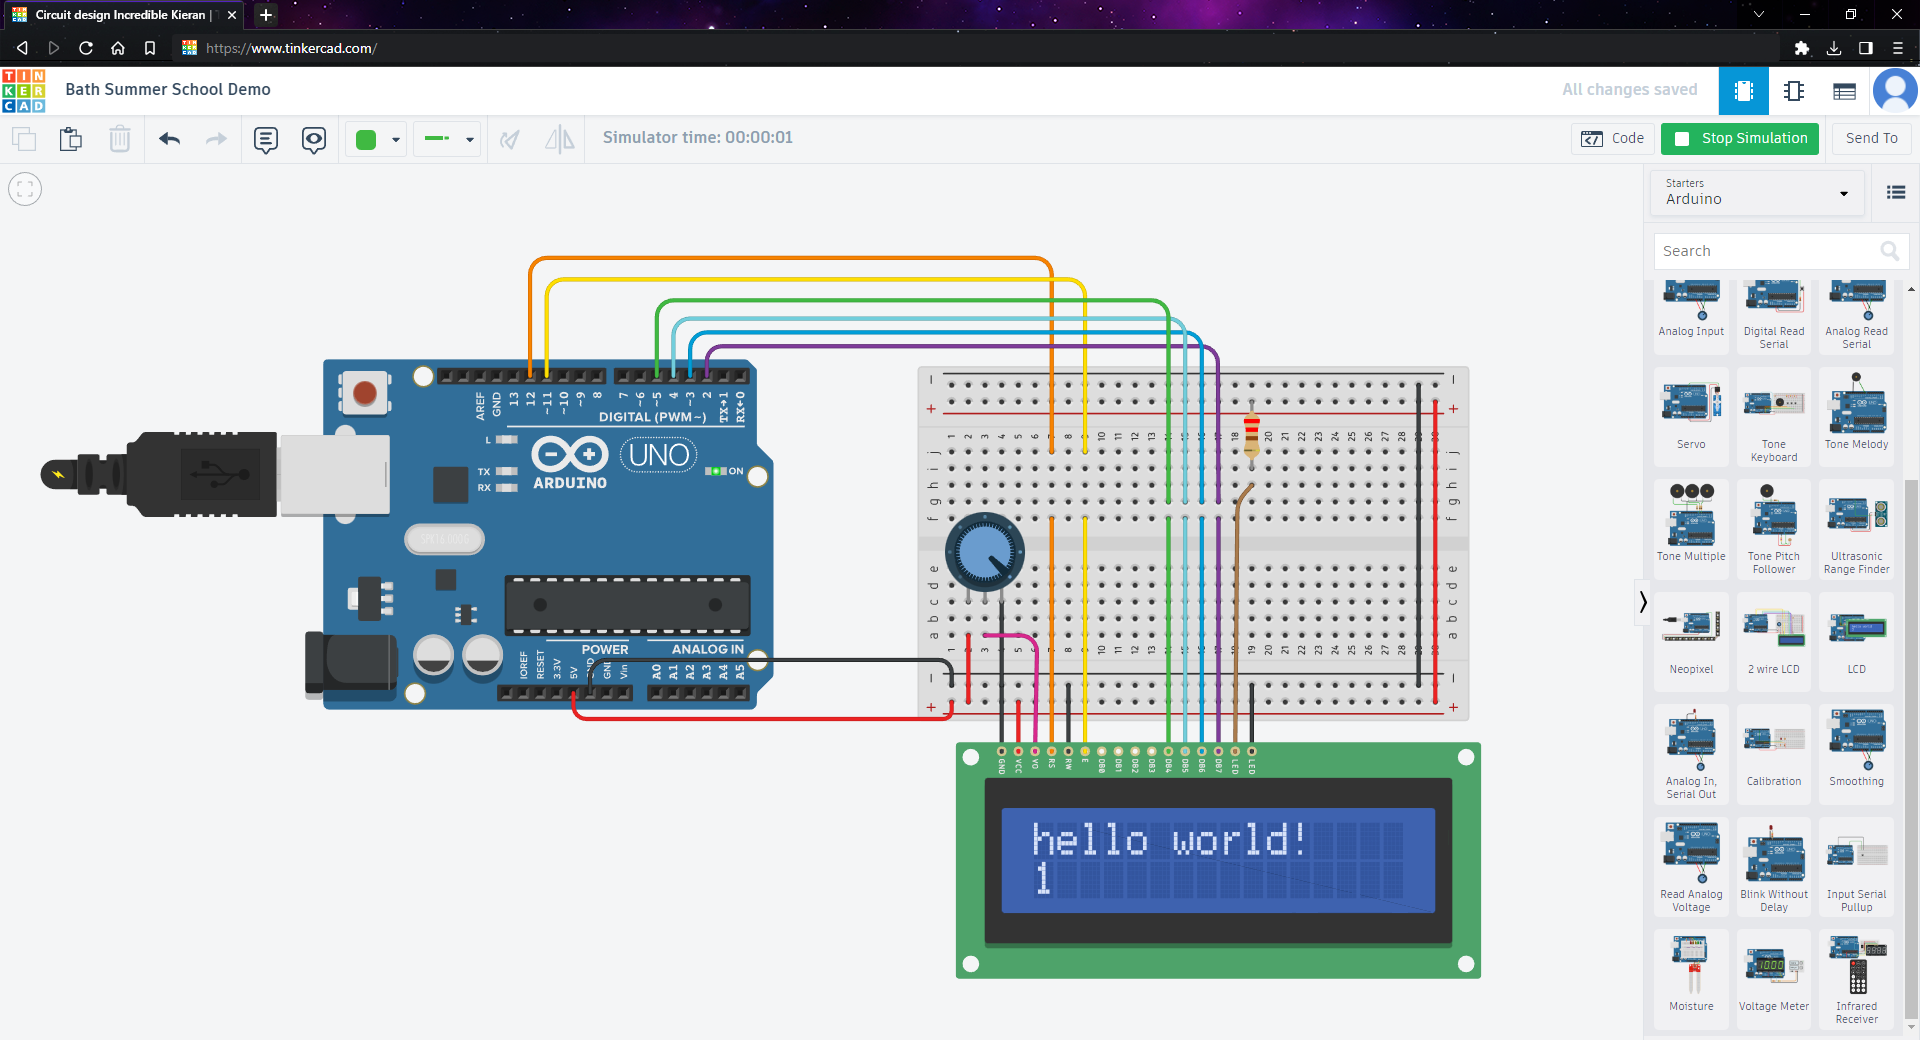
There are some really good design tools available to allow you to try out a circuit design (and even program it) before committing to anything in hardware. One of the best available is Tinkercad Circuits provided free by Autodesk (you will need to create a free account to use this tool). Tinkercad allows you to simulate an Arduino Uno, breadboard and many common components, as well as program the simulated Arduino Uno using either the Arduino language or a blocks based drag and drop tool.

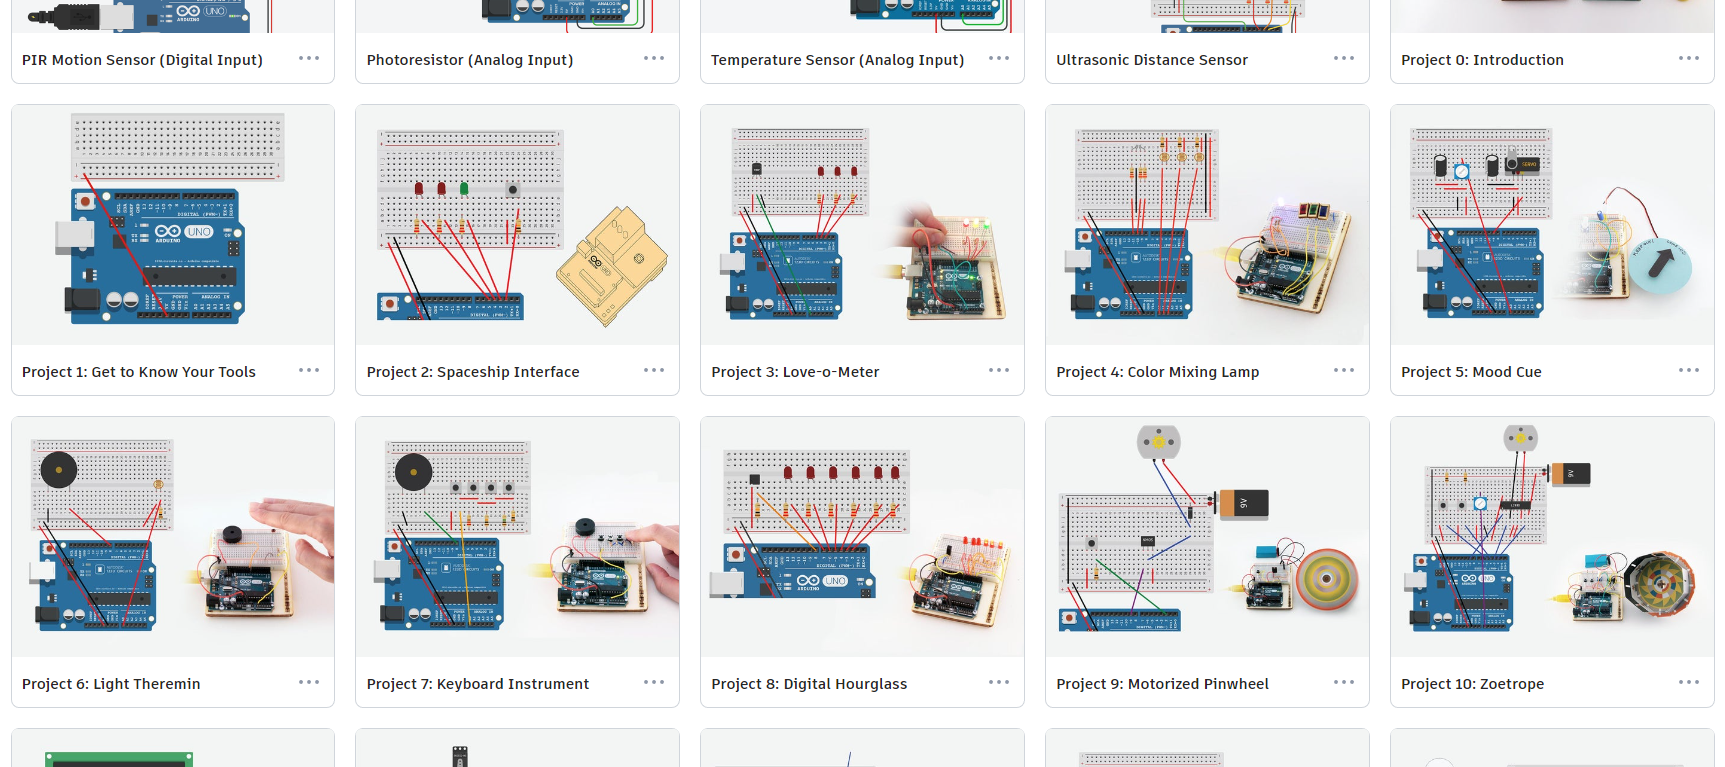
There are also some brilliant online tutorials provided by the Tinkercad team, to introduce you to the tool and teach you some of the basics of electronics. Simulators like this are a great way to get to grips with simple electronic circuits and familiarize yourself with the Arduino’s features and language.

Sadly, the simulator does not have a way to simulate the Arduino Nano, so you will need to use the larger Arduino Uno in any projects you create on the simulator. This means that some conversion would be required if you wish to implement any of the simulated circuits on your physical board. This is not really a limitation so long as you are careful to match up the pins between the two boards, and you don’t exceed the memory of the Nano.
Studying Engineering at Bath
If you enjoyed building and programming the Pulse Oximeter this week, then it may be that an Engineering Degree would appeal to you. At bath, we offer a range of different BEng and MEng engineering programmes within the Electronic and Electrical Engineering Department. Each of these programmes also have a placement version, where students spend an additional year working in a paid role within industry mid-way through their course. This gives you a chance to explore a specific field of interest, and apply your learning in a real and practical setting.
The courses offered by the Electronic and Electrical Engineering Department are:
-
Electronic and Electrical Engineering: Learn the latest theoretical, hardware and software skills to pursue a professional career as an electrical and electronic engineer. Our EEE course gives you a broad and flexible education in electrical and electronic engineering. The range of engineering units lets you tailor your degree to your interests to support your future career choices.
-
Electronic Engineering with Space Science and Technology: A specialist flavour of the EEE course, this course takes you beyond the engineering difficulties of designing equipment for use on Earth’s surface. Instead, you’ll develop the skills needed to design and build systems and platforms for the hostile environment of space.
-
Computer Systems Engineering: Explore the exciting space where electronic engineering meets computing to develop the computer systems our world needs now and in the future. This course combines electronic engineering expertise with advanced knowledge of computer hardware and software skills.
-
Robotics Engineering: An EEE course that focuses on the design and development of robotic systems. Introducing and advancing your knowledge of robotics, artificial intelligence and the electronics systems found at the forefront of engineering and design. This course focuses a little more on mechanical design skills than our other EEE course offerings.
The details, course structure, and entry requirements for all of these courses (starting 2024) may be found on our website at: https://www.bath.ac.uk/courses/undergraduate-2024/electronic-and-electrical-engineering/
The University of Bath also offers an integrated programme of study, called Integrated Mechanical and Electrical Engineering. This provides students with skills and expertise that span both the mechanical and electrical domains of engineering, and is taught in collaboration with the Mechanical Engineering Department.