General Information
Project week brief
The second project week delves into the innovative world of digital health monitoring. A key focus is on pulse oximetry, a pivotal technology in medicine that monitors heart rate and blood oxygen levels. This technology has been instrumental in advancing patient care. During this week, you’ll have the hands-on opportunity to develop your own pulse oximeter.
Aim
The aim of this project week is to design, build, and test a pulse oximeter, and produce an accompanying datasheet.
System Design
Your kit includes components to build both a single-wavelength system and a dual-wavelength system. You are encouraged to build both as that enables you to build more skills and get a more in-depth understanding of how to design a pulse oximeter. You may wish to consider ways to combine both systems into a single, more robust, one.
-
Single-Wavelength System: This system includes an Infra-Red (IR) light emitting diode and a phototransistor. Your task is to build a circuit to extract heart rate.
-
Dual-Wavelength System: This system makes use of the Heart Rate click board. The output from this is digital (I2C) and, therefore, the circuit design cannot be modified. A key advantage of this system is that it includes two emitters with different wavelengths, enabling $SpO_2$ to be measured as well as heart rate. There are a range of other physiological parameters that could be estimated with this system, should you wish to take it further.
The Intro to Pulse Oximetry page includes the overall theory you need to understand, the datasheets for all of the components can be found in the Equipment page, and specific information related to the Single-Wavelength System and Dual-Wavelength System can be found in their respective pages.
Using a Version Control System will help you collaborate more effectively and keep track of changes. You had a lecture on version control delivered by Dr Jabban which explains the process of setting one up.
Datasheet
A key element of this project week is producing a datasheet. You had a lecture on datasheets delivered by Dr Pigeon, so you are expected to be familiar with the process of creating one. Additionally, reading the datasheets for the different components provides you with a range of examples that should help you with writing yours. Further information about writing a datasheet can be found in the Sustainability and Transferrable Skills page.
Design Showcase
At the end of the project week, you will get the opportunity to showcase your work to Professor Mark Tooley, who was the Head of the Department of Medical Physics and Bioengineering and Director of Research and Development at the Royal United Hospital in Bath.
This informal showcase session, scheduled for Friday at 13:15, allows you to demonstrate your work and discuss the unique aspects of your design. No formal presentation is necessary; it is simply an opportunity to engage and discuss your work.
Guest Lecture
Professor Mark Tooley will also be delivering a guest lecture during the project wrap up lecture slot.
This project is not just about building a device; it’s about understanding its impact in healthcare and exploring how engineering can contribute to clinical practice.
Skills Mapping
- Circuits & Instrumentation:
- Circuit Design (A)
- Circuit Simulation (A)
- PCB Design & Manufacture:
- PCB Assembly (A)
- Programming & Embedded Systems:
- Programming for Embedded Systems (A)
- Sustainability:
- Climate action, Sustainability and SDGs Literacy (A)
- Electronics Enhancing Sustainability (A)
- E-Waste (K)
- Design & Development:
- Problem Solving (A)
- Communication:
- Social Media Communication (A)
- Writing a datasheet (K)
- Management:
- Effective Project Management (A)
- Effective time Management (K)
- Effective Teamwork (A)
Group Size and Allocation
The groups are formed of 5 students.
You can find the groups allocation in Moodle using this link.
Timeline
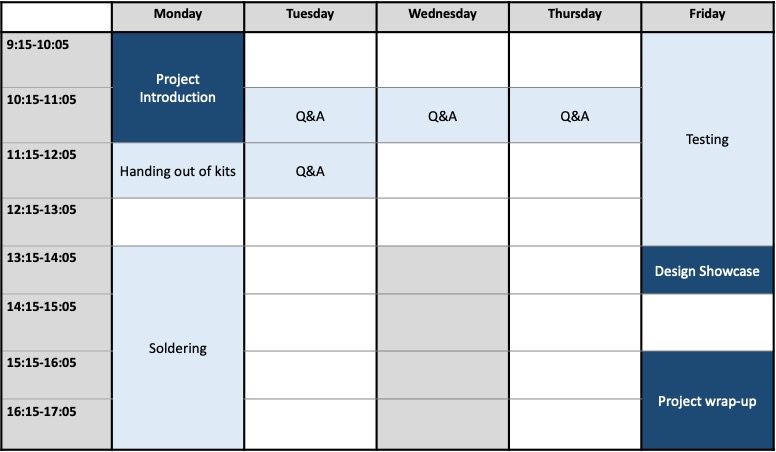
While you are free to use the lab throughout the entire week during lab opening hours, there are dedicated times for soldering and questions, as shown below.

Soldering Schedule
| Surface mount | Through hole | |
|---|---|---|
| 13:15-13:45 | Groups 1-10 | |
| 13:45-14:15 | Groups 11-20 | Groups 1-10 |
| 14:15-15:45 | Groups 21-30 | Groups 11-20 |
| 15:45-16:15 | Groups 31-40 | Groups 21-30 |
| 16:15-16:45 | Groups 41-43 | Groups 31-40 |
| 16:45-17:15 | Groups 41-43 |
Test and Validation
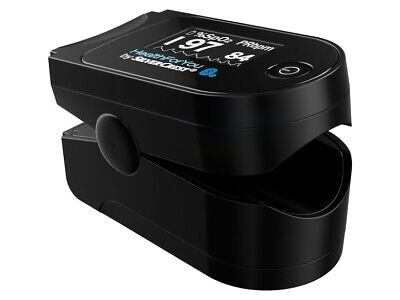
A commercial pulse oximeter will be available in the lab throughout the week for you to test. Please note that you shall not take it out of the lab, and you should return it to its assigned spot after use. A usage log will be kept next to it to help you organise your time.

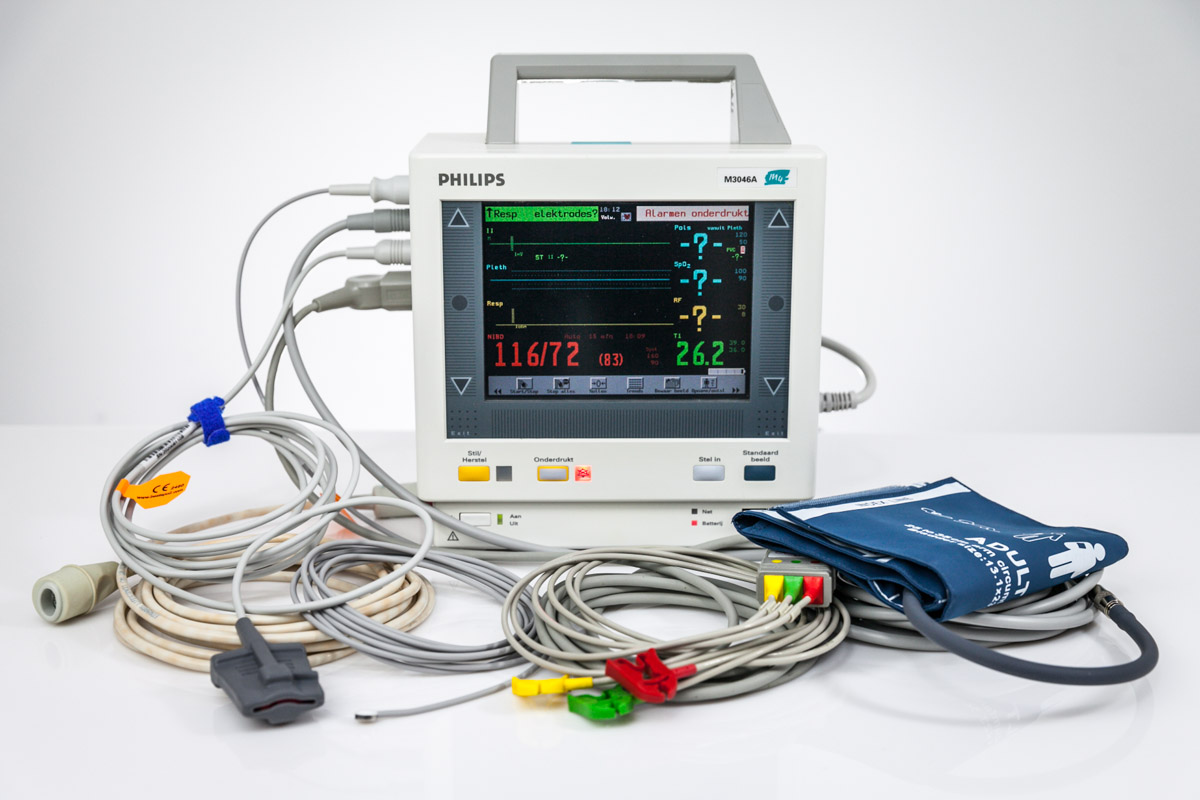
The final testing day allows you to evaluate your design against a hospital ICU monitor, which a certified medical device. Each group will have a 5-minute test slot according to the schedule below. You are free to decide on your testing plan. You are encouraged to collect varied data such as measurements from different group members or data collected during different activities (for example, jumping to increase your heart rate).

| Time | Group Number |
|---|---|
| 09:15 | 1 |
| 09:20 | 2 |
| 09:25 | 3 |
| 09:30 | 4 |
| 09:35 | 5 |
| 09:40 | 6 |
| 09:45 | 7 |
| 09:50 | 8 |
| 09:55 | 9 |
| 10:00 | 10 |
| 10:05 | 11 |
| 10:10 | 12 |
| 10:15 | 13 |
| 10:20 | 14 |
| 10:25 | 15 |
| 10:30 | 16 |
| 10:35 | 17 |
| 10:40 | 18 |
| 10:45 | 19 |
| 10:50 | 20 |
| 10:55 | 21 |
| 11:00 | 22 |
| 11:05 | 23 |
| 11:10 | 24 |
| 11:15 | 25 |
| 11:20 | 26 |
| 11:25 | 27 |
| 11:30 | 28 |
| 11:35 | 29 |
| 11:40 | 30 |
| 11:45 | 31 |
| 11:50 | 32 |
| 11:55 | 33 |
| 12:00 | 34 |
| 12:05 | 35 |
| 12:10 | 36 |
| 12:15 | 37 |
| 12:20 | 38 |
| 12:25 | 39 |
| 12:30 | 40 |
| 12:35 | 41 |
| 12:40 | 42 |
| 12:45 | 43 |