Getting Started with Mahara - Building Your Digital Portfolio
Mahara is an open-source ePortfolio system that is designed to help you create and manage your digital portfolios. It offers a platform for you to collect, reflect upon, and showcase your achievements, skills, and learning experiences through a range of digital artifacts, such as documents, images, videos, and more.
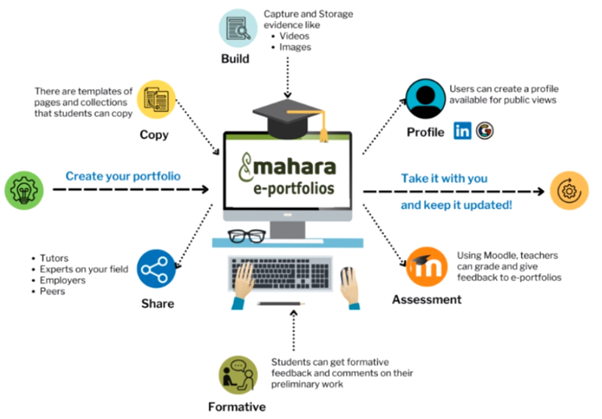
You can create your portfolio of pages by using basic templates and capturing evidence, such as videos, images, files and text. These digital artefacts may represent your work, achievements, or learning experiences. You can reflect on each artefact by adding text or multimedia comments to explain the significance of each artefact, what you have learned, or how it demonstrates your skills and knowledge.
You can share your portfolios with others; with peers, instructors, or potential employers, allowing for feedback and discussion. You have full control over the privacy settings of your portfolios. You can make them public, share them with specific individuals, or keep them private.
Within this unit, instructors will provide feedback on the portfolios, and assessment can be carried out to evaluate your progress and skills development.
You will be able to continually update your portfolios as you acquire new skills and complete projects, ensuring that your digital records remain up-to-date and relevant.
You can export your portfolios in various formats (e.g., PDF) to share them outside of the Mahara platform or for other purposes, such as job applications.
This lab session is designed to equip you with the essential skills for creating, sharing and submitting a portfolio to Moodle.
Step 1: Access Mahara
Navigate to https://mahara.bath.ac.uk/
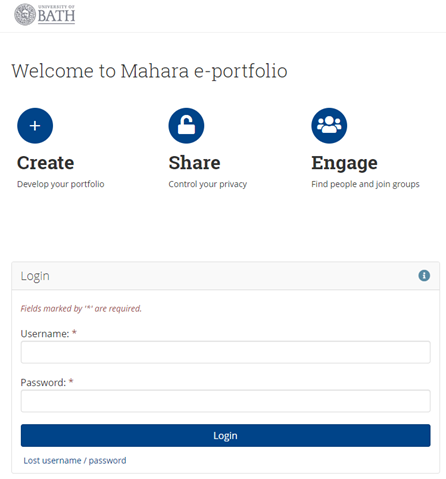
You can log in to the University of Bath Mahara site by using your University credentials. This will create an account when you first log in.
Step 2: Set-up your profile
After logging in, you should set up your profile, providing information about yourself.
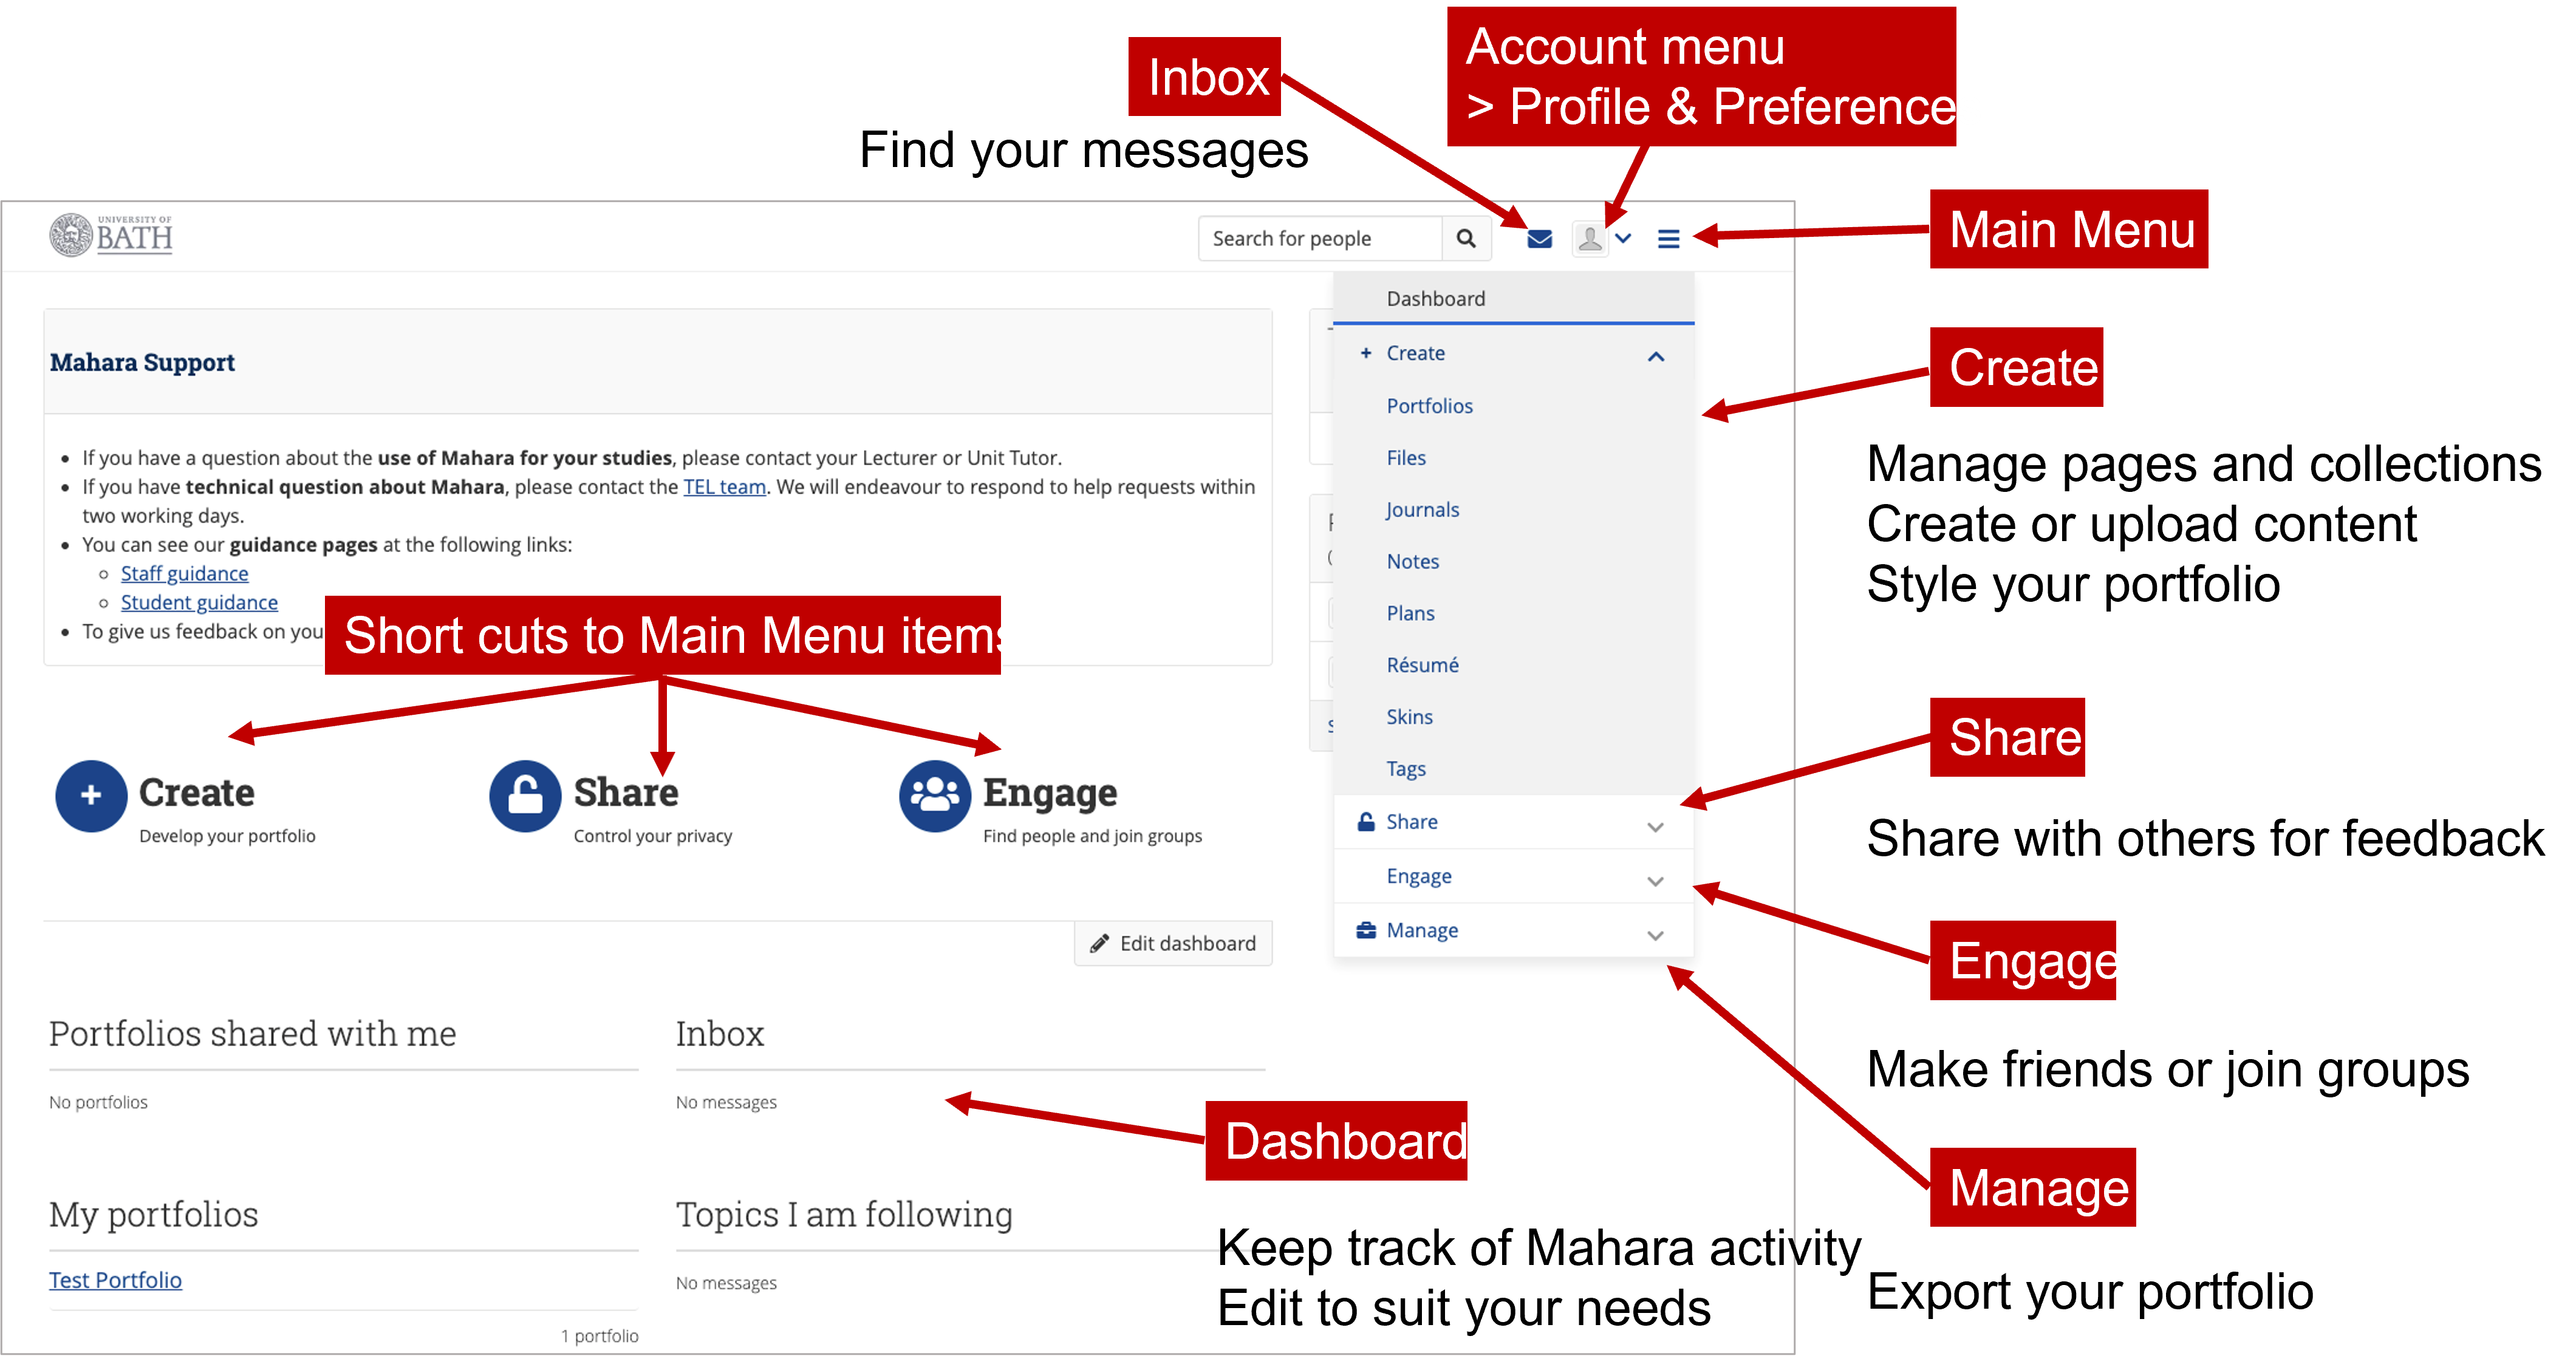
Clicking on the Account menu (located top right) and selecting Profile allows you to specify:
- Your first and last names,
- Your Bath username,
- And a display name.
It is essential that your Student ID field shows your correct Bath username to ensure that each portfolio can be uniquely identified. You can optionally add text to introduce who you are.
Step 3: Add a profile picture
Clicking on the Account menu (located top right) and selecting Profile picture allows you to upload a photo. This is helpful for academics, such as your personal tutor, connect names to faces.
Profile pictures should comprise head and shoulders only. Otherwise they will be too small. You can use Powerpoint to quickly and easily crop a photo into a square image of head & shoulders. Then right click > Save as picture… This can then be uploaded to Mahara.
Step 4: Setting your preferences
Account menu > Settings allows you to update your preferences and your reference for notifications. A range of activities in Mahara will trigger a notification to your Mahara inbox if you so choose. You can set these so that the notifications are sent directly to you by email, or you can request an email digest which will summarise any notifications at the end of the day.
Any messages sent to you in Mahara can be seen in your inbox.
Step 5: Update your Résumé
Main menu > Create > Résumé
The focus for now is to complete the Education section.
Click on the Add button and complete the Start date, Institution, Qualification type (e.g. Masters in Engineering) and Qualification name. Then Save.
Step 6: Finding your way around
Step 7: Copying a template
In the following actions, you will copy a template which we have provided so that you can then edit the content and make it personal to you.
Start by navigating to the Create space, your personal portfolio space.
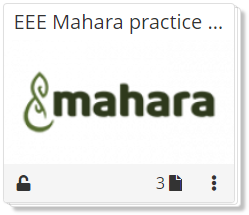
Select the Copy button and then search for the EEE Mahara Practice portfolio
You should then Copy collection rather than just the single page.
This will complete the entire contents of the portfolio. You should then rename the portfolio by adding your full name at the front, e.g. Joe Bloggs EEE Mahara practice. This naming is important for when academics will review and provide feedback to your portfolios and should be followed for all portfolios that you share with academics.
You should ensure that the portfolio is mapped to the correct SmartEvidence framework. For this practice, this is called Basic Skills in Mahara. Then click the next button to move to the next step.
At this stage you could add or reorder pages if you wanted. Click next again…
To bring up the next screen where you can Share with… a Person`.
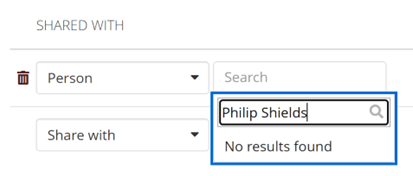
Search for Philip Shields (you will have more success) and give me the special role of a Reviewer.
If the person has the right privileges, they will be able to provide feedback and assess evidence provided against the evidence framework.
Clicking on Save will create your new portfolio which you can then view.
The navigation buttons at the top right will let you see the different pages of the portfolio.

If you have associated the Skills Framework correctly, you will see this on page 1.
If you select Main menu > Create > Portfolios, you will see your portfolio as follows:
The unlocked padlock shows that the portfolio has been shared, and by clicking on it, you can double check with whom.
Step 8: Edit your Overview page
When in the Portfolios section, click on your new portfolio title. This will open up your portfolio on the first page. If you have a Skills Evidence Framework attached to your portfolio, the first page will show this a summary of your portfolio and which skills are being claimed from each page.
Within this introductory session, you are aiming to demonstrate the basic skill of using Mahara. If you hover your mouse over the Basic competence in Mahara text, you will see the evidence that is required to demonstrate this skill.
You will come back to this framework shortly.
To start with you will edit the Overview page so that it shows your relevant personal details.
Navigate to this page by using the arrows top right or clicking on the title of the page in the Skills Framework.
Currently, the page has a Page navigation section. You now will add sections with your personal details and your education – all this will be pulled from your profile.
Clicking on the Edit (pencil) icon top right will open the page editing window.
You will now add a block containing your Personal details by clicking on the + sign top right. This will allow you to add a new block on the page.
Title the block Personal details and choose the Profile information content type (you will need to click more a couple of times to find this) and then ensure you have ticked the boxes for at least the following:
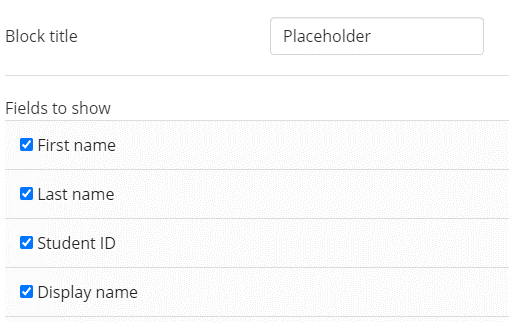
Show your profile picture and email address, and ensure the section is not Retractable.
You can now resize the added block to fill half of the page width.
In a similar way, add a new block of content type One résumé field entitled Education and choose to show your Education history.
Reposition this below your personal details.
You can view the page by using the Display page (monitor icon (top right).
Finally, remove the comments section at the bottom of the page via Edit (pencil icon) > Share (lock icon) > Advanced options > Set Allow comments to No.
Step 9: Edit your main page
Navigate to the Generic page`* which will serve as a template for all the rest of your portfolio pages.
All your pages should contain an Introduction block at the top of your page and a Skills mapping block at the bottom.
The aim of this session is for you to create a page with blocks containing all the key content types that you will need during the year:
- Text (via a
Textblock). - Video (via an
External mediablock. - Image(s) (via an
ImageorImage Galleryblock). - Displayed PDF file (via the
PDF` block).
The suggestion is that you create a page about your First weeks in Bath using:
- An extra
Textblock to briefly mention the highlights so far. - The Welcome to the City of Bath video on YouTube.
- Photos of the notes that you made in your lab book last week.
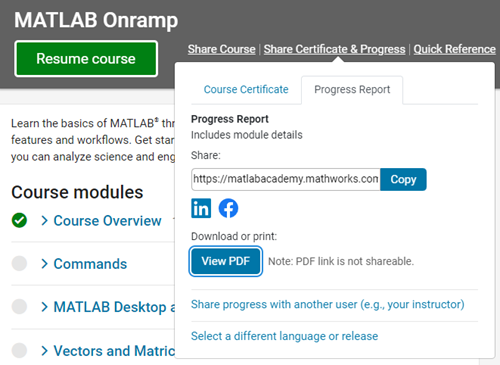
- A PDF file of your MATLAB Onramp certificate (You can obtain this on the Onramp page – Share Certificate & Progress > Progress Report > View PDF, and save the file to your computer). Then
Upload filewhen selecting the PDF block.
Step 10: Associate your page with a Skill from the Skills Framework
To claim a skill you will need to add an Annotation block below the Skills Mapping section.
You do not need to overwrite the title of the block as this will automatically be assigned by the evidence framework.
In this introductory framework there is only one skill that you can claim – Basic competence with Mahara. In the full framework there are many different skills. One page might only claim one skill. Equally, another might contain enough evidence to claim several.
The Purpose of the skill and Requirements to demonstrate the skill are presented as a reminder.
To save the Annotation, you will need to add a brief reflective commentary to explain how your work meets this standard.
Once saved. Ensure that the annotation appears at the bottom of the page below the Skills Mapping section.
If you now navigate to the front page with the evidence framework overview, you can see that an open circle has appeared for that page.
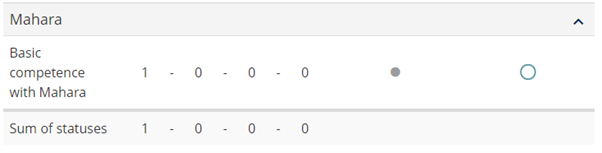
This means that the page is ready for assessment.
Step 11: Submit your Portfolio to Moodle
You will submit your Portfolio to Moodle at various points in the year.
Firstly, you need to ensure that you have shared your portfolio with the correct people.
For this submission, you should ensure that your portfolio is shared with Philip Shields as a Reviewer. In the Portfolio view, you can hover over the lock symbol on your portfolio to see if it has been shared with the correct Reviewer.
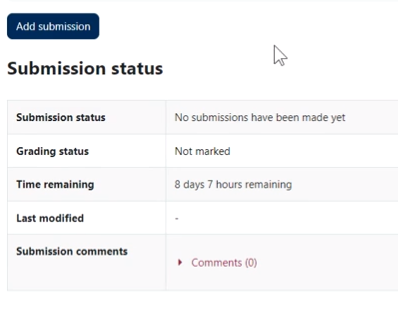
You should now navigate to the submission point in the EE12001 Design Skills Moodle site.
This will bring up a page giving you opportunity to Add a submission:
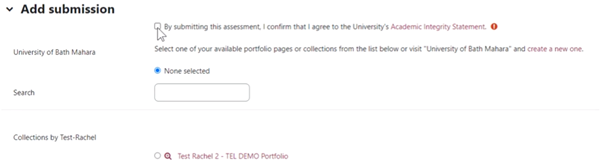
Click on Add submission and this will open a new page where you will need to confirm that you agree with the Academic Integrity Statement, select the correct portfolio, and click Save.
This is the end of the lab session. You should now be competent at creating and submitting your Mahara ePortfolio.
If you have not finished, you should complete the activities in your personal study time.