Automated Greenhouse Window Vent System Design
Introduction
In this lab, we will focus on designing an automated window opening system tailored for a mini greenhouse model, shown below. This system will utilise a rack and pinion mechanism driven by a single shaft, powered by a motor equipped with a gearbox. The heart of the temperature control will be a bimetal switch, which responds to temperature changes by opening or closing the windows, thereby regulating the greenhouse’s internal climate.

Aim
The aim of this series of lab sessions is to enable you to apply what you have learnt in solid mechanics to a real mechanical design problem.
Physical Model
The mini greenhouse was purchased to help you with visualising the design and dimensions and, if appropriate, creating simple prototypes out of cardboard.
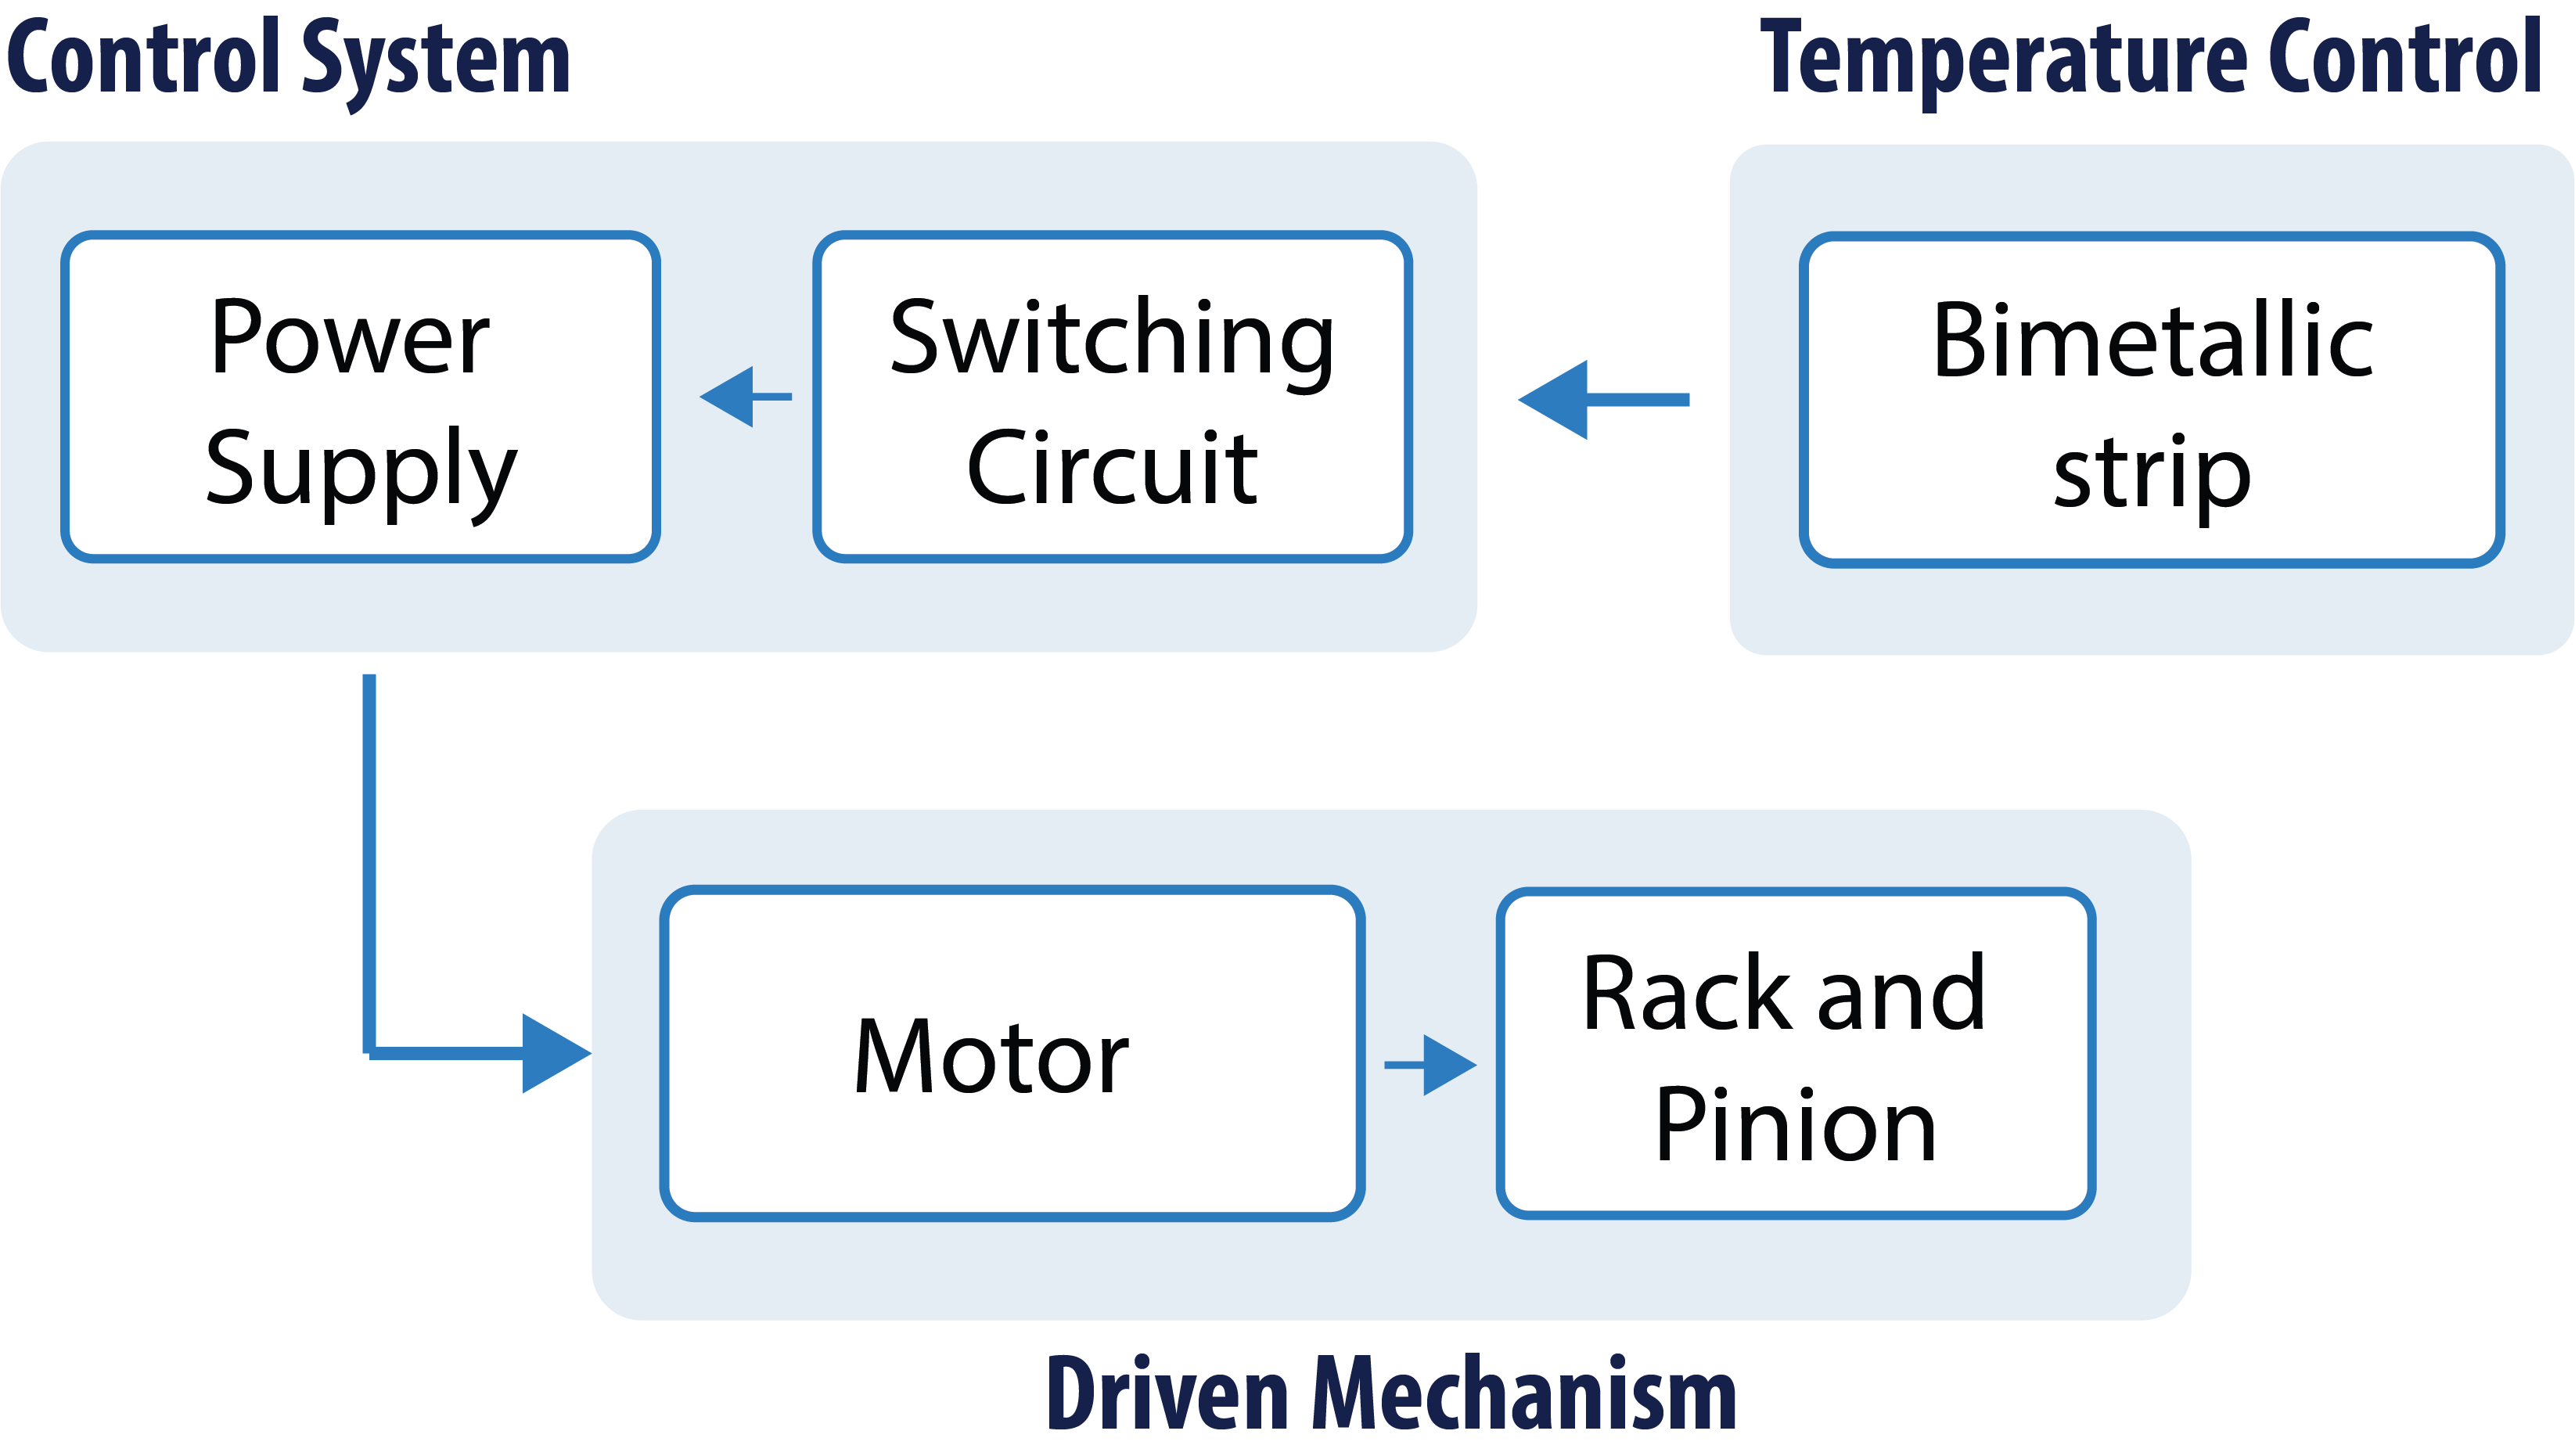
Overall System
The overall system block diagram is shown below. The bimetallic strip is used to control the switching circuit in response to temperature change. The switching circuit, in turn, controls the power to the motor which drives the rack and pinion system to open and close the mini greenhouse window.
Design Steps
The different pages of the lab script will guide you through the process. Those pages will be released on a weekly basis. The steps are as follows:
- Part 1 - System Analysis: You will start by drawing the Free Body Diagram (FBD) of the system, then calculate the forces acting on the rack when the window is both closed and open.
- Part 2 - Motor Sizing: The next step involves understanding the relationship between torque and window opening mechanism, selecting an appropriate motor, and determining the dimensions of the rack and pinion.
- Part 3 - Temperature Control: You will select a bimetal switch based on required material thickness for the desired temperature response, an optional extension exercise is designing the electrical circuit required to control the system.
- Part 4 - Finalising Overall Design: The final lab slot is an opportunity to finalise your design and update your e-Portfolio.