Constructing the Wind Turbine
Step 1: Unboxing
Open the package carefully and check that you have all the necessary components. If any components are missing, please go and find a demonstrator. The parts that should be within the box are specified in section 2 (Wind Turbine Kit).
Step 2: Preparation
Identify all parts by referring to the parts list. Ensure all necessary tools are available (you should only need a set of pliers)
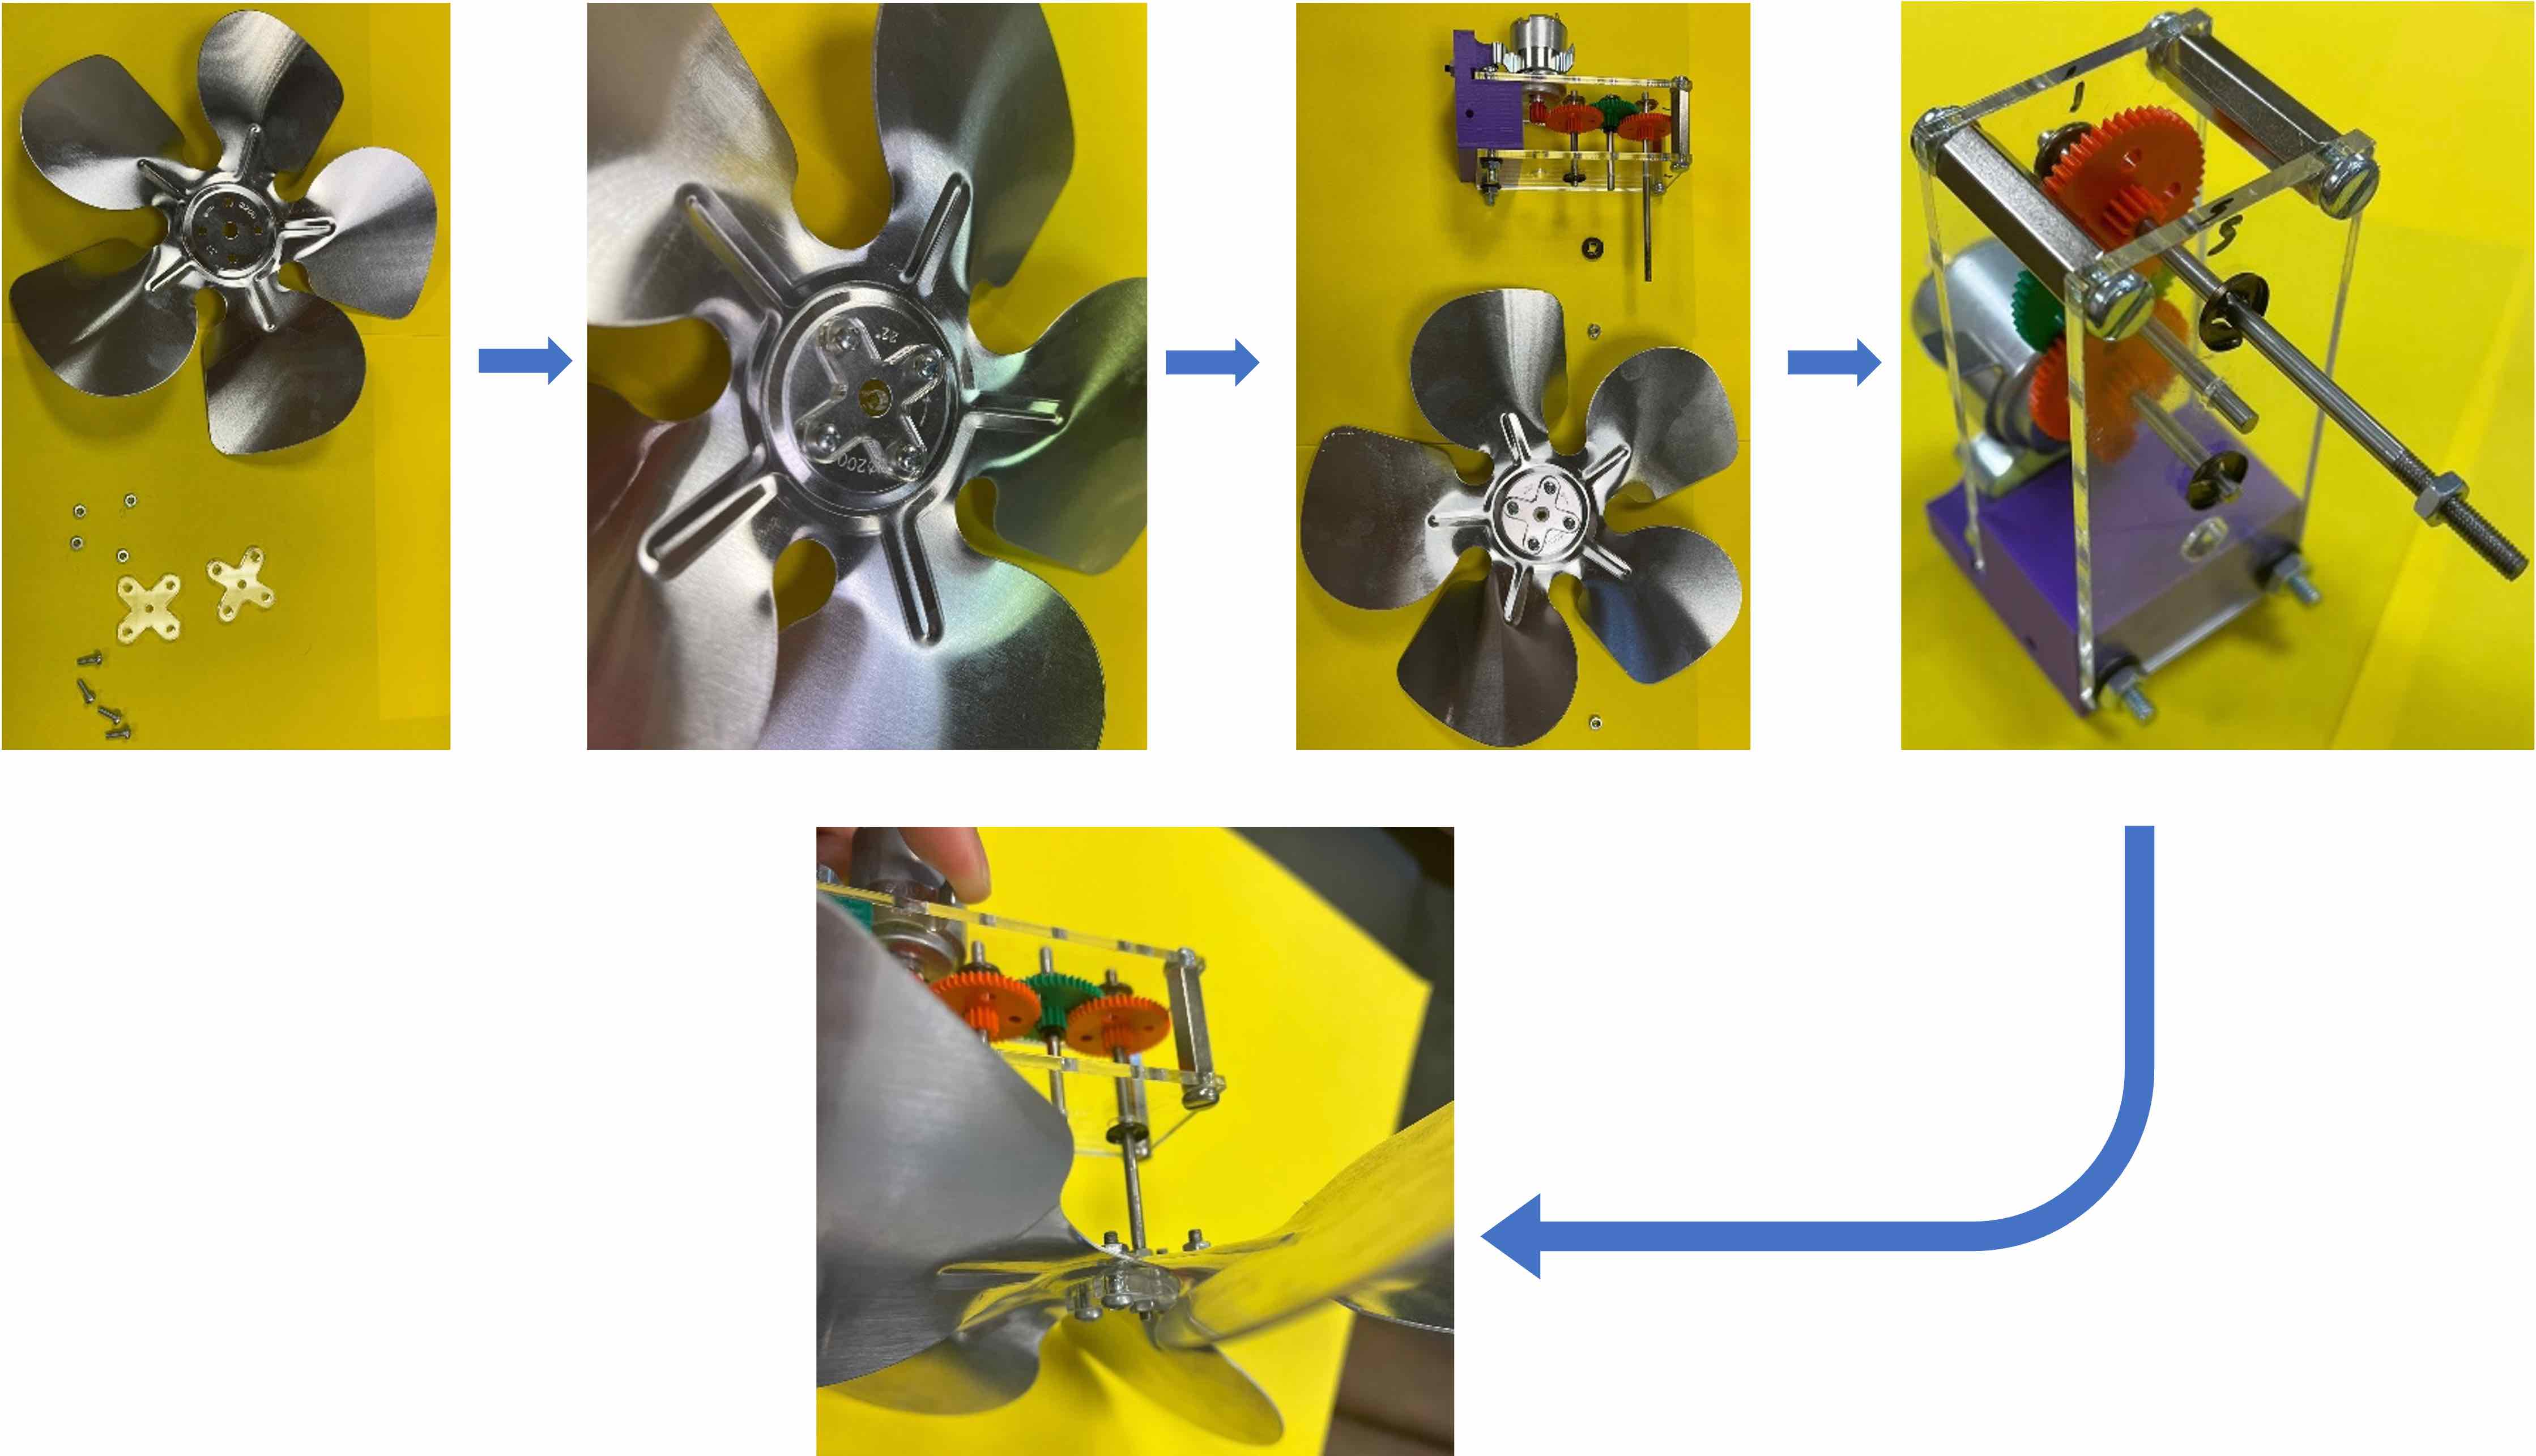
Step 3: Assembly
A quick step-by-step guide on how to construct the wind turbine.
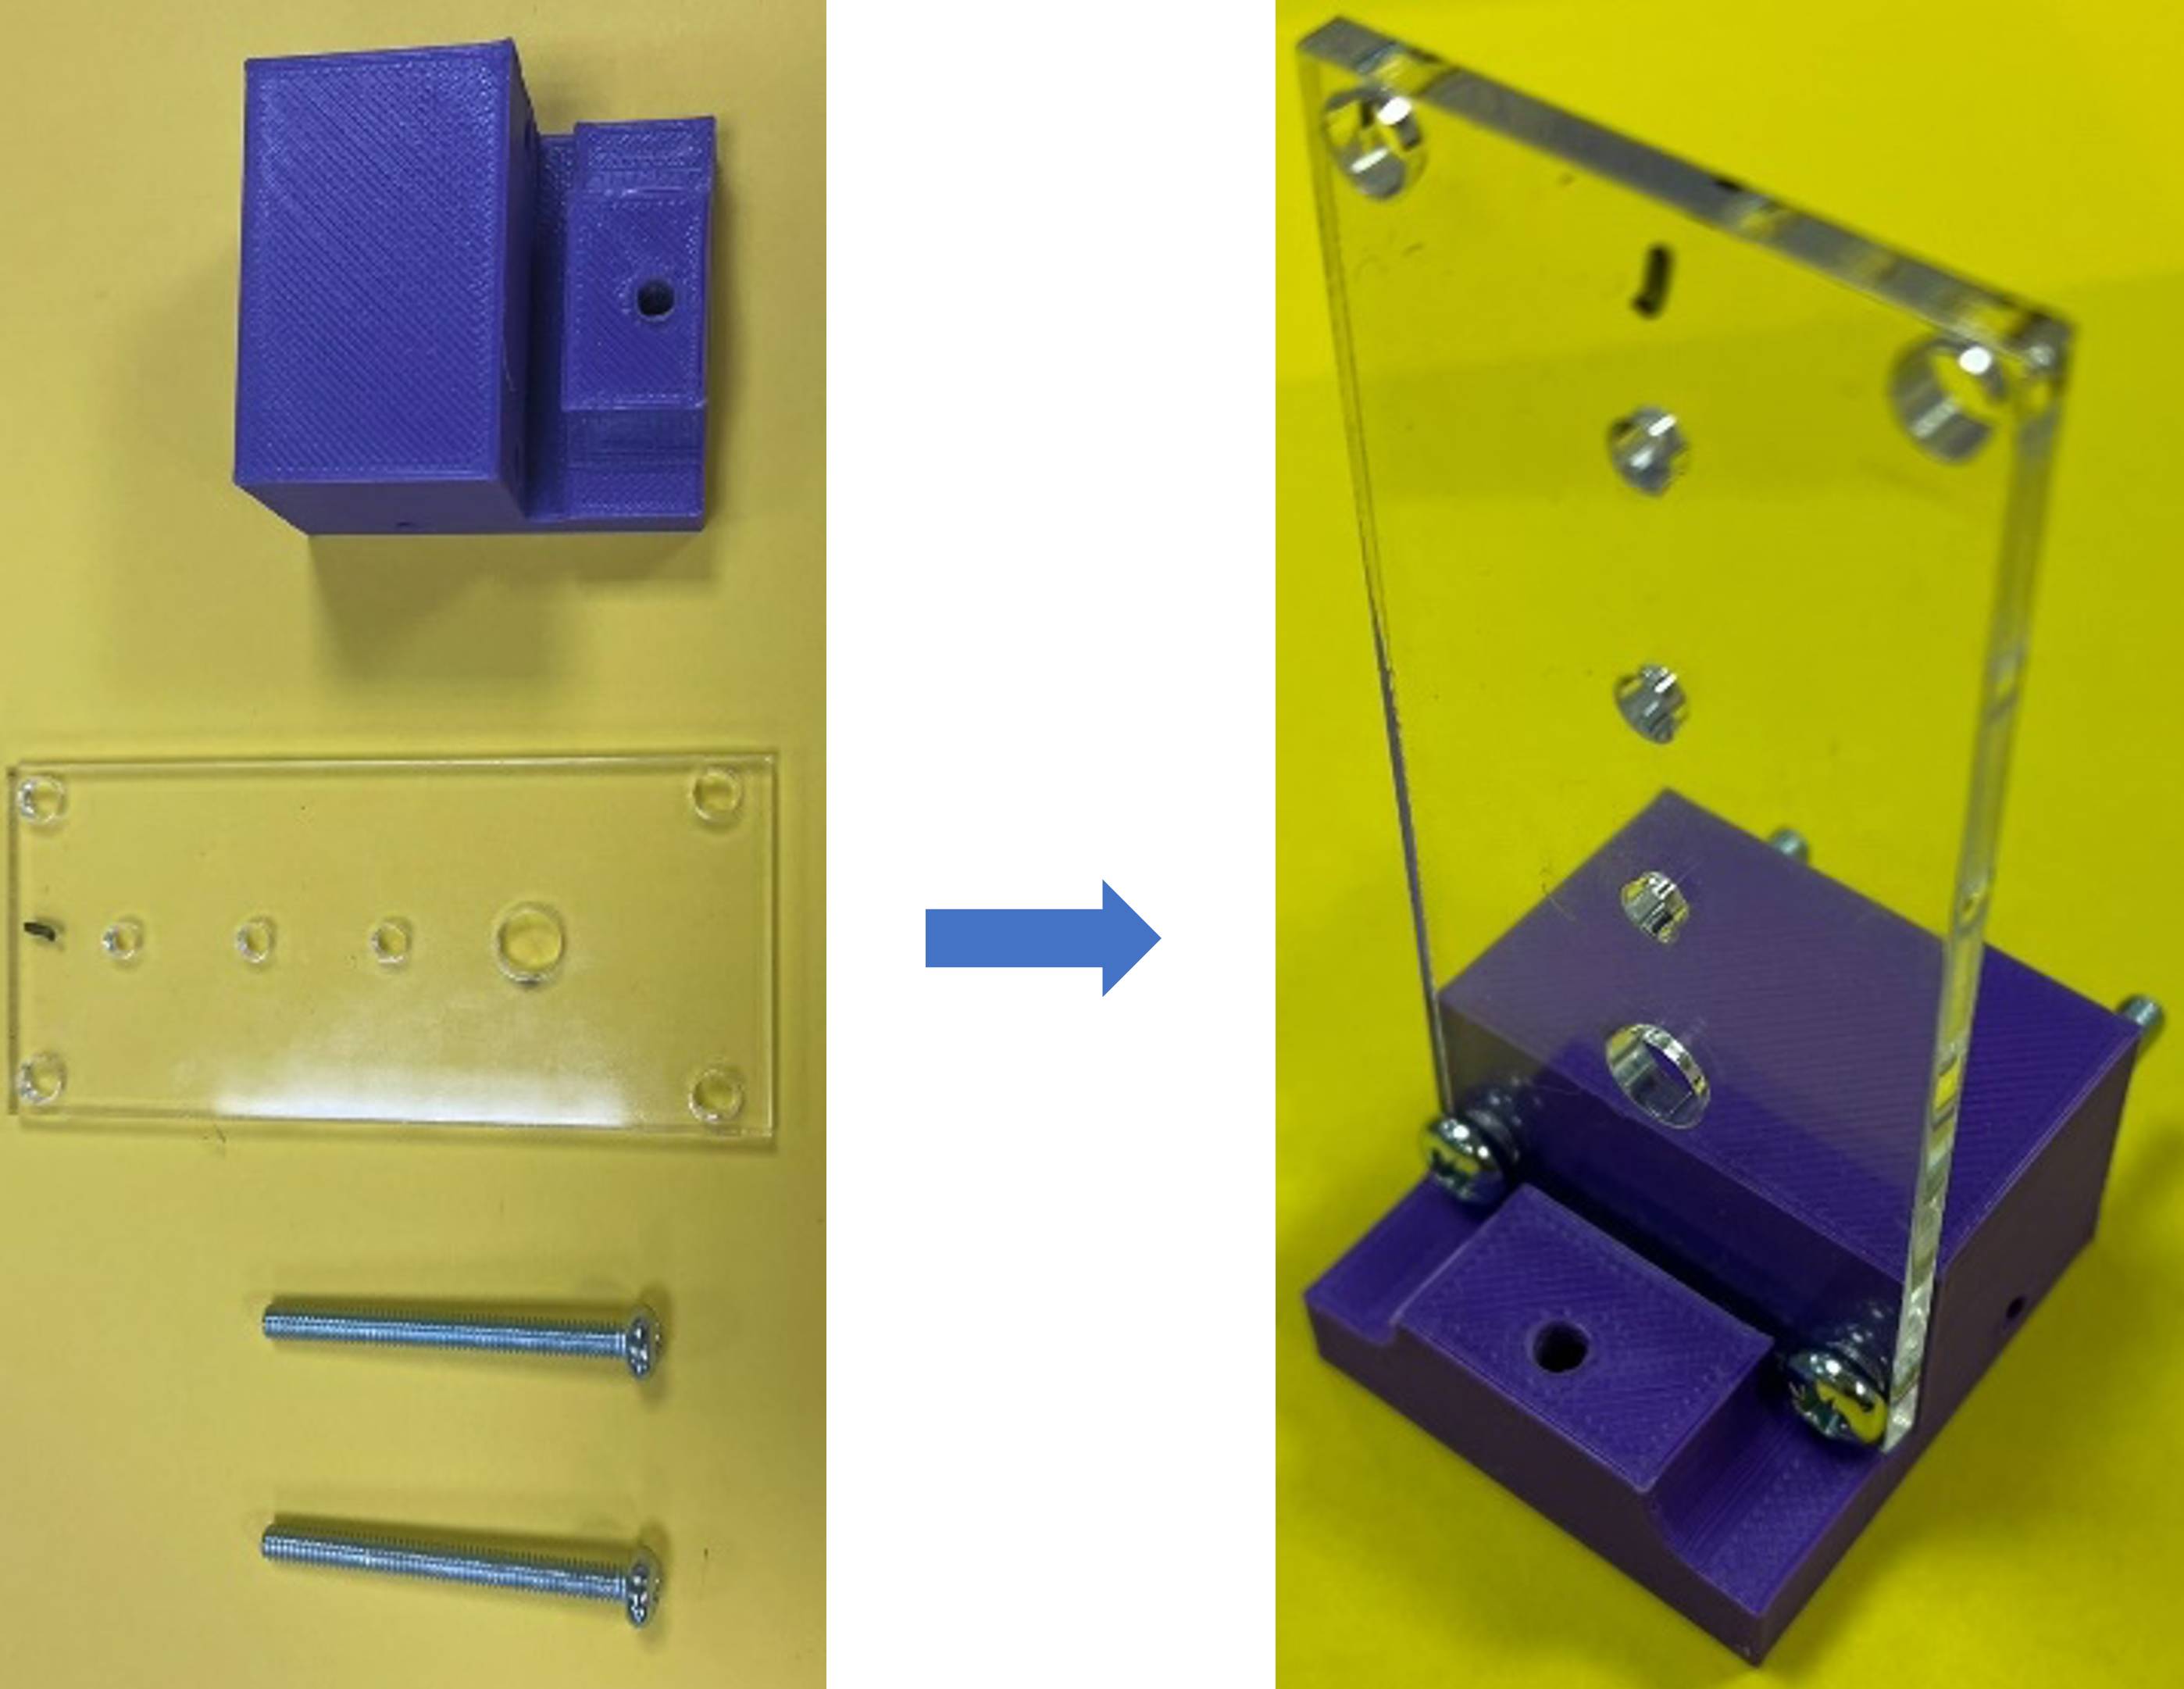
Base
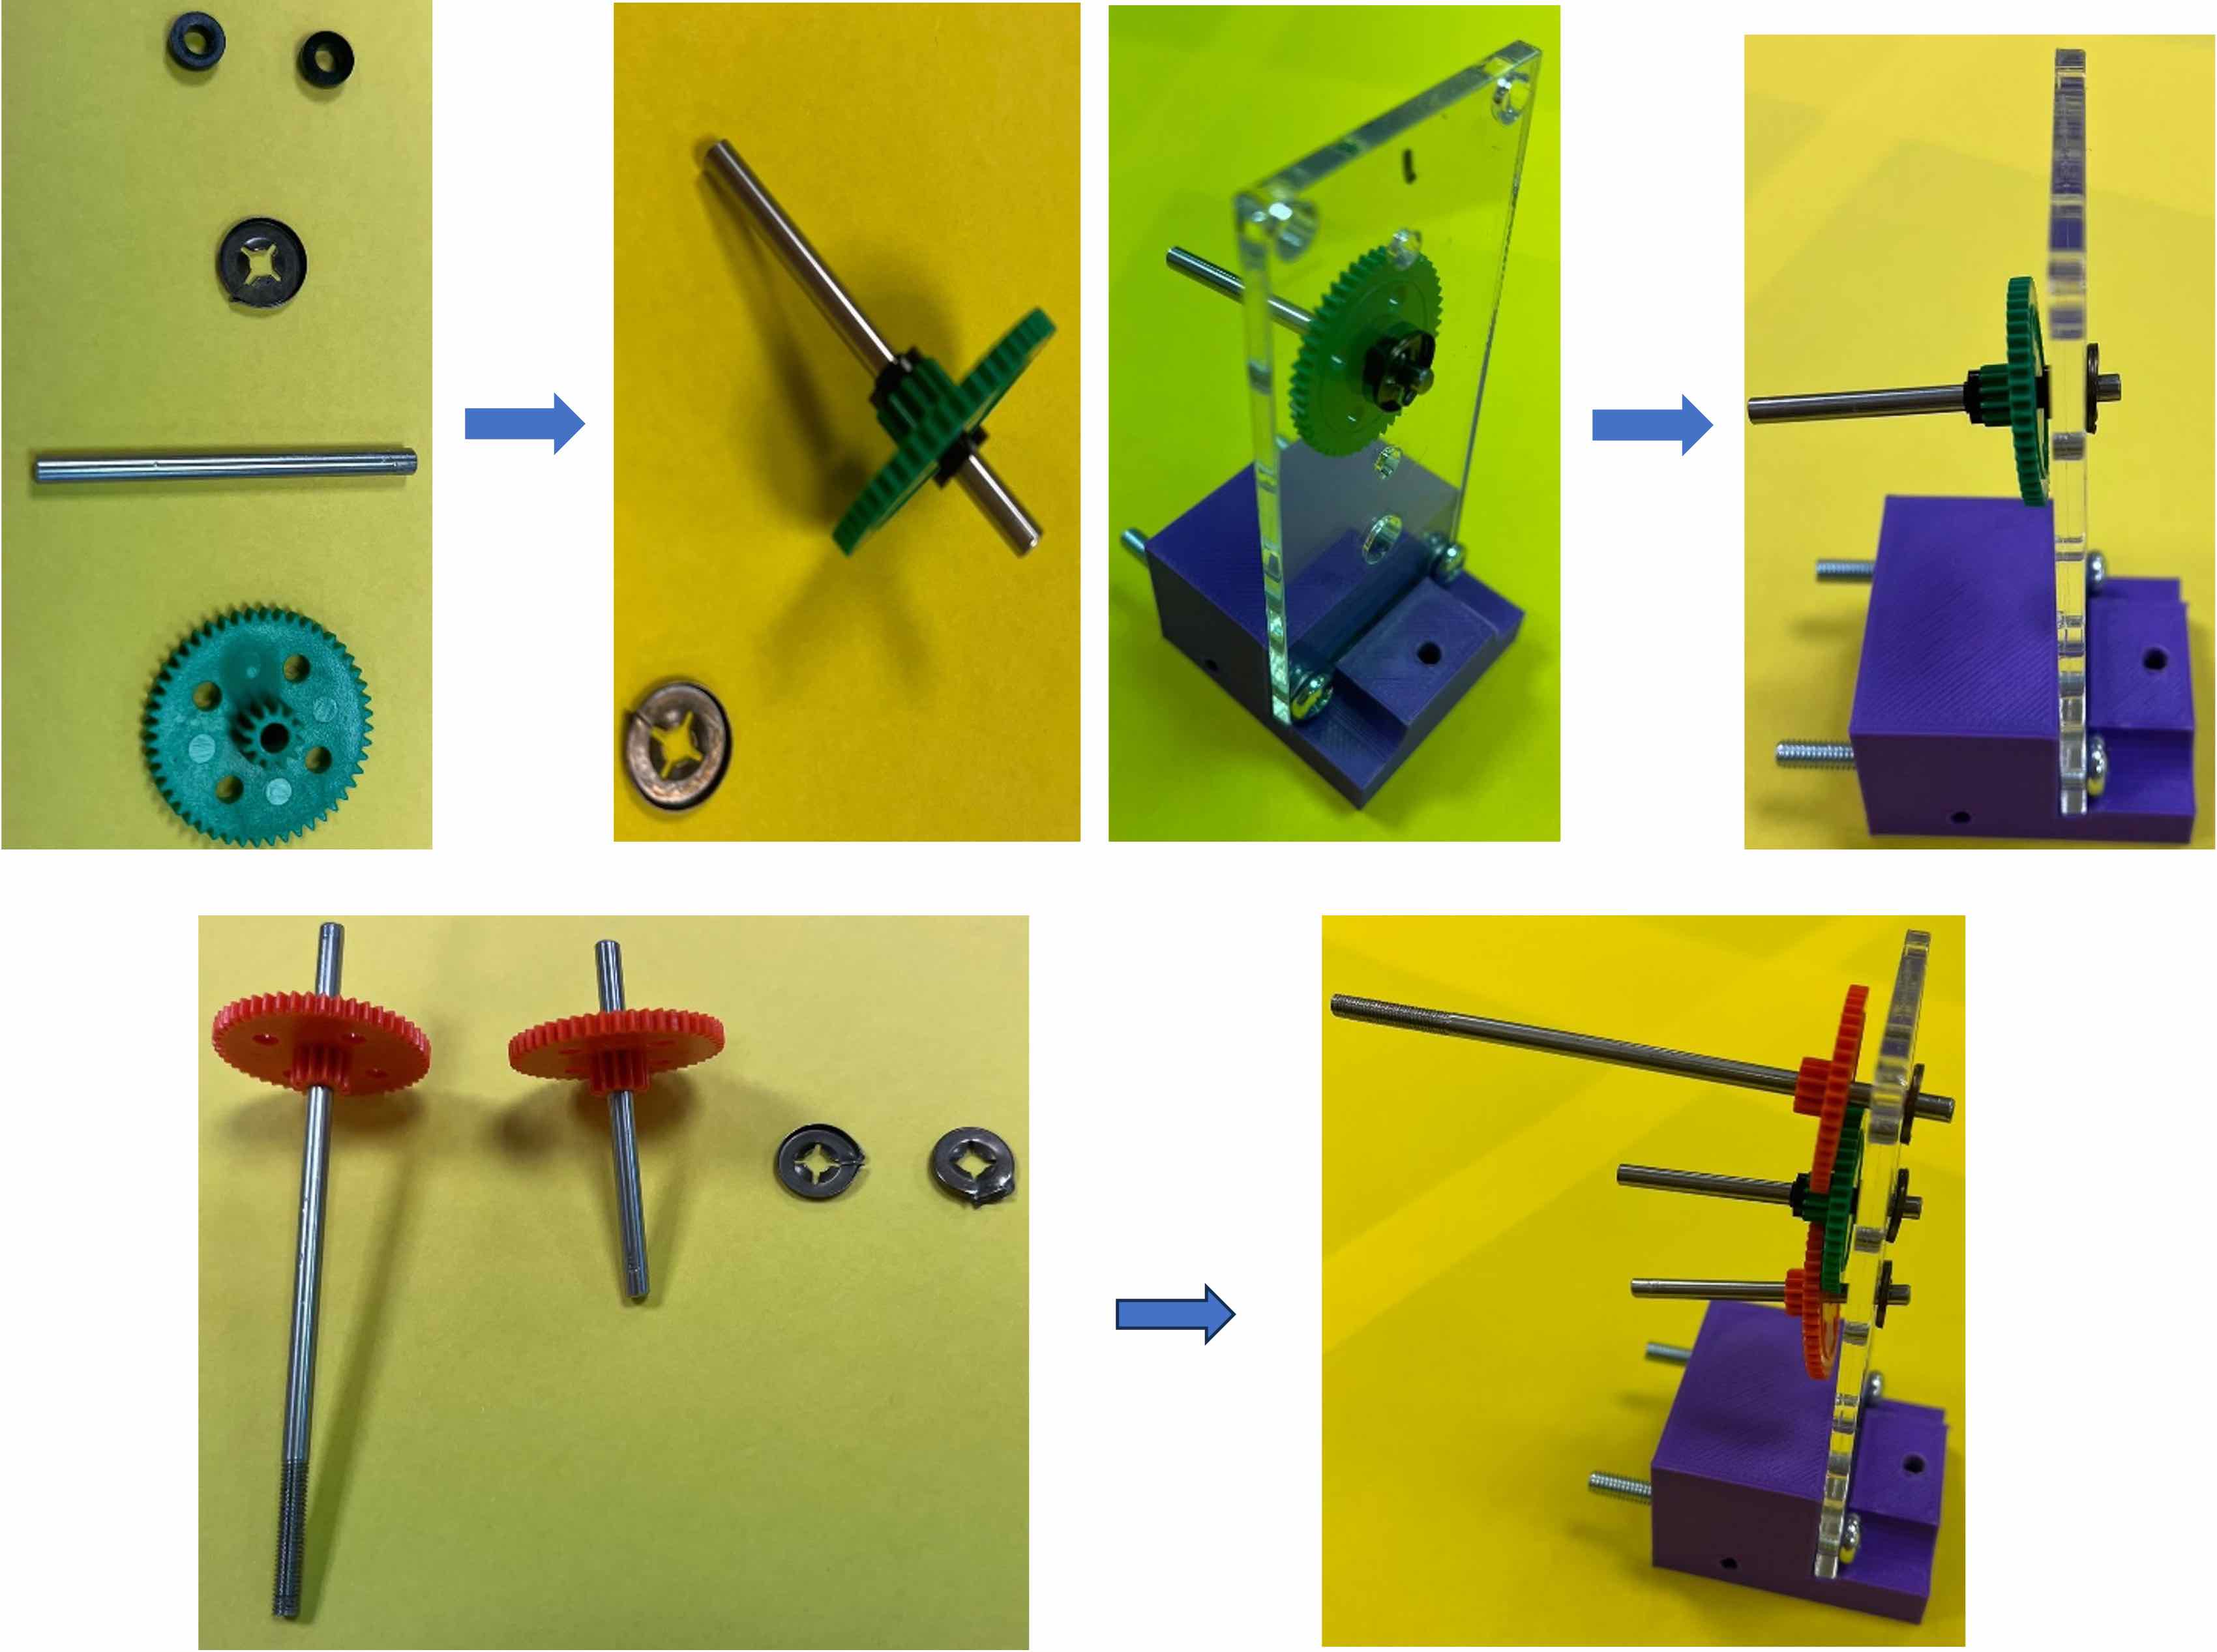
Gears
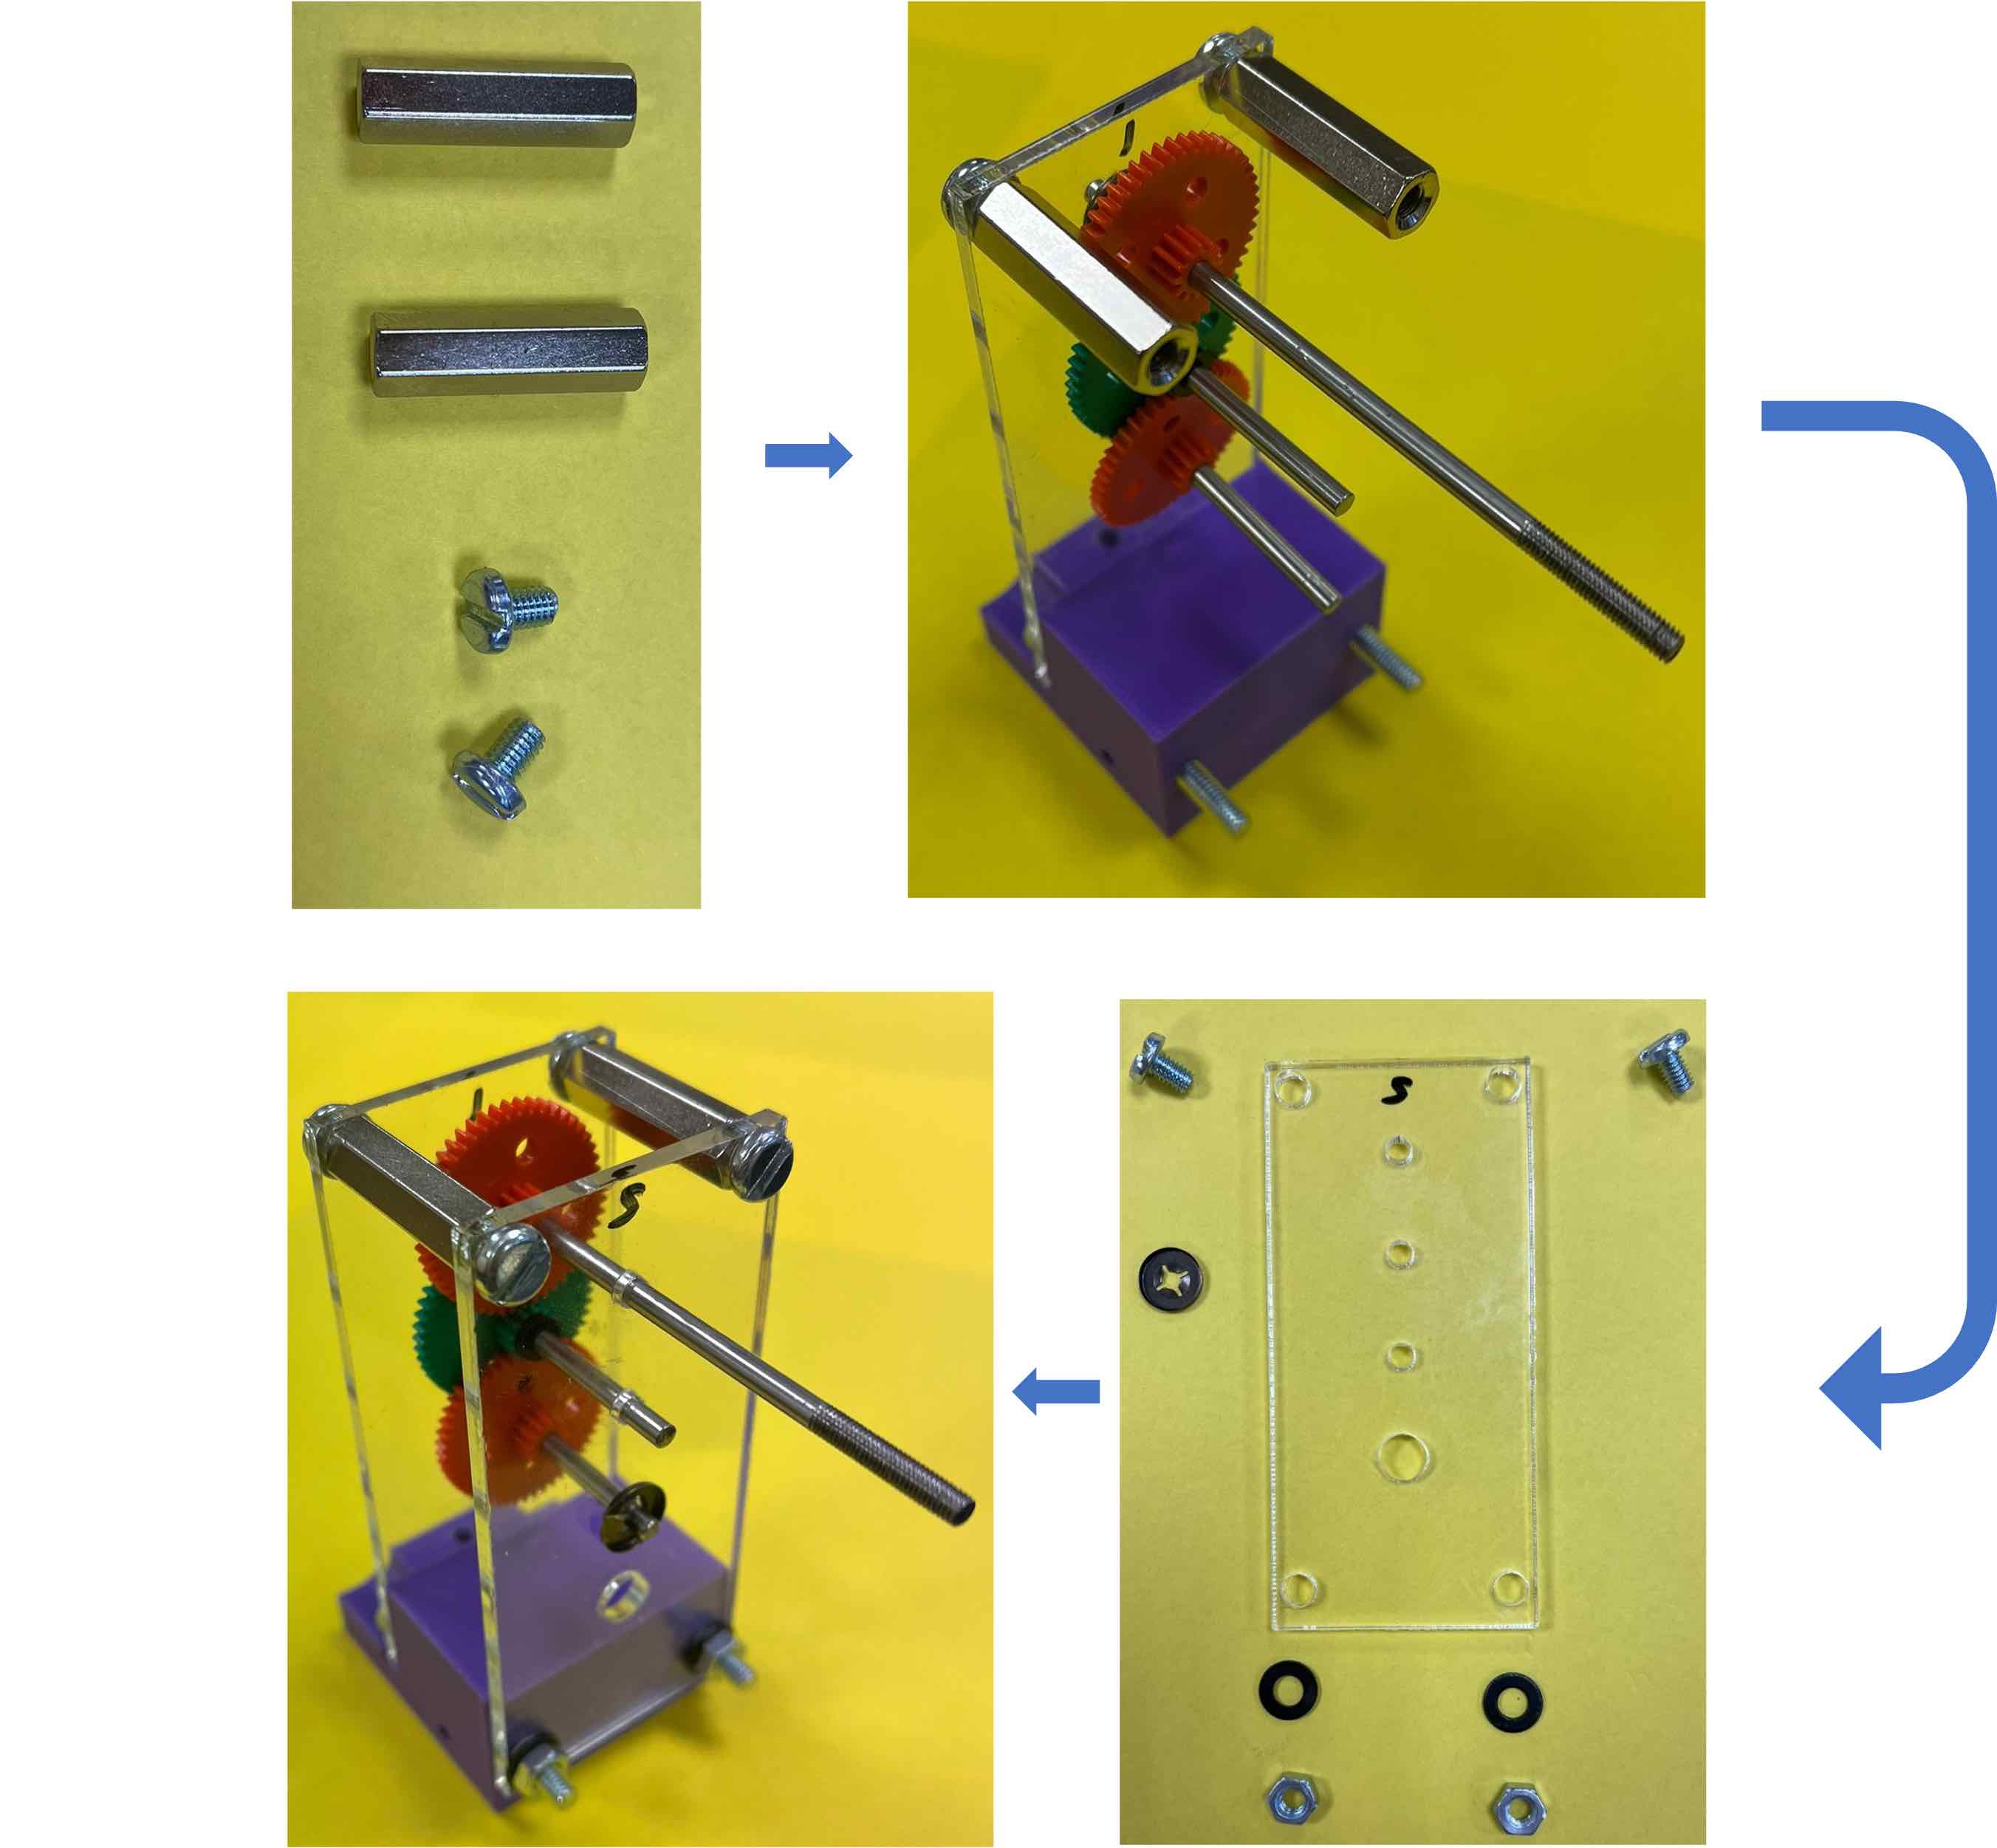
Motor and Motor Housing
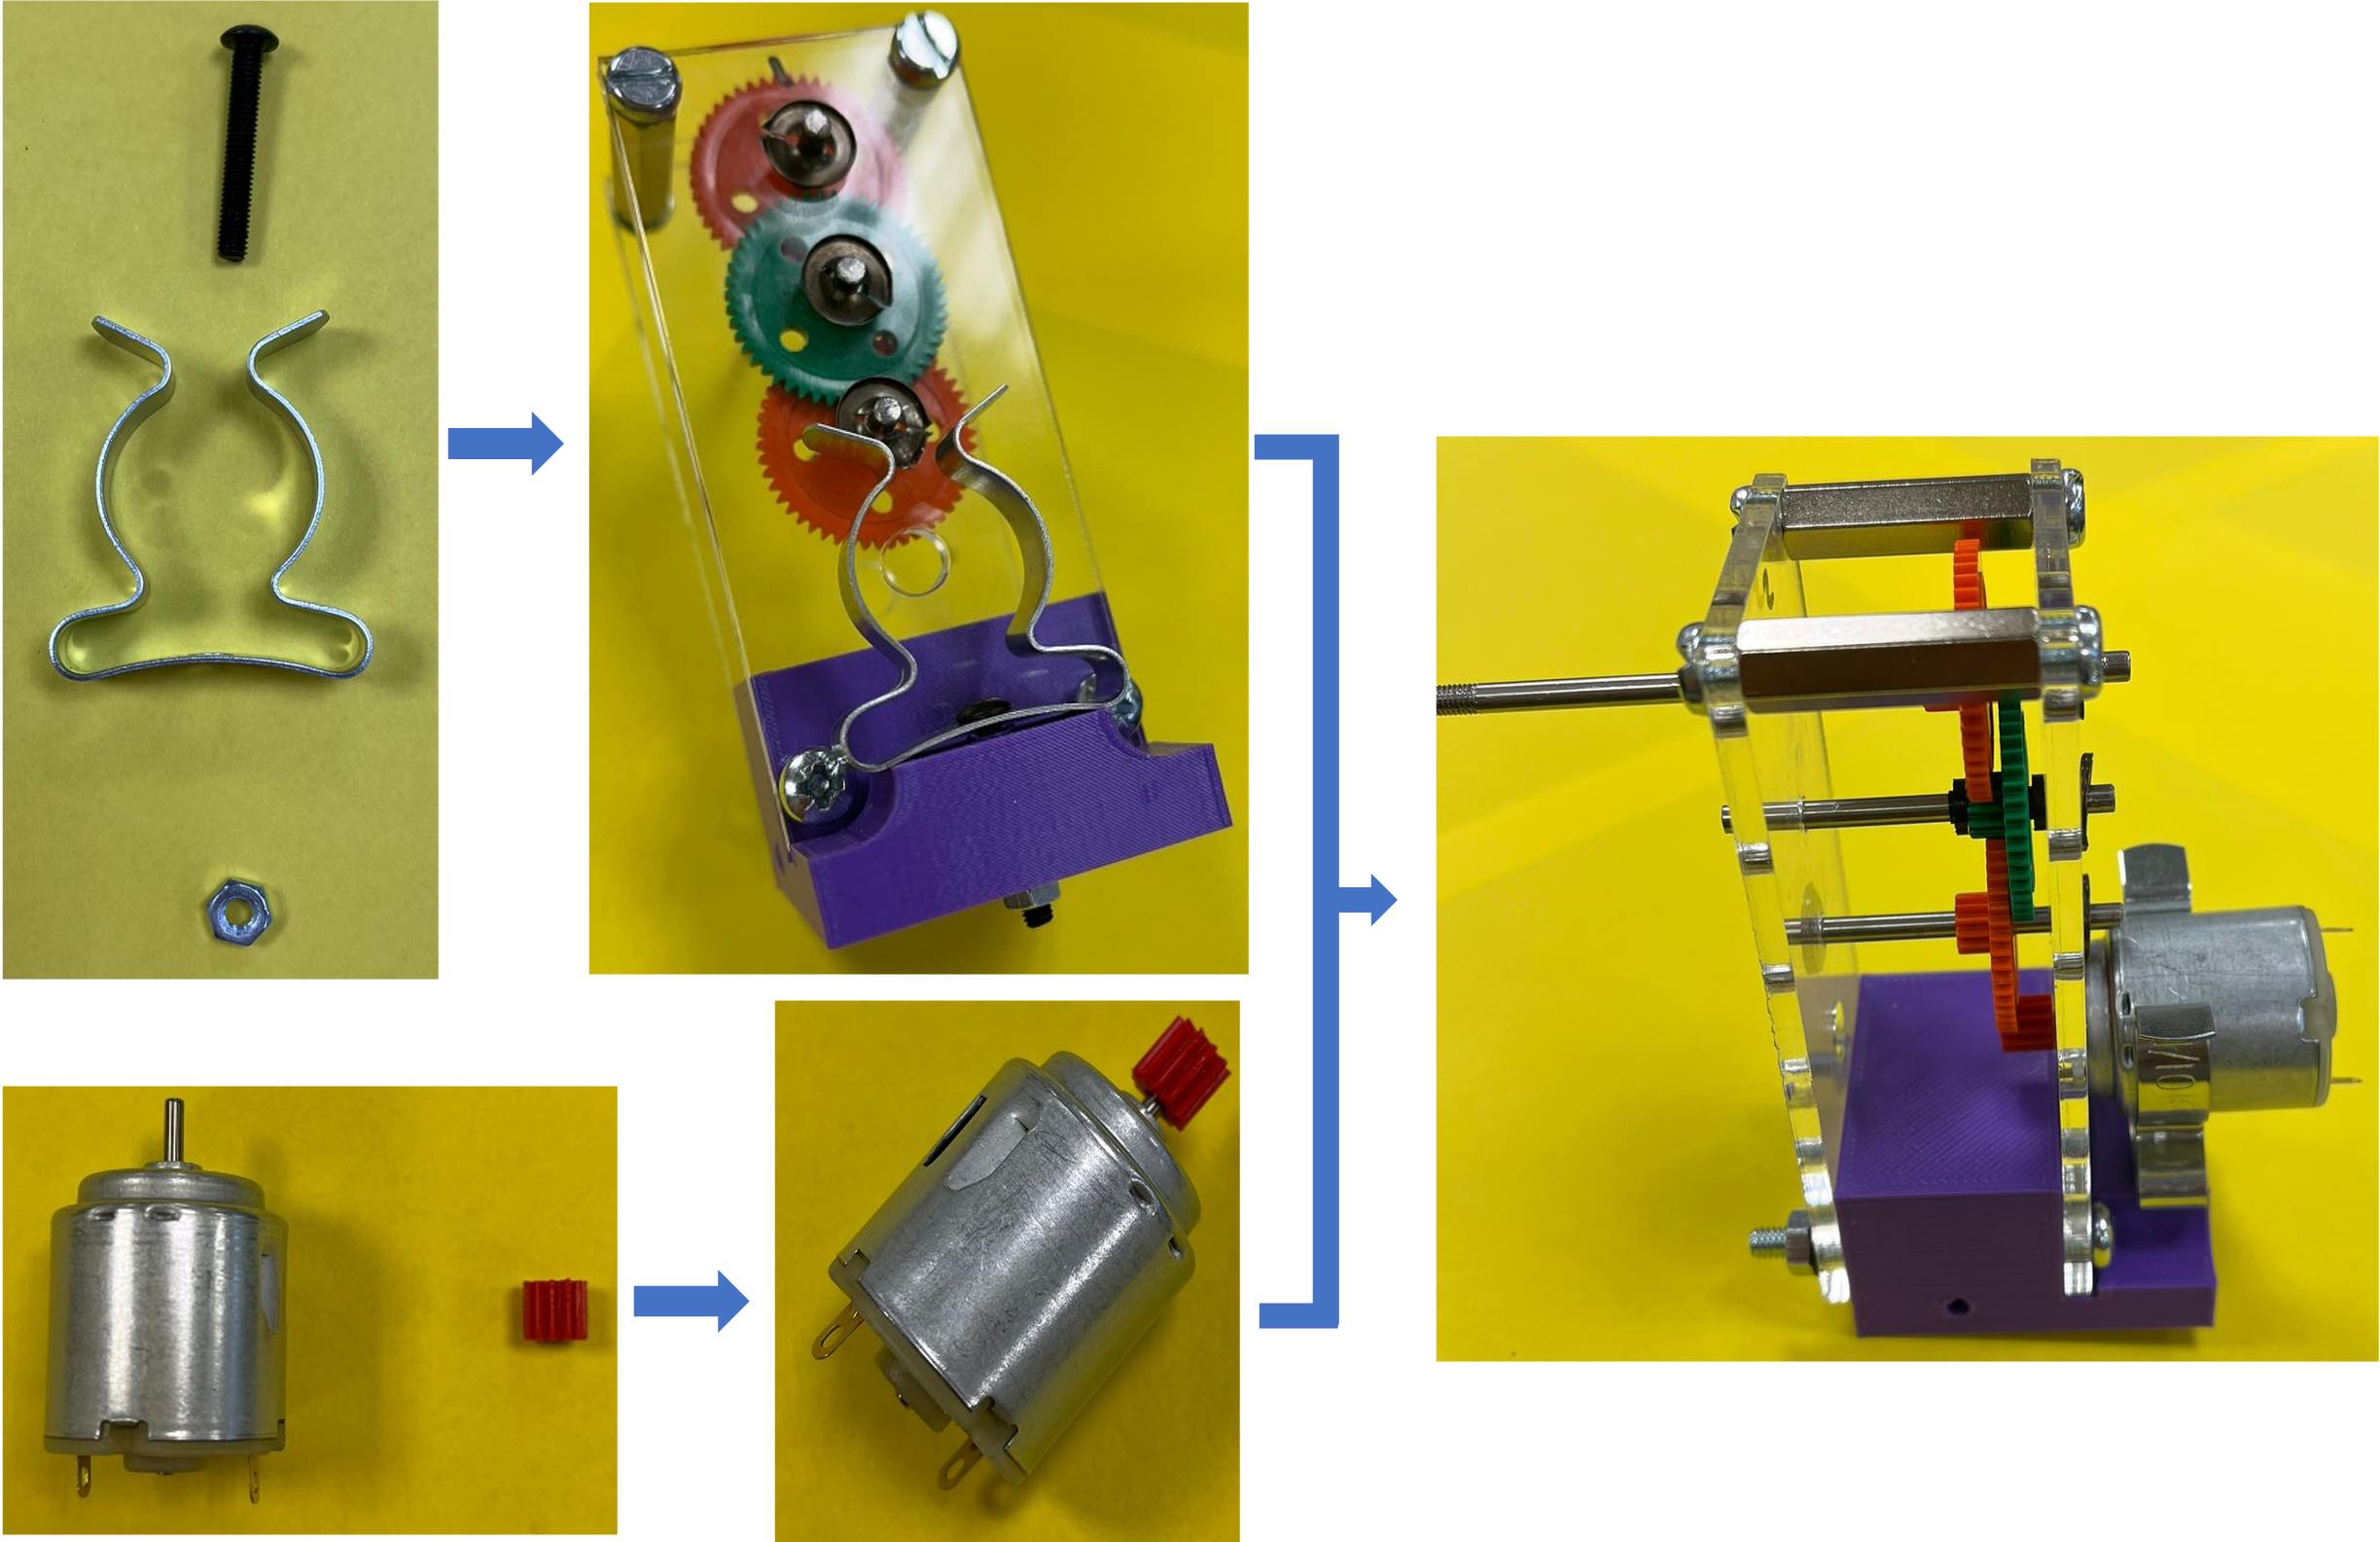
Turbine Blades
Step 4: Building the Electronic Circuit
The signal outputting the generator is a DC signal. The signal is just rectified and looks like the image below:
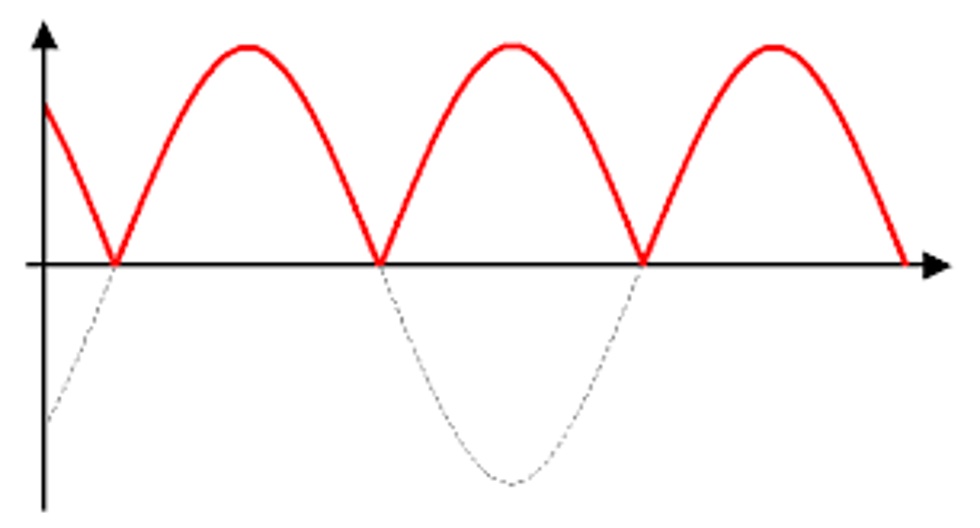
Because the signal is periodically reaching 0, the average power or energy harvesting is not great.
To increase the average amplitude of this signal you can smooth it. Smoothing in this case means that the drops to zero are removed in the signal and to keep a constant signal that is at the level of the maximum amplitude.
To smooth a rectified signal is simple, you just need one component: a capacitor placed in parallel to the load.
The capacitor will charge and discharge consecutively, creating an almost continuous signal, as shown below:
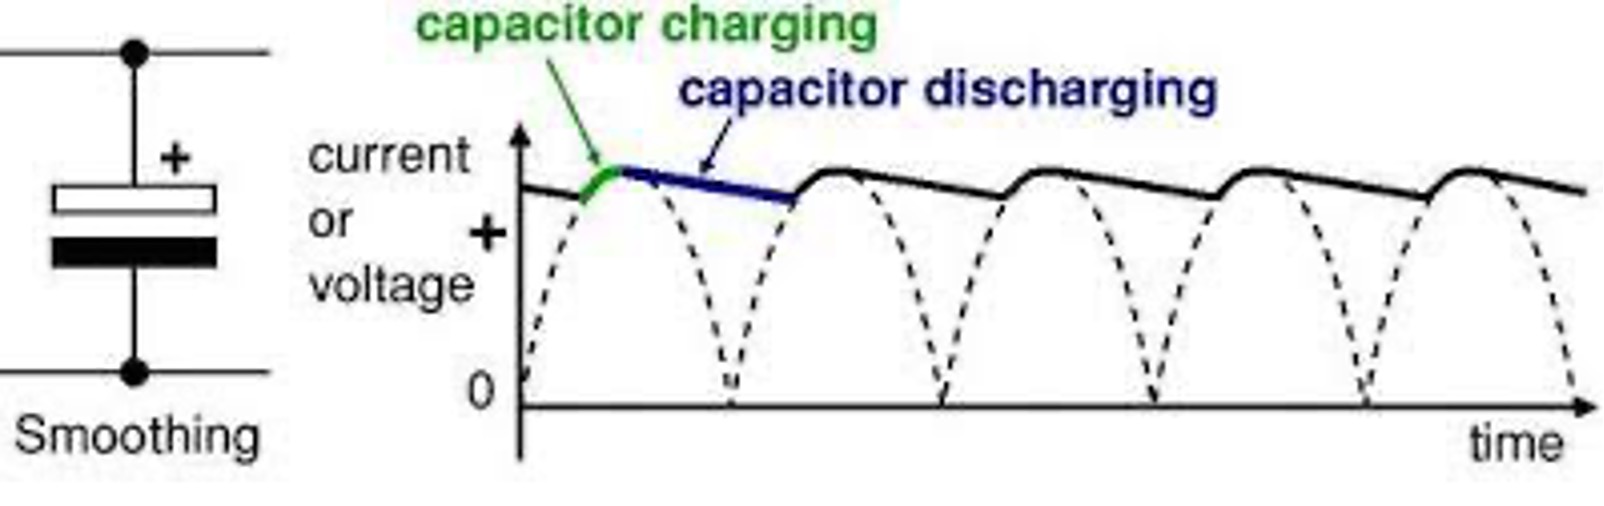
In your kit, you have been given 3 different capacitors with different values. You should test which capacitor is the best for the expected outcome.
Step 5: Connecting the wind turbine to the circuit
To connect the wind turbine to the electronic circuit, you need first to connect the generator to the cable in the wind tunnel.
Two crocodile clips are mounted on a cable. Plug these crocodile clips to the two pins of the generator.
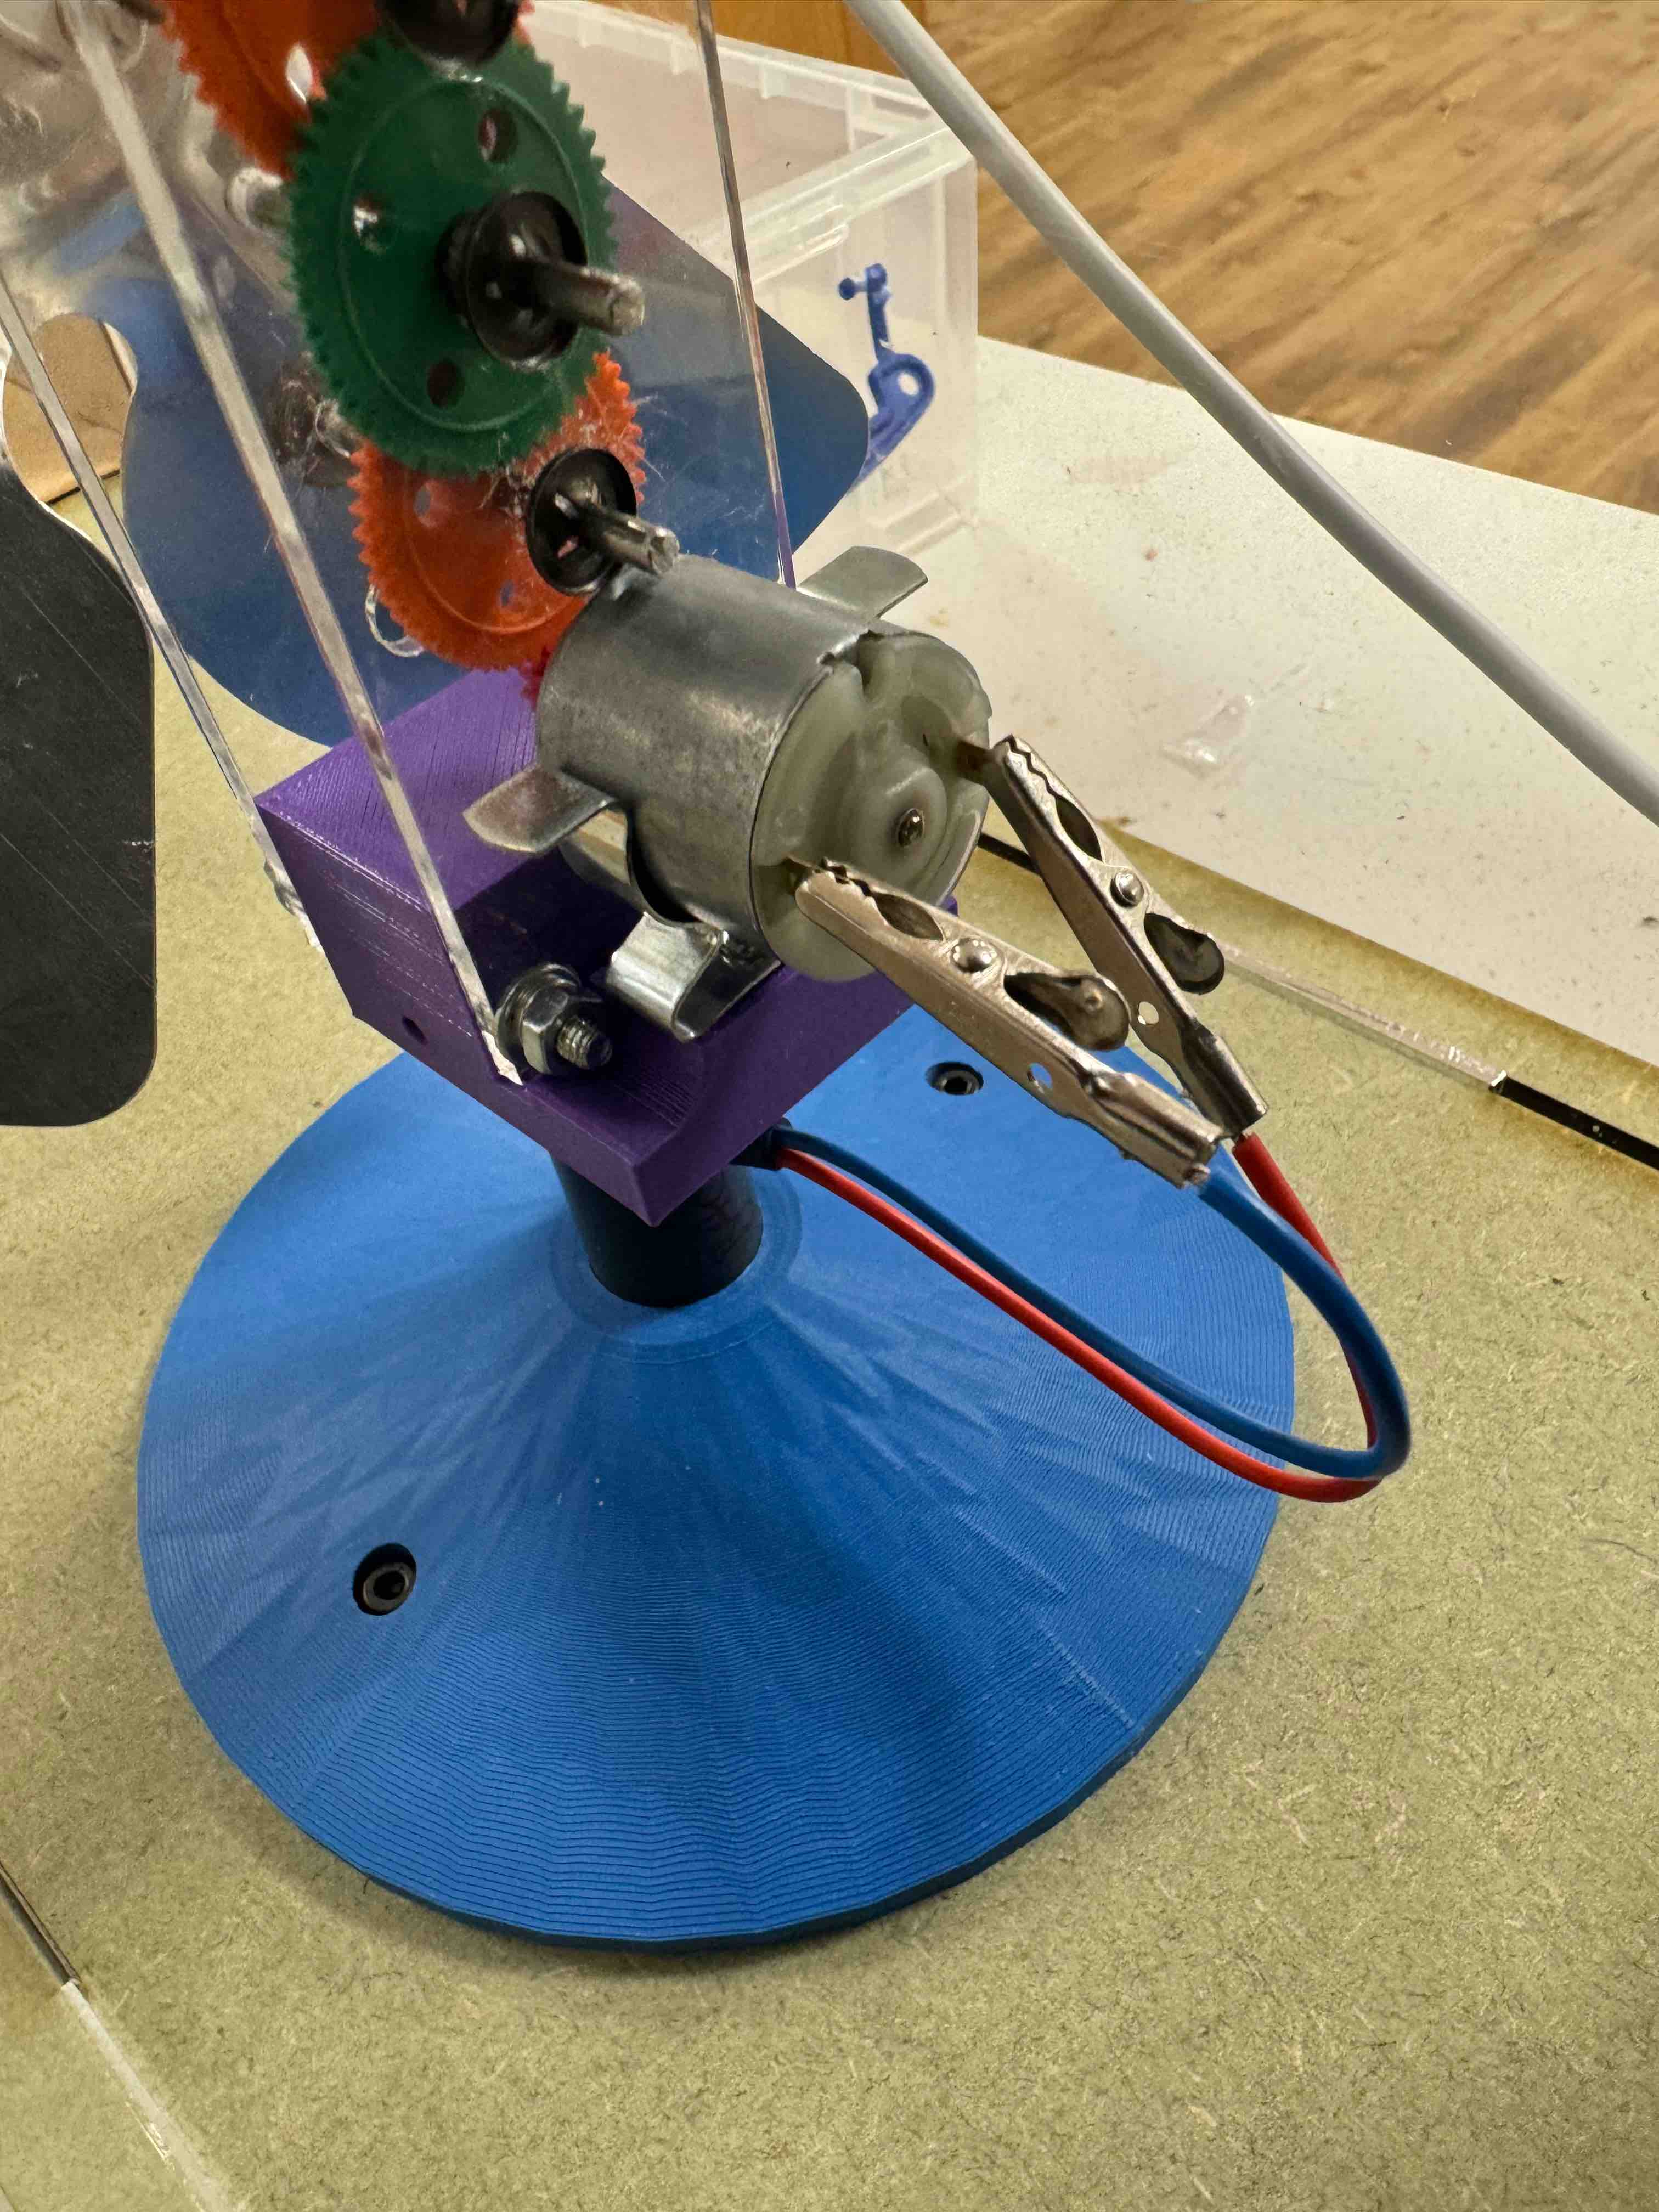
The other side of this cable should be connected to your breadboard where you have your load and the capacitor.
You will use the breadboard to measure with the oscilloscope.