Text only

skip   University | BUCS/MIS  | Registry | SAMIS  

-
Sulis head logo SAMIS - Student and Applicant Management Information System - Link to SAMIS index and log-in page University of Bath logo - link to University home page
 

RT for Admissions: User Guide

The Really Basic Guide
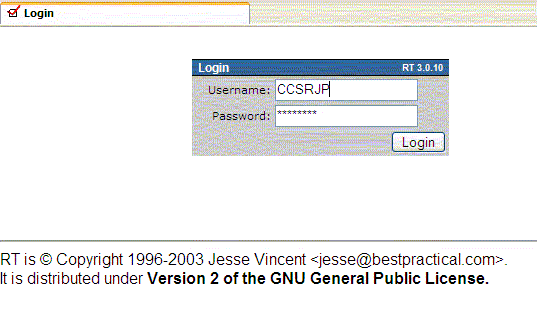
1. Process Summary
2. The Web Form
3. RT Basics
4. Dealing with RT tickets
5. RTFM
6. Old Admissions emails
7. How the requestor interacts with RT

Searching in RT

-

RT Basic Guide - read this first

This page outlines the basics of RT and shows how to answer a ticket.

For a fuller guide, see the section: Dealing with tickets - this includes alternative ways to perform the actions outlined below.

Access RT

On campus : open Internet Explorer (or other browser)

Type RT in the address bar and press 'enter' on the keyboard

Or: click this link: http://rt/

(you may wish to save this address as a 'Favorite' (click Favorites-Add to Favorites.. in IE)

Off campus: type this url in your browser, or click the link:

https://rt.bath.ac.uk

You will be presented with a page like this:

The RT Login Screen

Put your Bath Username in the username field
Put your Bath password in the password field
Click the 'Login' button

You are now in RT

Your RT home page:

You will see a page labelled with a white heading 'RT at a Glance'.

At the top of the screen there is a button labelled 'New ticket in' which allows you to create a new ticket in a Q selected from the adjacent drop down list.

To the right of this button is a text box and a button labelled 'Search'. If you know the number of a ticket you wish to view, you can put the ticket number in this box, click the search button, and details of the specified ticket will be retrieved.

On the left hand side is a series of links.

To the right of this, in the middle of the screen, is a list of the highest priority tickets you Own and Created.

On the right hand side is a list of the Queues to which you are a 'watcher'. Each Queue has real people associated with it who are able to answer the ticket. These people are called queue watchers. Typically for Admissions between 3 and 6 people are associated with any Queue.

Next to each Queue name are the number of 'Open' and 'New' tickets. If the number of 'new' tickets is greater than 0 (zero) that means there are new tickets that need dealing with.

'New' and 'open' tickets might be considered as 'live'. The difference between 'New' and 'Open' tickets is important. A newly created ticket that has had no action taken on it by anybody will remain as 'New'. Once someone has actioned the ticket - taken it, been given it, commented on it or replied to it - it becomes 'Open'. Therefore all 'New' tickets require action.

(When a ticket has been successfully answered, it becomes 'resolved'. For more on the status of RT tickets, click here >>)

View tickets and take action:

To view tickets for one of your Queues, click on the Queue name on the right hand side of the screen. You will know see all New and Open tickets for the Queue. The screen lists ticket name, subject, requestor and then a number of other properties on which you can sort the list - status, created (date), queue name, owner, last updated.

All 'new' tickets require action.

To action a ticket, click on it.

Resolve, Reply to or Comment upon the ticket, by clicking the appropriate link. Any of these actions will make you the owner.

If you have a solution to the question, 'Resolve' it. The ticket will be closed and will no longer appear in the default lists for that Queue.

Replying to a ticket or adding comments will cause the ticket to remain Open.

Everything you do is recorded in the ticket history which is always viewable.

The ticket screen:

You will see various blocks of information - The Basics, People, Dates, Relationships and ore about [the requestor]. These blocks mirror links on the left hand side. Click on the title eg the words 'The Basics' for more details.

'The Basics' and 'People' are most likely to be useful. Clicking on 'The Basics' allows you to change the Queue that the ticket is in, or silently resolve the ticket.

Clicking on 'People' takes you to a screen that allows you to set the owner of the ticket to someone else who belongs to the same queue.

Beneath these blocks is the history of the ticket. Every action related to the ticket is recorded and viewable here. Any text you write in replies or resolutions to questions is recorded. The first action is at the top, the latest action at the bottom.

There are links at the top of the screen, and at each transaction in the ticket history to [Reply] [Resolve] [Comment] [Copy]. These are the key links that you will use all the time when dealing with tickets.

The basic actions you will be undertaking in RT

1. To Reply to a ticket - when you need to correspond with the requestor but are not yet ready to close the ticket (maybe you need more information form the requestor):

With the ticket details displayed on the screen, click one of the 'Reply' links.

Add your message in the text box and hit the 'Submit' button.

The details of the ticket will be displayed again. Notice that you reply has been added to the ticket history. The requestor receives an email with the text of your reply.

More about replying

2. To Resolve to a ticket - when you are happy that you have the solution to the request

With the ticket details displayed on the screen, click one of the 'Resolve' links.

Add your message in the text box and hit the 'Submit' button.

The details of the ticket will be displayed again. Notice that the text of your resolution has been added to the ticket history, and the status has changed to 'Resolved'. The requestor receives an email with the text of your resolution.

You may wish to use a standard response in A Reply or Resolve - how to add a standard response >>

More about resolving tickets

3. Add a comment to a ticket - this will add a comment to the ticket history without informing the requestor. Useful if you wish to make a 'note' about the ticket for future reference.

With the ticket details displayed on the screen, click one of the 'Comment' links.

Add your comments in the text box and click 'Submit'.

The comments are added to the ticket history.


4. Move the ticket to another queue.

You think the ticket would be best answered by people in another Queue.

On the ticket details screen, click the Basics link, either form the left hand menu, or from the top left of the screen where the words 'The Basics' are displayed against a red-brown background.

You will go to a screen entitled : Modify ticket #xxxxx

From the drop down box labelled Queue: select the Queue to which you want to move the ticket. Click the 'Save Changes' button.

-

1. Summary of process

The web form is designed so that queries are filtered into appropriate RT Queues.

Applicant enters question on Ask Admissions web form, having selected a broad subject area that the question relates to from a list of options - Prospectus Request, Open Days, Fees, Status of a submitted application etc.

After submitting a query, the applicant receives an email confirming that their query has been received and specifying the ticket number.

A ticket is created within RT, in a queue corresponding to the subject area of the question.

Relevant admissions personnel will check RT via the web interface on a regular basis. Admissions personnel can check for new tickets in Queues to which they have access by checking the 'New' column in RT.

A member of the Queue will take ownership of the ticket by replying to or resolving that ticket. The first person to access a 'new' ticket becomes the 'owner'.

The owner of the ticket can then correspond with the requestor by using the 'Reply' option in RT, can add comments using the 'Comments' option, or can resolve the ticket immediately.

When the ticket has been Resolved, it no longer appears in the list of current tickets for the Queue, but it can be accessed via the search screen.

Tickets can be 'bounced' to another Queue if it is felt appropriate.

Tickets can be 'bounced' to another member of the same Queue.

Every action pertaining to the ticket is recorded and can be viewed. Every action is stored in a database and will not be deleted, providing a detailed audit trail for every ticket.

-

2. The Web Form Top of page

[Is this section necessary??]

There will be one web form that will be accessible from all Admissions web pages.

The web form will list the main areas of enquiry and prompt the user to select the subject area appropriate to their enquiry via a radio button.

The form is designed so that if the applicant clicks a top-level category e.g. fees or International Information, then another group of radio buttons appears asking the applicant to specify the area of their enquiry.

The image below shows radio buttons for the top level categories. At this point, no category has been clicked.

Rt Admissions Form - nothing clicked at this stage

If the applicant then clicked Fees, the International Information questions would be hidden and Fees related button would be displayed:

Rt Admissions Form - Fees button clicked


After selecting the area that their question most closely relates to, the applicant must then enter a valid email address for correspondence and add the text of their enquiry in free form text box:

RT for Admissions - The Subject field

The form is validated to ensure that the Applicant provides all the information we require: a valid category and sub-category, an email address and the text of their query.

On hitting a ‘Submit’ button, the subject and the text of the enquiry will feed directly into the RT system. The specific question will be filtered into the relevant RT queue based on the option selected.

A page is output onto the users web browser thanking them for their enquiry.

-

3. RT Basics Top of page

3.1 Accessing RT

Point your browser to: http://rt.bath.ac.uk. From on campus you can just go to rt.

From off campus you have to connect securely. Connect to https://rt.bath.ac.uk

In all cases login using your usual username and password. An initial screen is presented which will display the queues you have access to and any tickets you may own or have requested.

3.2 Navigating the Screens

Browse queues via the Quick Search menu on the right. If you know a ticket number access it directly via the Search box in the top right hand corner. Keyword searches in this search box are restricted to new or open tickets currently on the system. More detailed searches can be performed via the main search box.

Left hand navigation caters for getting home and ticket manipulation and management.

The home page has the following links on the left hand side:

  • Tickets -> Shows all New and Open tickets for last Queue accessed
  • Configuration -> Details about Queues and Groups (privileged users only)
  • Preferences -> Customise RT, add a signature, amend personal details
  • Approval -> Not used

Clicking on any ticket will cause the Ticket menu to expand and will show the main ticket menu options of:

  • Display -> The default screen for a specific ticket
  • History -> Removes ticket meta data - just show the history
  • Basics -> Change ticket status, priorities and queues
  • Dates -> Modify dates for the ticket.
  • People -> Change owner, requestor, add and remove people from ticket tracking and monitoring
  • Links -> Manages ticket relationships - merges, dependencies, referrals etc.
  • Jumbo -> Concatenation of Basics, Dates, People and Links management screens

It is likely that most users of RT will use the Display option. The Basics and People may also be used. The other options may be used infrequently.

3.3 Finding new tickets

The initial screen lists all the Queues to which you have access. There are two columns, entitled 'New' and 'Open', and a number in each column, indicating how many tickets there are of each type currently in the Queue.

Any newly created tickets will be indicated in the 'New' column. When any action is taken against a new ticket it's status changes to 'Open'.

To view tickets in a particular Queue, click the Queue name on the Home page. This will list all 'New' and 'Open' tickets for that Queue. Under the column Status/Created you can see how long ago that tickets were created.

Sort by 'Created' (click on the word Created) to view tickets in date order. The default format for the Created Date is '3 hours ago'. However, this can be changed to display in the format: 'Thus Apr 01 12:10:32' under the Preferences Tab.

3.4 Ticket statuses

All tickets in RT have a status. The most important and widely used statuses are New, open and Resolved.

By default, RT list all New and Open tickets as these are 'live' tickets. To find tickets with other statuses, use the search function.

The list list of statuses is as follows:

New - a newly created ticket. No one owns it and no action has been taken on it.
Open - some action has been taken on the ticket and/or someone owns it. It is a work 'in progress'.
Stalled - The ticket has been put on hold as it cannot presently be resolved. If there is any further correspondence, the ticket will automatically be reopened.
Resolved - the ticket has been successfully resolved.
Rejected - the ticket has been rejected - maybe it was a duplicate or blank ticket.
Deleted - similar to Rejected

3.5 Auto replies

When a ticket is created, an autoreply is sent to the requestor. This autoreply informs the requestor that their enquiry has been received and includes the ticket number.

The autoreply can be customised on a Queue by Queue basis, allowing relevant information to be sent to the requestor when they submit a query via the web form.

This is the example of the text used in most Admissions Queues:

Dear User,

Thank you for your interest in the University of Bath.
This message has been automatically generated in response to your query, a summary of which appears below.

There is no need to reply to this message. Your query has been
assigned a Reference number of #123456.

Please quote this in the subject line of all future correspondence about this issue.

Bath receives a very large number of enquiries every week, so please bear with us while we work through your questions. Do try to find the information you need on our web site or in our prospectus. Meanwhile, thank you again for contacting us.

Best wishes from admissions@bath.

This is the customised message used for the Queue Overseas Students - Representatives:

Dear User

Thank you for your recent email and interest in the University of Bath. I regret that we are not currently seeking to appoint agents to represent us in your area .

Best wishes

International Office
University of Bath

3.6 Preferences

On the left hand menu, click the Preferences link.

This allows you to configure certain aspects of RT to your own requirements. Of particular importance here are: Signature, Style of dates, Number of tickets displayed on the Home page.

Un ticking the box 'Whether you wish to receive email:' will mean you would not receive any emails generated by RT , for example any correspondence made by the requestor. You may wish to un tick this box if you have the web interface to RT permanently open.

 
-

4. Dealing with tickets Top of page

This section deals with all possible situations when dealing with tickets.

Note: RT allows considerable flexibility in dealing with tickets, and most actions can be accomplished in more than one way. All options within RT present you with a screen on which various defaults are set, but it is always possible to change these defaults on a ticket by ticket basis.

4.1 Access a ticket:

Enter the ticket number into the Search box for direct access.

Browse to it via Quick Search -> <queue name> -> ticket.

4.2 Take ownership of a ticket

Open or view the ticket.
Clicking Take from the top navigation bar will make you the Owner.

Clicking reply, resolve or comment from the top navigation bar and then replying, resolving or commenting will make you the owner.

In short, the first person to action the ticket becomes the owner.

4.3 Change the status of a ticket:

Open or view the ticket.

Click basics -> Choose new status from the Status drop down list. Click Save Changes.

4.4 Resolve a ticket

Open or view the ticket.

Click Resolve from the top navigation bar. Choose your userid from the Owner: drop down list. Enter solution in the Message field. Click Submit. This method will notify the requestor.

4.5 Resolve a ticket and quote from requestor's text

Open or view the ticket. Scroll down to the relevant history section. Click Reply on the top right of the relevant history section. This will quote the contents of that history section in the message field. Choose status of Resolved from Status drop down. Choose your userid from the Owner: drop down. Edit quoted text appropriately and enter solution in the Message field. Click Submit. This method will notify requestor with appropriately quoted text.

4.6 Silently resolve a ticket (no notification to requestor)

This method of resolving tickets is the quickest way of closing tickets and is useful if you do not need to inform the requestor by email.

Open or view the ticket. Click basics -> Choose resolved from the Status drop down list. Click Save Changes

4.7 Use a pre-defined 'Standard Response' as the text of a ticket resolution or reply.

RT uses a system called RTFM to create and store standard responses to Frequently Asked questions.
These are called 'Articles' in RT. An article can be used when replying to or resolving a ticket.

For full details about creating and managing articles, see the section on RTFM.

Click reply or resolve. The procedure for including an article is the same for both functions.

Just above the Box for writing your reply is a drop down box stating 'Select RTFM article'. This drop down contains all articles that you have permission to use.

Select the article you wish to use and click the 'Insert' button. The text of the article will be placed into the text box. Click Submit.

The text of the article will be included in the ticket history.

4.8 Reply to a ticket without resolving it

Reply to a ticket when you require more information from the requestor.

Open or view the ticket. Click Reply from the top navigation bar. Choose your userid from the Owner: drop down list. Enter message in the Message field. Click Submit. The reply will go to the requestor.

Your reply will be added to the ticket history, as will any further correspondence.

4.9 Reply to a ticket without resolving it and quote from requestor's text

This method of replying is useful when you need to quote existing correspondence.

Open or view the ticket. Scroll down to the relevant history section. Click Reply on the top right of the relevant history section. This will quote the contents of that history section in the message field. Choose your userid from the Owner: drop down. Edit quoted text appropriately and enter solution in the Message field. Click Submit. This method will notify requestors with appropriately quoted text.

4.10 Find out if a Requestor has 'replied' to my 'reply'

You will receive an email with the text of the reply made by the requestor. This reply will be recorded in RT in the ticket history.

On your RT home page, the 'Correspondent' column will read requestor when the last action related to the ticket was made by the requestor.

4.10 Comment on a ticket

Commenting on a ticket is useful if you wish to record some information about the ticket, perhaps for future reference, that you do not wish the requestor to see.

Open or view the ticket. Click Comment from the top navigation bar. Choose your userid from the Owner: drop down list. Enter message in the Message field. Click Submit.

The reply will be added to the ticket history. It will NOT go to the requestor.

4.11 Comment on a ticket and quote from requestor's text

Open or view the ticket. Scroll down to the relevant history section. Click Comment on the top right of the relevant history section. This will quote the contents of that history section in the message field. Choose your userid from the Owner: drop down. Edit quoted text appropriately and enter comments in the Message field. Click Submit.

The reply will be added to the ticket history. It will NOT go to the requestor.

4.12 Include an attachment with a reply or resolve

Click reply or resolve. Look for the text box labelled 'Attach'.

Click the Browse button and browse for the file you wish to attach.

To add further files, click the Add More Files button, then Browse for the file. Previously attached files will be listed above.

The attached file will be sent to the requestor as an attachment, and can be viewed in the RT ticket history.

4.13 Bounce a ticket to another queue

You may need to 'bounce' the ticket to another Queue if you feel that another Queue is more appropriate.

Open or view the ticket. Click Basics.From the Queue drop down choose the queue you want to bounce the ticket to. Click Save Changes

4.14 Assign a ticket to someone else

You can assign tickets you own or are unowned to someone else within the same queue.

Open or view the ticket. Click people. Choose the new owner from the Owner drop down.

4.15 Get a ticket back I mistakenly assigned to someone else.

Steal it. You can only steal tickets from people in the same queue. If a ticket is owed by someone else a Steal option will appear in the top navigation bar of the Ticket interface.

4.16 Split a ticket into two

Do this if a ticket actually contains two or more distinct questions, each of which should have it's own ticket.

Click on the ticket you wish to split. In the bottom window click on 'Copy'. This takes you into the 'Copy Ticket' screen. On this screen set the Queue that the new ticket will be created in by selecting from the drop down box. You can change the subject of the new ticket, and remove, amend or add any text in the Message body. If the new ticket does not depend upon the existing one, leave the two check boxes under 'Links' blank.

4.17 Merge two tickets into one

Do this when a call has mistakenly been submitted twice or the root cause of a number of tickets is the same.

Open or view the ticket you want to merge into another. Click Links. In the Merge into: field enter the ticket number you want to merge the ticket into. The ticket history of the merged ticket will record the merge and who implemented it.

4.18 Merge a number of tickets into one
Repeat the above procedure.

4.19 I can't remember which link does what in the ticket management interface.
Click Jumbo - it will concatenate the ticket management screens of Basics, Dates People and Links


-

5. RTFM Top of page

RT uses a system called RTFM to create and store standard responses to Frequently Asked questions.

These are called 'Articles' in RT. An article can be used when replying to or resolving a ticket.

Articles are grouped into 'classes' - a class corresponds to a Queue.

5.1 Creating a new Article

From the left hand menu click the RTFM link:

Click Articles

Click New Article - available 'classes' that you have permission to alter will be displayed.

Click the class in which you wish to create a new article.

Add the Article name, summary and text in the appropriate boxes.

Click Save Changes

5.2 Creating a new Article by 'extracting' from ticket correspondence

It is possible to create new articles from existing ticket correspondence.

This could be useful if you have a 'new' question to which you written a response that you feel is worth saving for future re-use.

Against the ticket which has the correspondence you wish to save, click 'Extract Article' from the top menu.

Click the 'class' in which you wish to create the new article.

Use the dropdown menus to select which transactions you want to extract into a new RTFM article - select FAQ from the drop down menu for the transaction that you wish to save.

Click 'Create'.

Now add a Name for the Article, and amend the summary and body of the article as required.

Click 'Save Changes' when you are happy with the new article.

5.3 Updating an existing article

From the RTFM menu on the left hand side, click 'Articles'.

To find the article to update either:

Click 'Overview' from the left hand menu. Overview listed most recently created and updated articles. If your article is listed, click Update., or click the ticket, then 'modify' from the left hand menu.

If the article is not listed in the Overview, use one of the Quick search options on the right hand side to list all articles within a Class.

Or:

'Search' for the article - clicking the Admissions class and Submitting Query will return all Admissions tickets.

When you have found the article, click on the article you wish to amend.

Click 'Modify' from the left hand menu.

Make your changes and click 'Save Changes'.

Note: each article has a 'History' - so all changes made that article can be viewed

5.4 Searching for articles

RTFM has an advanced Search Interface similar to that for searching tickets.

Search the name of the article, the body of the article, or using date criteria.

The RTFM Search Interface

-

6. Old Admissions Emails Top of page

This section details the procedures for dealing with old email lists that will gradually become redundant as all enquiries are directed through the web form, and the old email addresses are no longer publicised.

In the short term Applicants who use one of the current email addresses will be sent a 'trip note'.

..Will go into ask-adm Queue, which is managed by Suzanne Breeze. Any tickets that Suzanne cannot quickly resolve will be forwarded by her to an appropriate Queue.

[need to complete this section]

-

7. How the Requestor interacts with RT Top of page

This section explains how the requestor experiences RT.

If the user submits a query via the web form, they will see a web page thanking them for their query. They will also receive an automated email reply. This should normally reach them within seconds, or, at most, minutes, of submitting their query.

This automated email is customisable and might vary between Admissions RT queues. It is the first opportunity to provide the u requestor with some information that may help to answer their query.

The email will be 'from' something like this:

Admissions Applications - Overseas Students - Visa And Immigration Enquiries via RT <adm-oseas-visa@rt.bath.ac.uk>

The text of this email might be somehting like this (with body of the query appended at the bottom):

Dear User,

Thank you for your interest in the University of Bath.
This message has been automatically generated in response to your query, a summary of which appears below.

There is no need to reply to this message. Your query has been
assigned a Reference number of #22423.

Please quote this in the subject line of all future correspondence about this issue.

Bath receives a very large number of enquiries every week, so please bear with us while we work through your questions. Do try to find the information you need on our website or in our prospectus. Meanwhile, thank you again for contacting us.

Best wishes from admissions@bath.

What happens if the requestor replies to the automated email?

The email will have the ticket number embedded within it, so RT knows which ticket the reply belongs to.

The requestors email is added to the ticket history.

The watchers of the queue receive an email to alert them to the requestor's correspondence. This email contains the full text of the reply.

(NO!- but test: In RT, if the ticket was still 'New', the status will change to 'Open'.)

The ticket remains 'New' until one of the watchers actions the ticket. The reuqestors reply is added to the ticket history.

On the RT home page, under the column 'Correspondent', the value will be 'requestor' , indicating tht the last action related to this ticket came from the requestor.

Watchers of the Queue also receive a copy of this email

What happens when I Reply via RT?

The requestor receives an email will full text of my reply. This email in turn can be replied to by the requestor. The ticket number is embedded into the email so RT always knows what ticket the correspondence relates to.

What happens when I Resolve the ticket via RT?

The requestor receoves an email with the text of the resolution

What happens if the requestor replies to my 'resolve' email?

This will re-open the ticket.

If the reply has simply been to say 'thanks', then the best thing to do now would be to silently resolve the ticket (here's how..).

What happens if the user simply grabs the email address and posts to it?

A new ticket is created.

-
-

 University | Search  | News | A-Z Index  | Contact Us