Simon's Rockets Page
Just a quick page (in terms of time to write it - the pictures are pretty big so it may take some time to download) about some of my rockets.
I started making rockets at school in the sixth form after reading an interesting old book on rocketry. I was persuaded by my chemistry teacher, Mr Grimshaw, to not try and make my own propellants, but to buy them in the shops - this was doubtless a good plan, less exciting maybe, but at least I'm still alive.
I started off launching a bought-in-the-shop rocket, which was interesting,
but as an engineer I wanted a bit of a challenge and building my own rockets
seemed to be the thing to do. I experimented with some sleek and fast designs
to see how high they could go, but living in
Next step was to try making some 'scale models' of crewed rockets such as Mercury and Gemini. I say 'scale models' because they weren't detailed in any particular way bar the fact that they had the right number of astronauts on board (3 3/4in Action Force figures), and the parachute systems tried to stay as close to reality as possible.
I moved on from these scale models (as the scale was rather small, and there are only so many rockets which you can launch straight up and wait for them to parachute down) as I needed a bit more of a technical challenge. This challenge was the missile. I've always been interested in cruise missiles and specifically how the various fins, wings and air intakes are folded for launch. I made a folding wing design, but never got round to launching it for some reason (probably my A-levels), though I did launch a standard design with a lighter-fluid-soaked-rag warhead - this went up, burst into flames (it also had a load of match heads on board to help the process) and promptly landed in the 'safe area' where I'd been standing with the spectators. We all survived.
Something I've always wanted to try is a submarine launched ICBM style rocket, but not having a swimming pool (or a tank of sufficient depth) to launch from I've not got very far, though I think it would be interesting. I know that people perform/enact scale R/C marine battles, even with working torpedoes, and an ICBM would be pretty cool IMHO.
Amongst my other experimentations was a scale Space Shuttle with an R/C car remote control system on board to control separate outboard ailerons and inboard elevators (rather than trying to make my own mixer for elevons). I decided against the normal 2 channel R/C plane setup of ailerons and rudder as I didn't think the rudder would have much effect as my craft 'mushed' its way to the ground. Unfortunately due to a misfiring (or mis-wiring) of my multiple launch rockets, the craft fell off when only 10 or so feet of the ground; I like to think that my control inputs helped it to mush safely to the ground, but in truth I was also pretty worried about the main tank (which housed lots of rockets) scudding along the ground towards me at a high rate of knots. The shuttle didn't fly again mainly due to the irate German who'd pressed the launch button taking out his anger on said vehicle with his boot before I could grab him and stop him from destroying my R/C hardware. If you want to see the real thing - a proper rocket powered R/C space shuttle, then look at this page, I'm very impressed indeed.
After all of these random rocket designs I moved onto ejection seats. These really are pretty cool bits of kit in a technical/engineering sense, and they also challenge what you can do with rockets and parachutes (in full scale that is, so I thought a smaller scale might add a bit more of a challenge ;-). I first tried making an ejection seat with 3 3/4 inch pilot, but this was very small scale and it was difficult to control the trajectory of the seat (the rockets were far too powerful which meant that any seat design alterations made almost no odds - which made it all pretty boring after the first couple of goes).
Then I went off to uni and forgot about rockets for a while; bar the rocket kit which I bought for a mate as a birthday present - I obviously bought him the most powerful boosters which could be fitted in the tube, just to make it more fun; anyway a big group of us launched it one cloudy (and windy) afternoon up on campus (The University of Bath is on top of a big hill) and the last we saw of it (even with it's supposedly easy to find fluorescent streamer parachute) was as it streaked through the 100' cloud base and into the lower stratosphere. Needless to say we never managed to find it, though I'm sure some Mongolian yak herder's daughter is very happy with her new brightly coloured hair tie. We did also launch Jon's/Woody's skipper doll, but she suffered from catastrophic roman candling on her way down, so it's probably best to ignore that.
Anyway, this year 3 events coincided to prompt me to start making rockets again, sunshine and warm weather, not much to do as no-one in the office can play cricket, and my watching a program called 'Seconds from Death' (or something like that) on the National Geographic Channel. This program was all about the lucky escape of 2 Mig pilots who crashed into one another at the Fairford air show some years ago and it focused in some detail on their ejection seats.
After watching this program I was inspired to have another go at building an ejection seat, but this time I decided to go for a larger scale - using a Maxx Power figure (like Action Man - 12" tall - but cheaper) as my pilot. I bought my pilot for a fiver, asked my mum to sewed him some flight overalls (as he was the cheapest base model he only came with shorts, and I took pity on him ;-) and made him a helmet out of cut-up practise golf balls.
Now I hasten to add that this is still work in progress, and I haven't yet got round to performing a moving launch from the back of my R/C car (which I rebuilt for the occasion), as my static launches have shown some flaws in my aerodynamic design process (which is based on gut feeling whilst in the pub mainly), plus my local toy shop has run out of rocket motors and I'm told the ones I want are on back-order. The images below show the carnage which ensued from my preliminary testing....
Seat Design 1b
This was a slight redesign (no photos of the original I'm afraid) - note the clear CD which has been added to try to move the centre of pressure further back to try and counteract the effect of the CofG being in front of the line of thrust. An avi of the first launch (without the CD CofP alteration device ™ can be found here (3.69MB)). An avi of the launch of the 1b device can be found here (2.72MB). Sorry, both of these videos are tilted on their sides so you'll have to turn your heads.
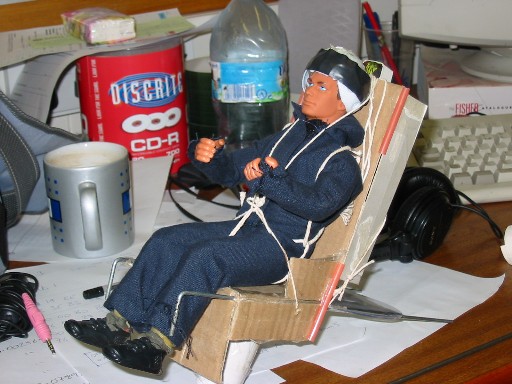
Note the clear plastic 'CD' which is used to move the CofP backwards. The metal rods are required for strength (though they didn't need to stick so far forwards or backwards) as otherwise the CD would be ripped off by the aerodynamic forces at launch.
Design notes: Single large motor (D-12-0) thrusting through (or at least pretty close to) the CofG. Lap belts go through the top of the rocket mounting to be severed by the ejection charge. Shoulder harness holds parachute in place and also go through the top of the rocket mounting to be severed by the ejection charge.
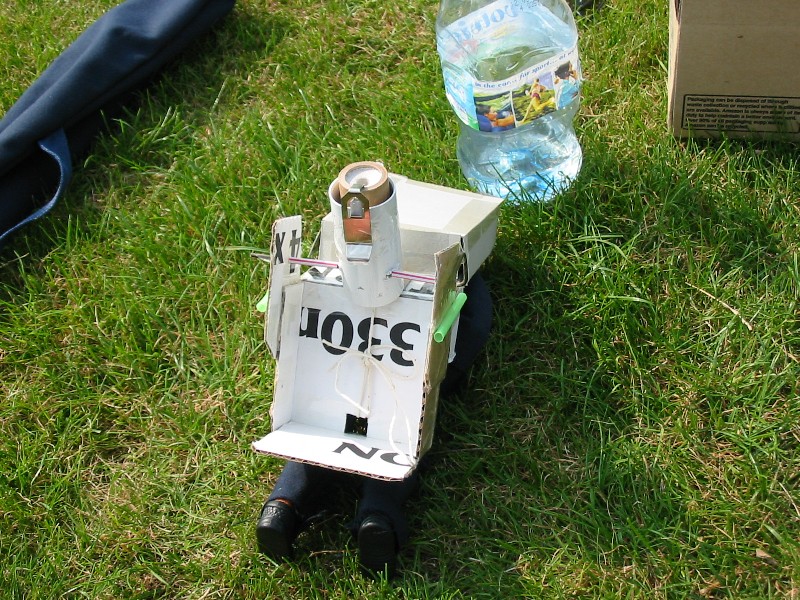
Seat Design 2
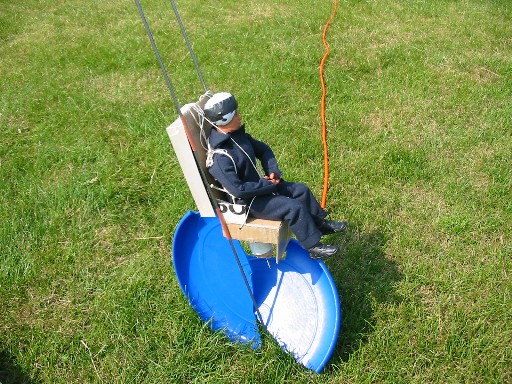
Note the carefully adjusted broken-frisbee inspired blast deflector.
A video of the launch of this seat can be found here (2.50MB).
Design Notes: Same design as seat 1a (i.e. no CD to move CofP), but with updated (less strings to burn through and match heads to speed the process) cutting mechanism, and an extra (small) rocket motor to move the centre of thrust toward the front of the seat (rather than moving the CofP back as in design 1b).
Rockets: 1 x D-12-0, 1 x A-10-0
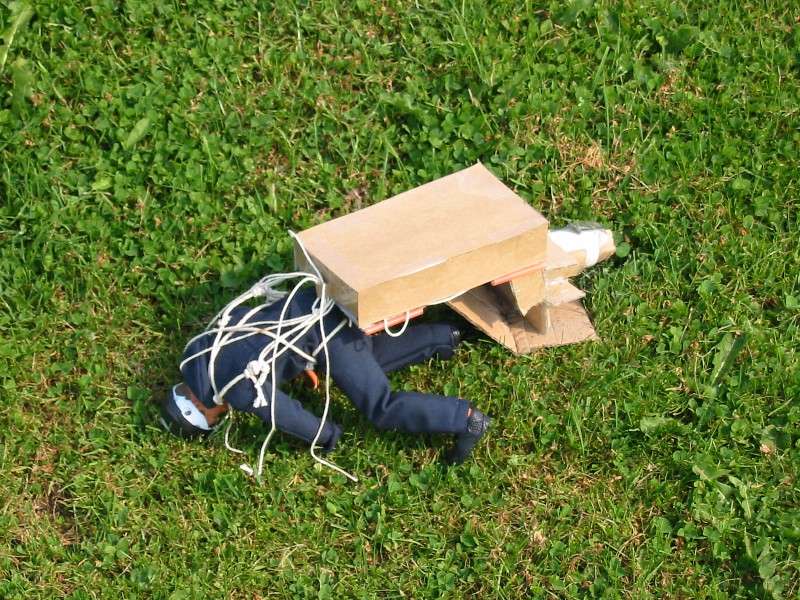
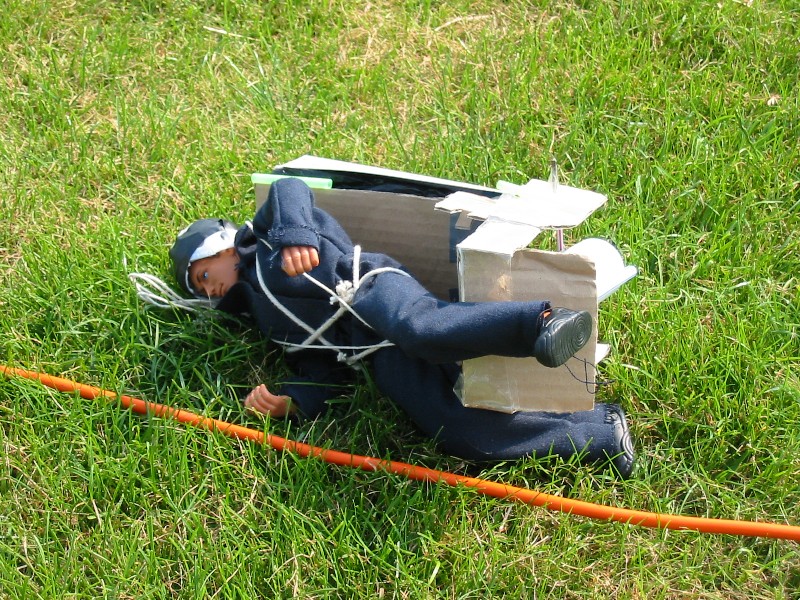
In this picture you can see that the pilot has been separated from the seat, but is still nearby as the parachute was stuck in its housing due to my not removing the sellotape 'safety pin'.
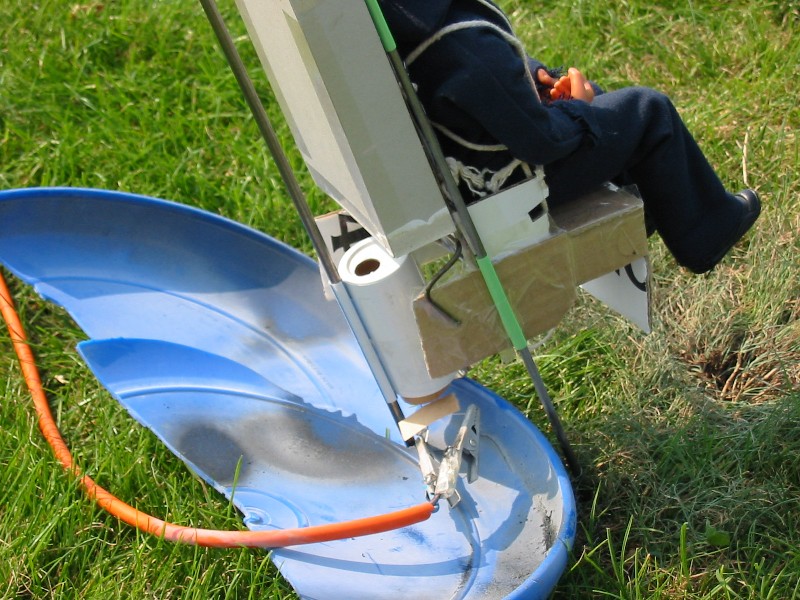
Seat Design 3
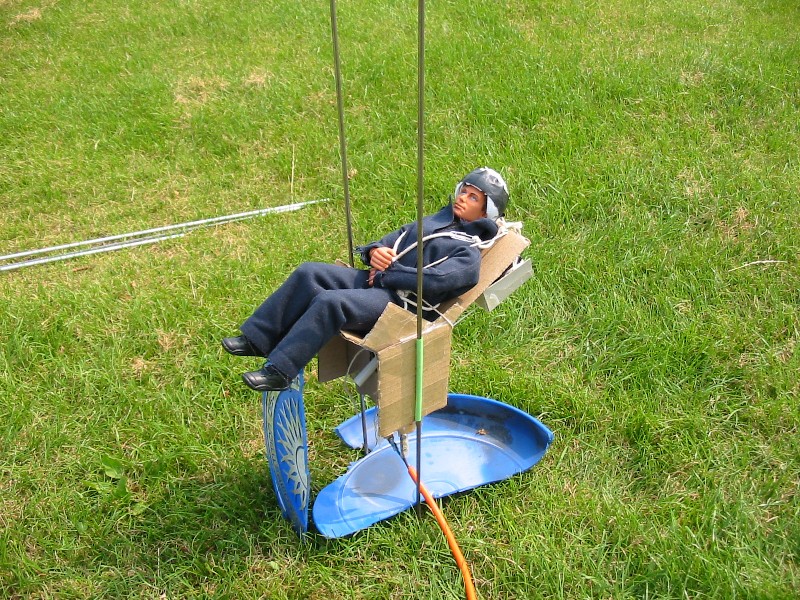
Here you can see the eventual launch setup.
This picture shows the mini motor which was to be used to power the launch piston. Note that there is no parachute in the parachute container as this was to be a test firing only without a main motor.
A video of this launch can be found here (2.50MB).
Design Notes: This was to be a gas piston/catapult launch - see the second of the two pictures above. This picture shows a small rocket motor which was to fire downwards into a semi sealed tube - the idea was to build up gas pressure and force the seat off a static pole which was mounted in the ground. Unfortunately I didn't realise that the little rocket motor was quite as powerful as it was, and it just popped out of the top of the tube and continued on its merry way up into the sky.
The fall back plan has the seat tilted back (see first of the two pictures above) so that the thrust of the motors is in the same direction as the launch rods. Unfortunately I had to use small rocket motors for this launch as the D-12s are too long, and I didn't have any C-6 motors (which would have been my choice) so had to use lower powered B-6s.
Rockets: 2 x B-6-0
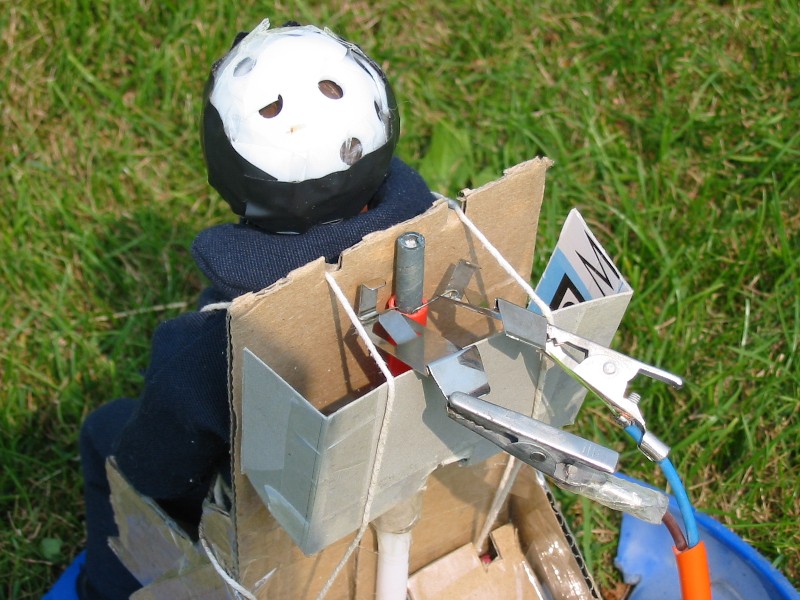
Seat Design 4
You can see the hole on top of the rocket casing through which the exhaust gases are supposed to exit and burn through the pilot and parachute retaining straps so that they can both attempt to leave the seat behind (note that the motor casing will rotate in a clockwise direction until it is pointing at c.45 deg into the seat - this is where the lines are routed).
This picture shows the rocket in its thrusting position at 45 deg. You can also see the single line (string) which holds the pilot to the seat (it is split into a proper harness above the seat) and the parachute in its housing. The metal clip (actually a drawing board clip) is used to hold the motor in the white casing when the ejection charge fires otherwise, if the rocket motor falls out, there is insufficient heat/general burning to sever the pilot and parachute restraints.
A video of this launch can be found here (2.96MB).
Design Notes: This design implemented a moving rocket motor which swings round from an approximately upright position to about 45deg after the seat has cleared the launch rails. I like this idea, and it is closer to how real seats work (at least in terms of the direction of thrust after the initial boost out of the cockpit).
Rockets: 1 x D-12-0
Mission Synopsis: Interesting effect produced by using a rotating rocket mounting. Parachute lines weren't cut as the ejection charge forced the motor back in the opposite direction as soon as it fired - not enough time in contact with the hot gases to burn through them. I need to add a latch so that once the motor has rotated it will remain in the 45 deg position. I might try this again but with a less powerful engine to try and get an idea of whether it is viable.
Future Plans
Try out an updated Seat Design 4, but with a less powerful motor and a latching mechanism to try and ensure that the restrains are severed.
Try out updated Seat Design 3 using more powerful (C-6-0) rocket motors.
Once I have a viable ejection seat, try launching from the back of an R/C car to make life a little more difficult - I could try it from my car, but I quite like the paintwork on its roof.