
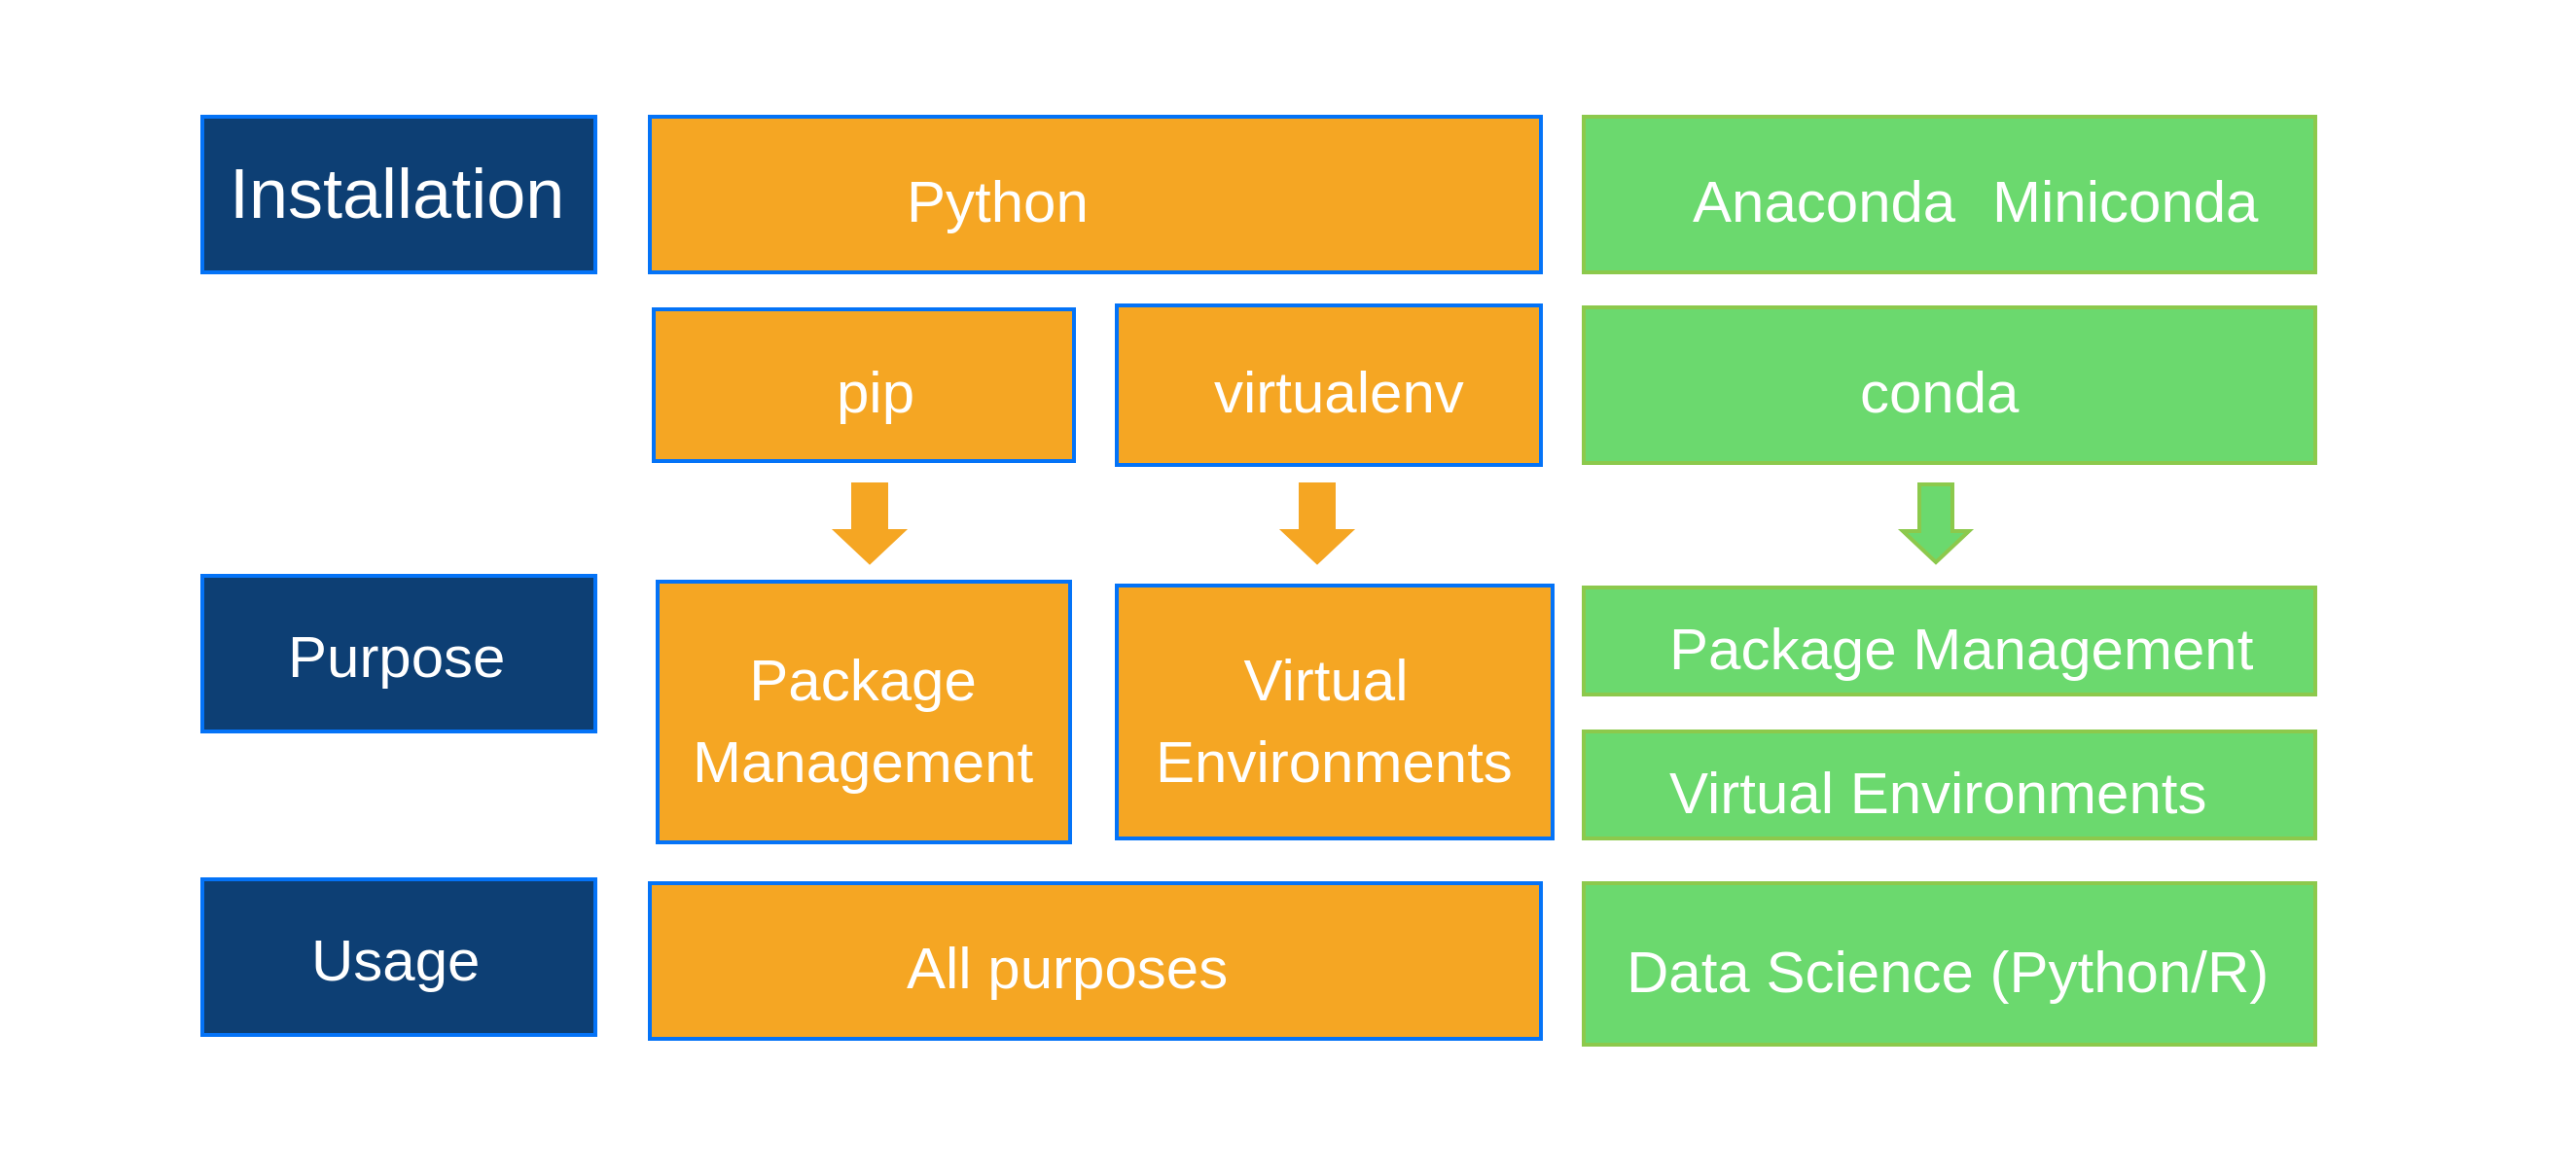
Anaconda is a distribution of the Python and R programming languages for computing (data science, machine learning applications, large-scale data processing, etc.). It aims to simplify package management and deployment process involved in Python and R. Anaconda includes most of the data-science packages and it is consistent for Windows, Linux, and macOS. This provides a simpler control of virtual environments and allows moving and copying environments in different systems. It is developed and maintained by Anaconda, Inc., which was founded by Peter Wang and Travis Oliphant in 2012.
Package versions in Anaconda are managed by the package management system conda. This package manager was spun out as a separate open-source package as it ended up being useful on its own and for things other than Python. There is also a small, bootstrap version of Anaconda called Miniconda, which includes only conda, Python, the packages they depend on, and a small number of other packages. Most of packages used for Data Science are provided by Anaconda. This makes it a good distribution to use for beginners. It provides installation for many popular editors: pycharm, VScode, Spyder, Rstudio, etc.

Installation is straightforward. Please go to the link to download the Anaconda installer for your system (Windows, Mac or Linux): https://www.anaconda.com/products/distribution
If you need more help with distribution installation, here is one simple youtube video to demonstrate how to download and install Anaconda.
For linux system, after download the bash installer (.sh file). You need to open a terminal and move to the folder where you downloaded the Anaconda3-5.2.0-Linux-x86_64.sh file. If the file is saved in the folder /home/user/Downloads, use the following commands to change your directory:
$ cd /home/user/DownloadsTo install the package:
$ bash Anaconda3-5.2.0-Linux-x86_64.shFor Mac system, the process is similar to linux. Details can be found here:https://docs.conda.io/projects/conda/en/latest/user-guide/install/macos.html.
Installation of Miniconda can be found in this link: https://docs.conda.io/en/latest/miniconda.html and download the installer for your system.
For linux system, download the bash installer (.sh file). You need to open a terminal and move to the folder where you downloaded the Miniconda3-latest-Linux-x86_64.sh file. If the file is saved in the folder /home/user/Downloads, use the following commands to change your directory:
$ cd /home/user/DownloadsTo install the package:
$ bash Miniconda3-latest-Linux-x86_64.shFor Mac system, the process is similar to linux. Details can be found here:https://docs.conda.io/projects/conda/en/latest/user-guide/install/macos.html. More details can be found here: https://docs.conda.io/projects/conda/en/latest/user-guide/install/linux.html
Task:
Please install Anaconda or Miniconda on your computer. (You could also choose to install Python with pip, but the instruction for using pip will not be included in this document.)
A conda environment is a directory that contains a specific collection of conda packages that you have installed. For example, you may have one environment with NumPy 1.7 and its dependencies, and another environment with NumPy 1.6 for legacy testing. If you change one environment, your other environments are not affected. You can easily activate or deactivate environments, which is how you switch between them. You can also share your environment with someone by giving them a copy of your environment.yaml file. For more information, see Managing environments.
To create a new environment using the Anaconda Navigator, open the Navigator. After it is loaded, click on Environments:
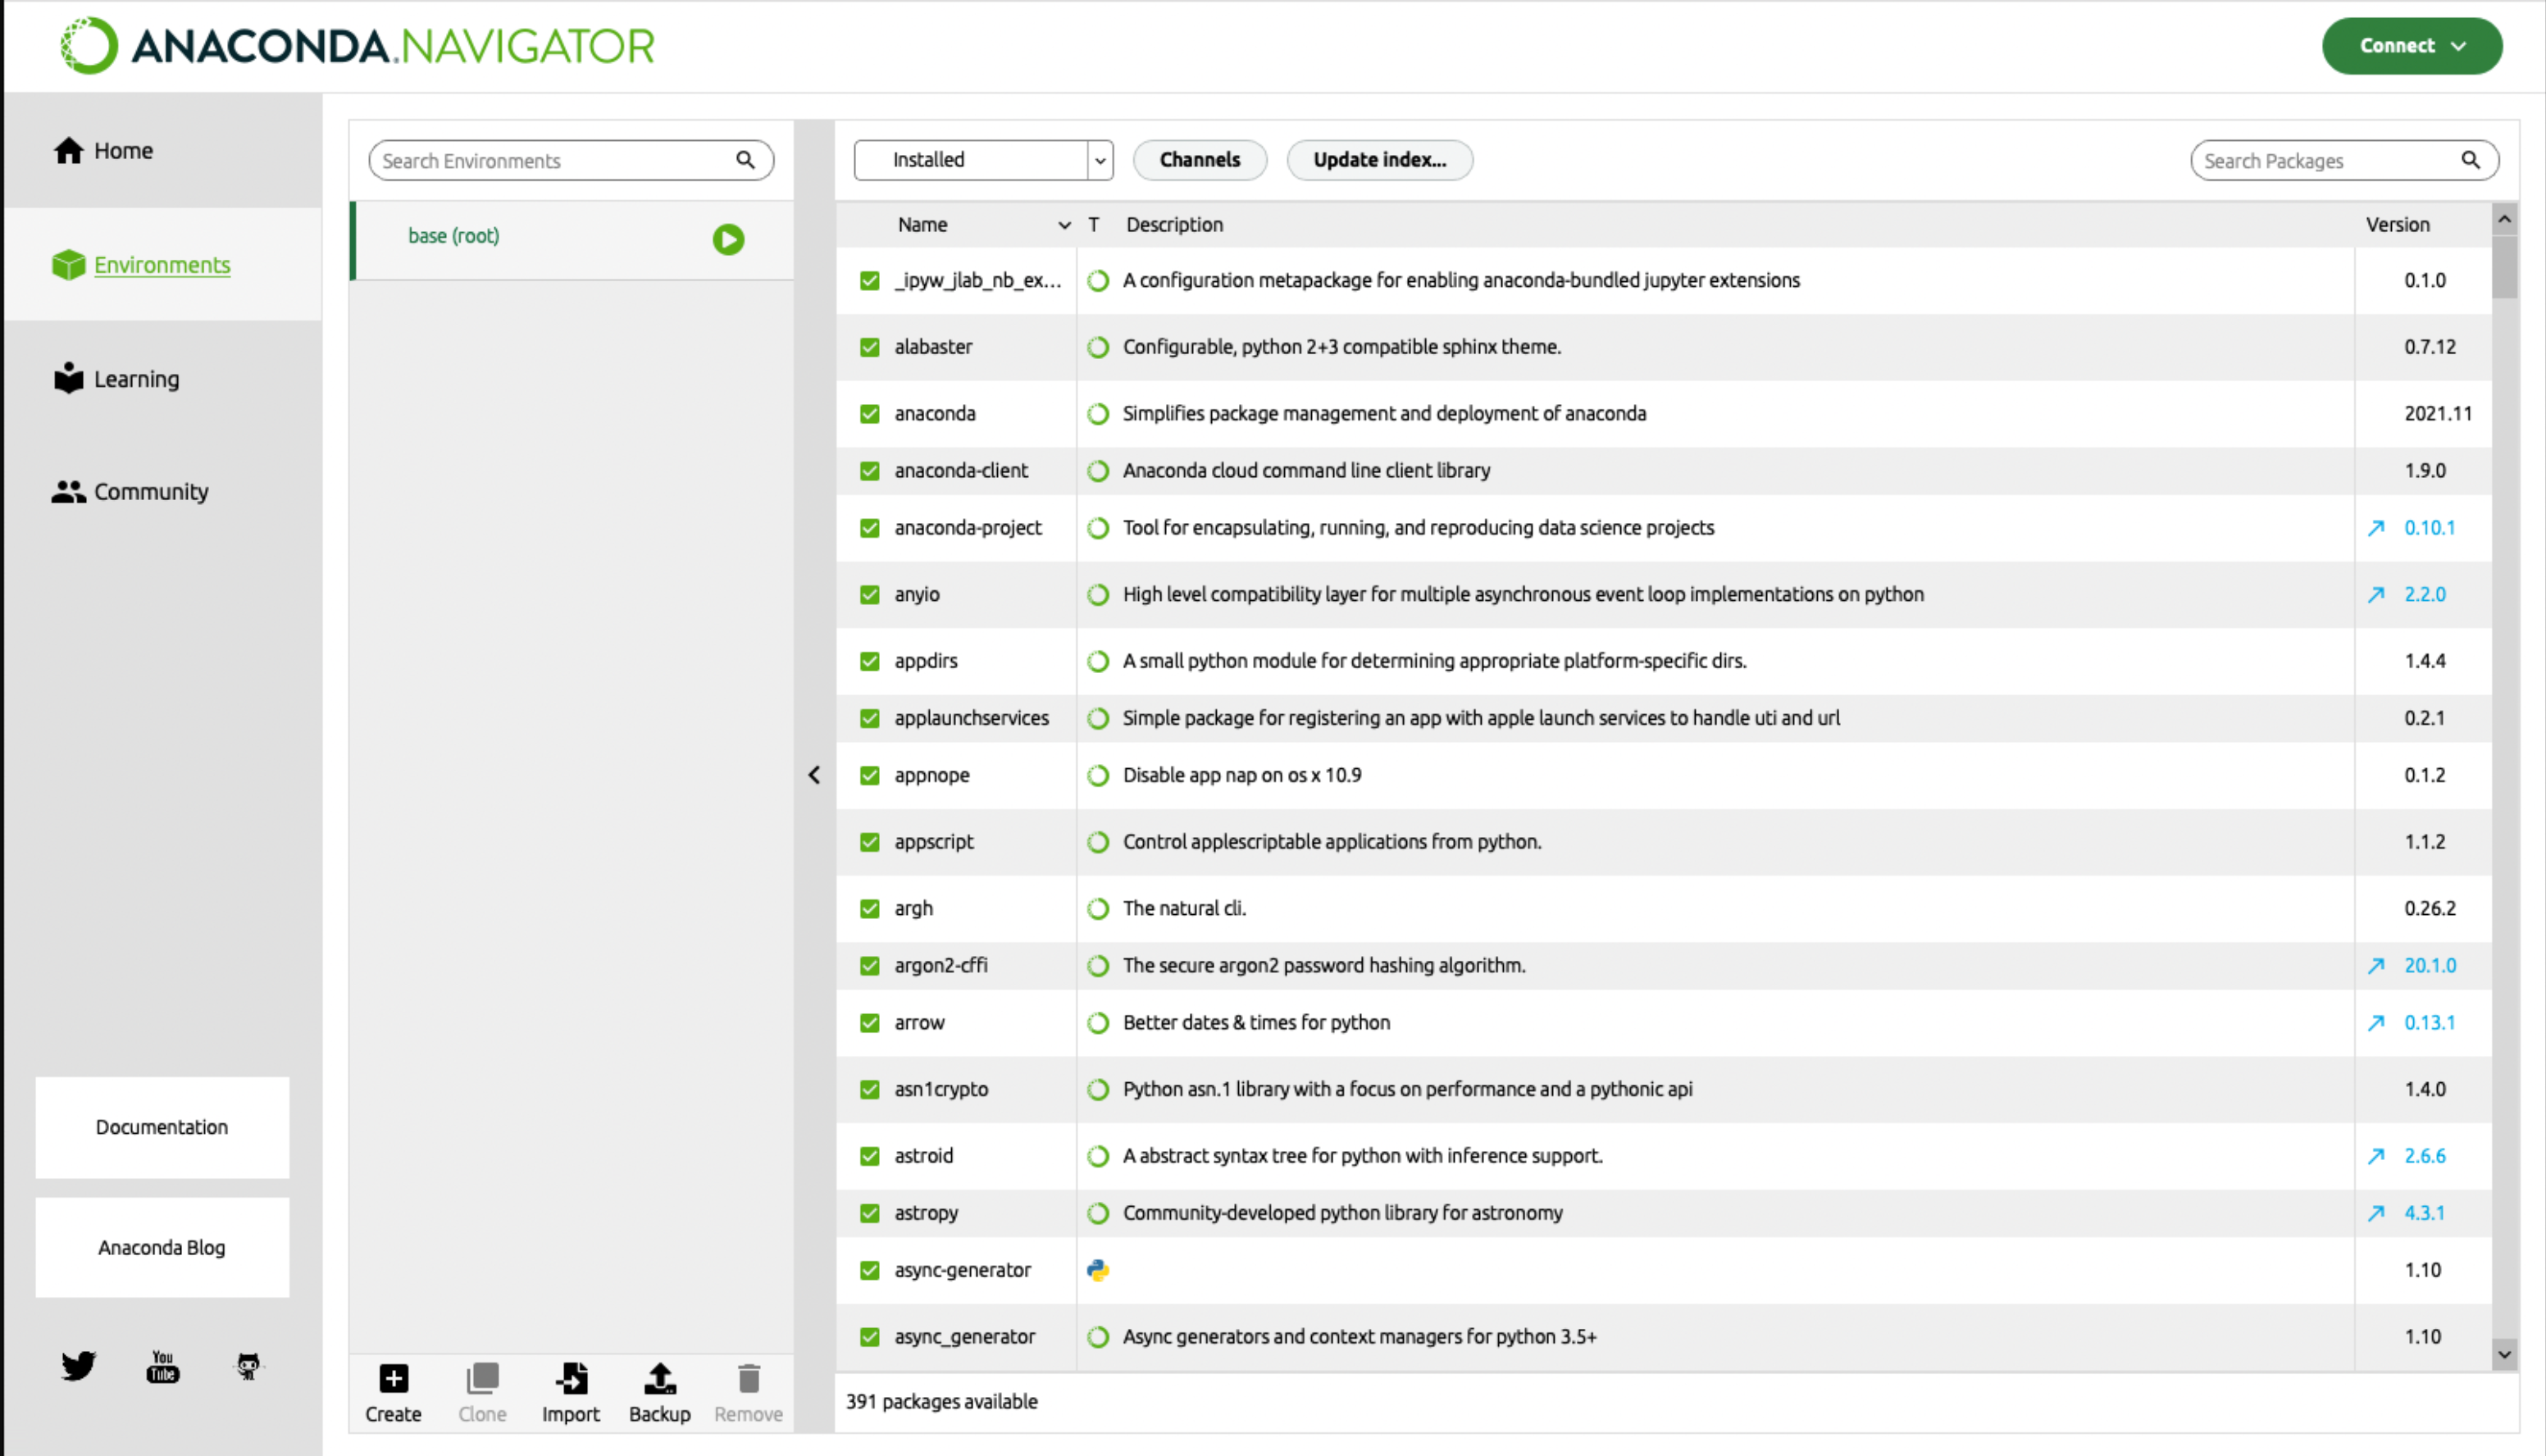
Currently we are in the base environment. We generally do not use this environment rather we will create a new environment. It is a good keep a separate environment for a unique project. (Similar projects can use the same environment). To create a new environment, look at the bottom of the mid column:
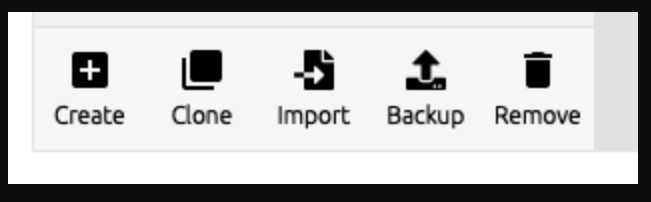
Click on Create, a new window will jump out:
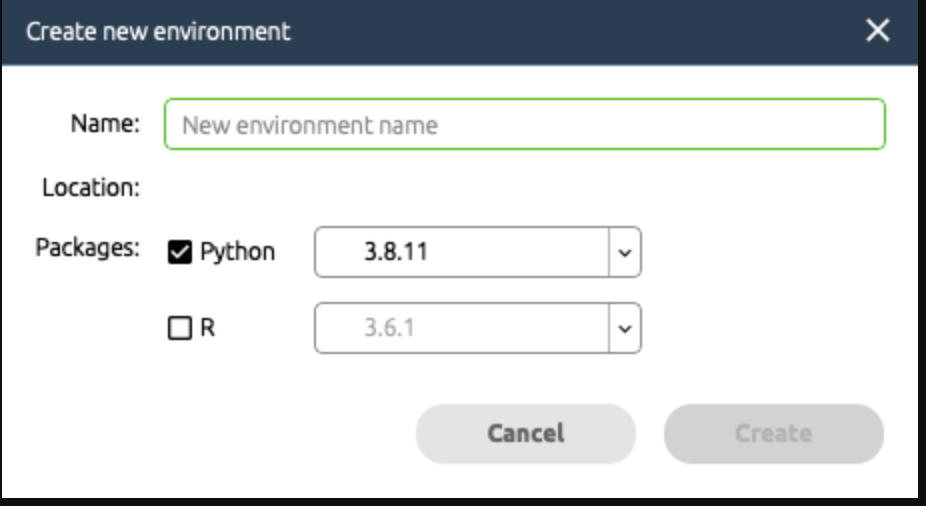
The Python language has been selected automagically. Just give a name then click on the create button. Each time you want to use a special evn for python, just go to the Environment page and select the one you need.
Here is the link for managing environments using the Anaconda Navigator: Navigator managing env. It is possible to copy (Clone) your envirnment with all the same packages and export your environment to a yml file to transfer it to another computer. Or delete (Remove) the env you do not need. The yml file can be used to re-create your environment. Even though the import function might not work all the time, you can refer to the .yml for package versions.
This section I will demonstrate how to create new conda environment for Linux OS. The process for Windows and MacOS are similar.
Open a terminal or use an Anaconda Prompt then type the following to create an new environment:
$ conda create --name myenvReplace myenv with your environment name.
To create an env with a specific python version:
$ conda create -n myenv python=3.10This creates a myenv with python version as 3.10.
To activate the new environment myenv, type in the terminal:
$ conda activate myenvNow you will see the terminal changes to:
(myenv) user:~$This means you have activated your conda environment and you can call your specified editor to run Python codes.
When you finish, remember to deactivate myenv:
$ conda deactivateSpyder is one editor you can choose to use. I use this one as an example here. You can install Spyder using the Anaconda Navigator. When you open your Navigator you can see there are many choices to install. Always remember to check which environment you have installed the editors or software. Do not install Spyder, VScode, Pycharm all together, choose the one you like to use and keep one is enough.
In this Figure, the applications are shown for the base environment. Here the Spyder has been installed already. If not installed, you shall see the button says Install . By clicking on the button, you can install the application you want to have. If installed, you see the button says Launch . You can click on the button to launch the application.
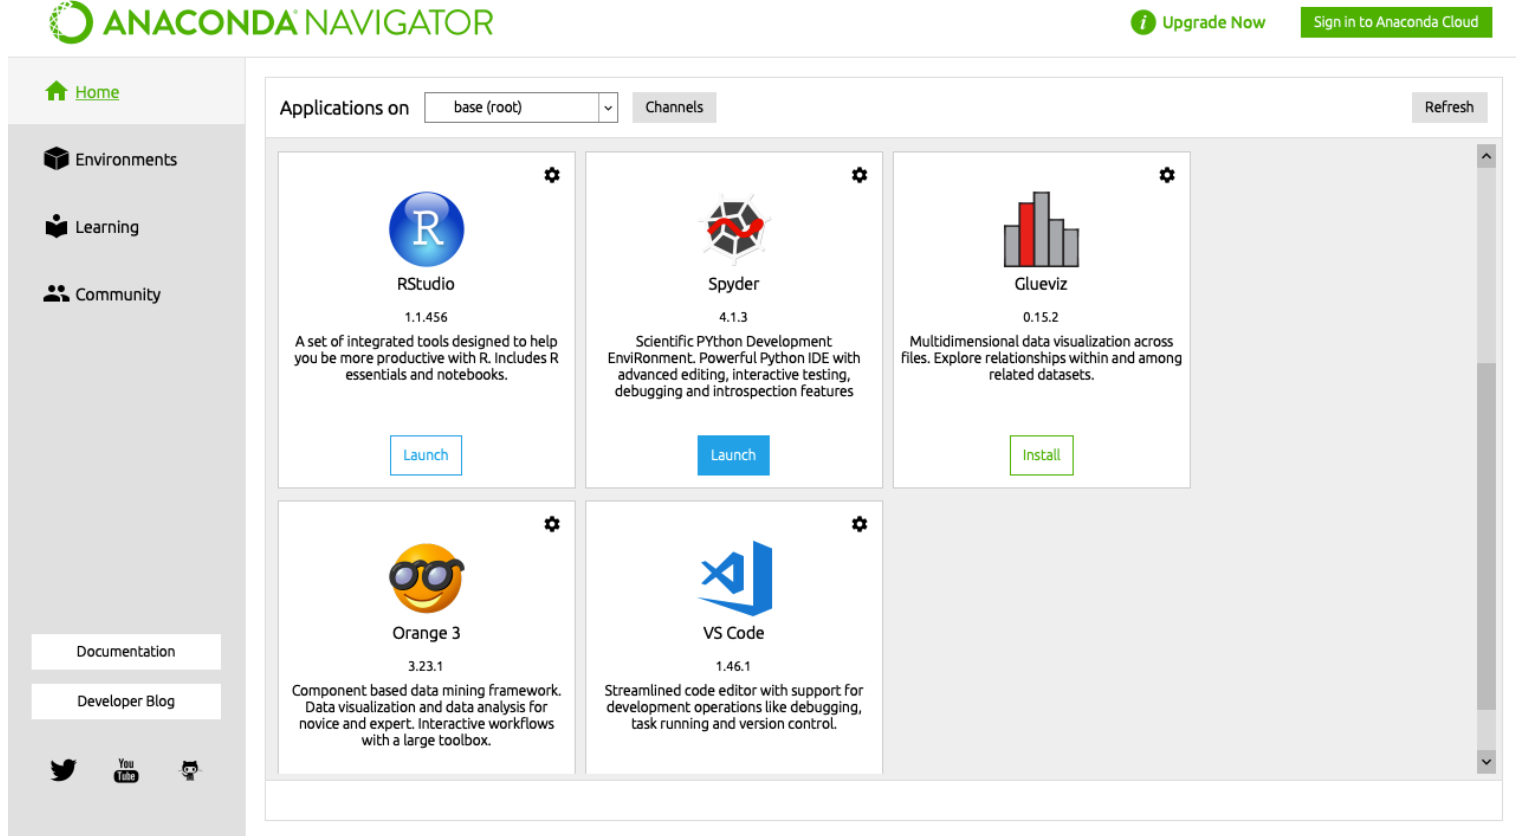
Clicking on Launch under Spyder, and give a few seconds for it to load, you should see a window like this opens on your screen:
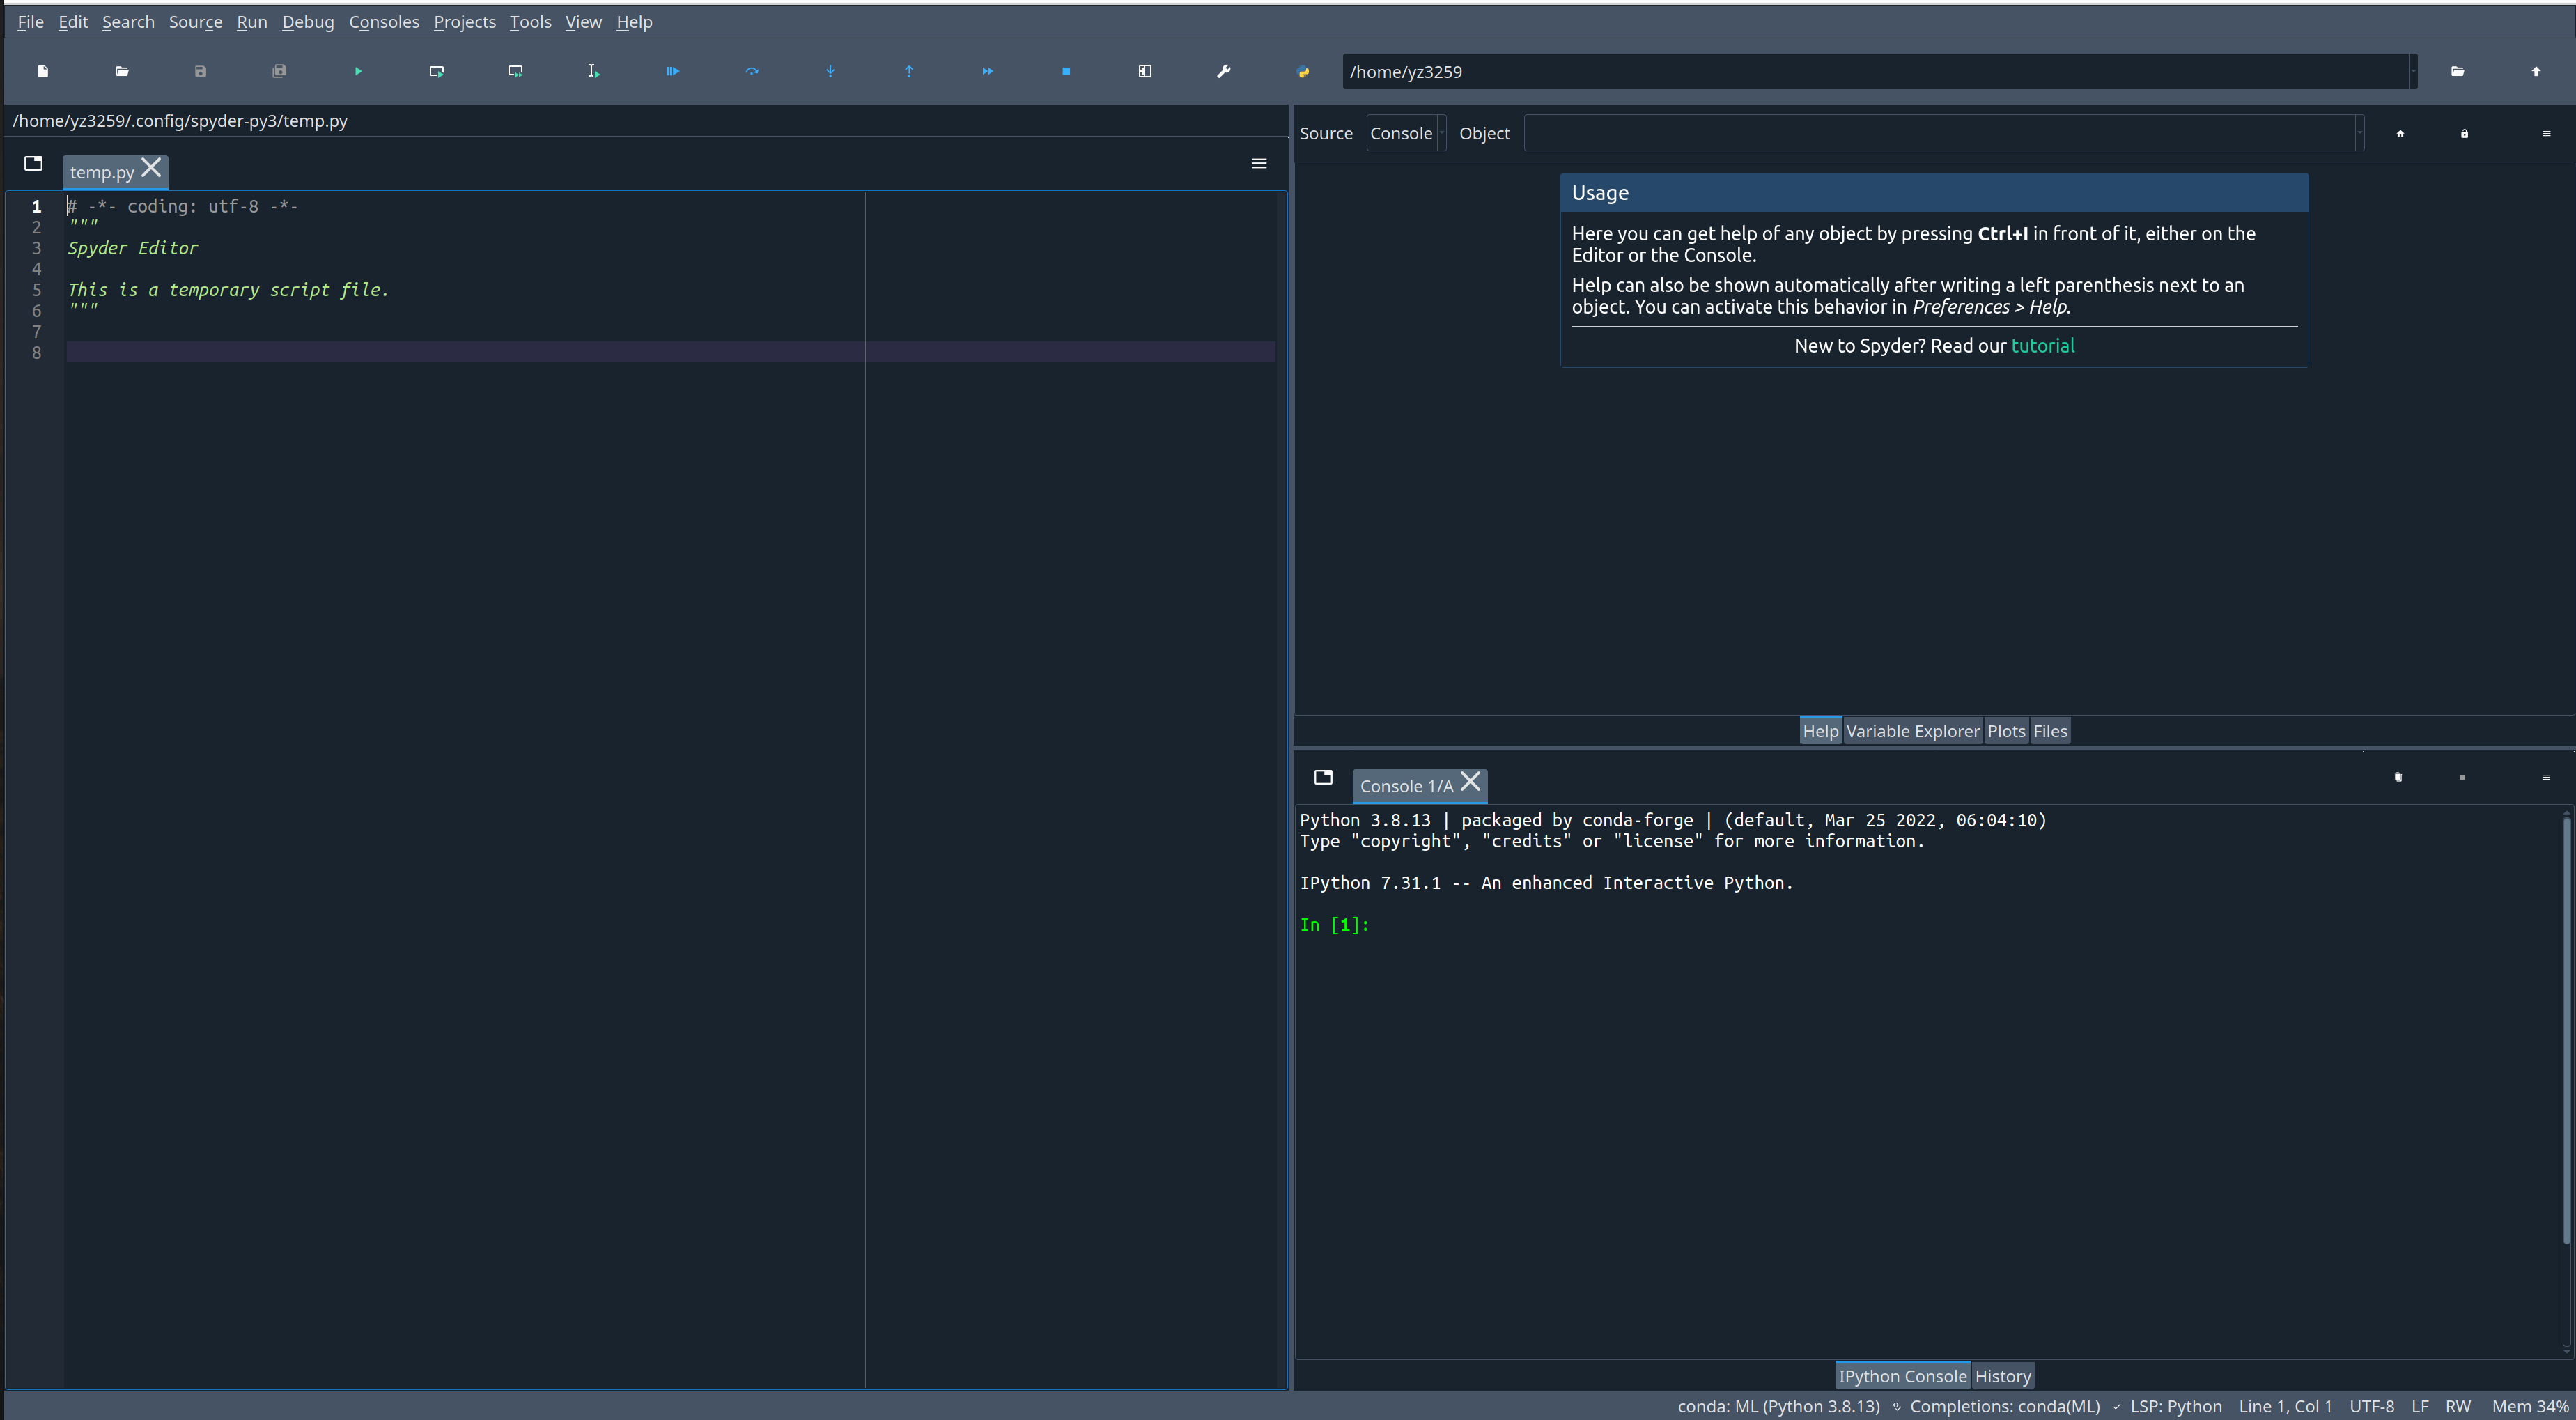
More details about using Spyder can be found here: https://docs.spyder-ide.org/current/index.html. Or you can follow some youtube videos.
To call Spyder using command line is simple, after you activate a conda environment, type:
$ spyderYou will see spyder jumps out and the same window should pop out.
Anaconda allows to set up virtual environment for R language.
Similar to set up a python environment, when you create the new environment, click the box for R(both Python and R need to be selected):
Here is a video to explain how to set up conda environment for R using the Navigator: youtube video.
Create a new environment for r (only with the essentials for R):
$ conda create --no-default-packages -n r_env r-base r-essentialsWhen installation finishes, activate your environment:
$ conda activate r_envRegister kernel with Jupyter Notebook. (Jupyter Notebook is installed via conda in your base environment.) This will allow you to use Jupyter Notebook within your r environment.
$ conda install -n base nb_conda_kernelsYou can install RStudio on the environment:
$ conda install -c r rstudioTo run rstudio:
$ rstudioTo run Jupyter Notebook:
$ jupyter notebookInstall tensorflow please refer to: https://www.tensorflow.org/install/pip
Use tensorflow Docker: https://www.tensorflow.org/install/docker
Pip install and virtual environment control: https://packaging.python.org/en/latest/guides/installing-using-pip-and-virtual-environments/
Conda cheat sheet: https://docs.conda.io/projects/conda/en/4.6.0/_downloads/52a95608c49671267e40c689e0bc00ca/conda-cheatsheet.pdf
Pip install and virtual environment control: https://packaging.python.org/en/latest/guides/installing-using-pip-and-virtual-environments/
Anaconda availabe packages lists: https://docs.anaconda.com/anaconda/packages/pkg-docs/